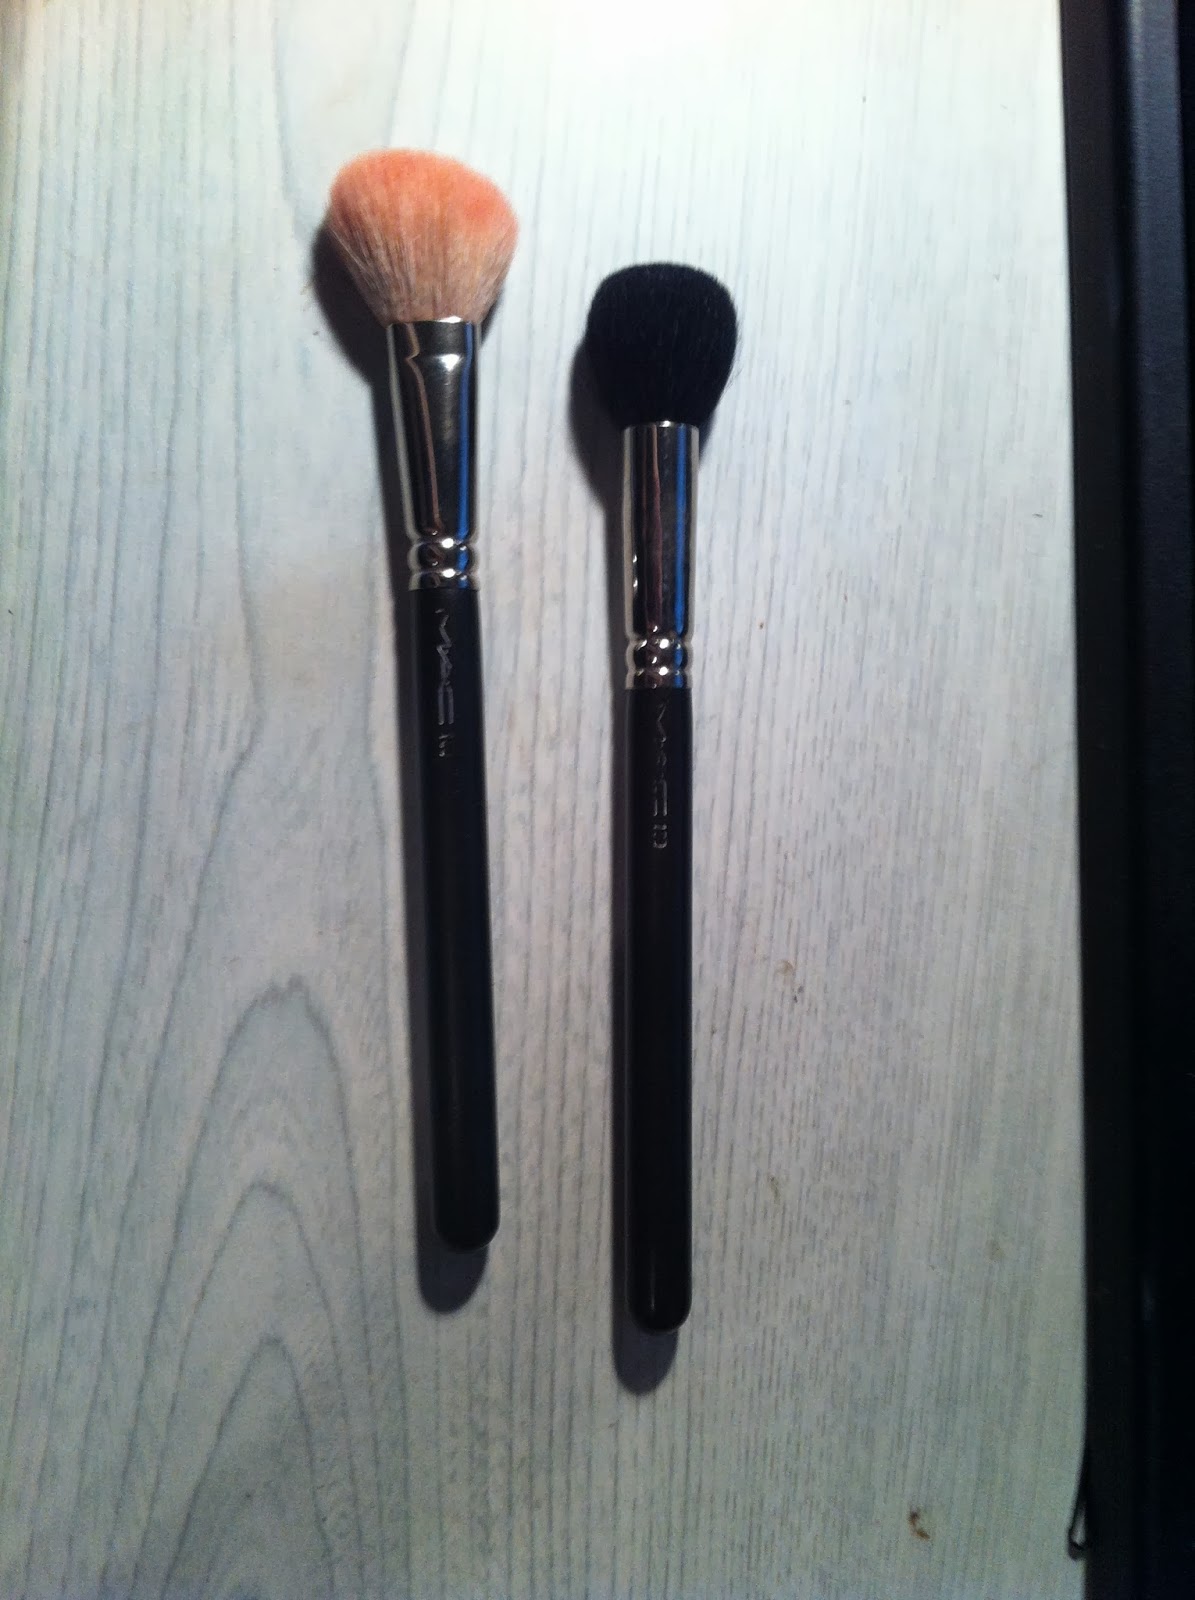
Hola a todos!!
De nuevo perdonad mi ausencia, pero he estado (y sigo) enferma, la voz decidió abandonarme y cada vez que me pasa me quedo sin demasiadas ganas de hacer nada, pero ya estoy por aquí!
Hoy estoy de vuelta con una técnica de maquillaje que seguro que mas de una la habrá usado mas de una vez sin darse cuenta, pero ahora mismo es la última novedad en maquillaje.
Hi everyone!
Sorry about being M.I.A. again, but I´ve been (and still) sick. My voice decided to leave me and everytime that happens I get super uninspired and sad, but I´m back!
I´m here today with one makeup technique that I´m very sure more than one used without realizing it, but now it´s the trendiest thing of the moment!
Como bien sabeis, el "contouring" o la técnica del claroscuro ha sido tendencia durante mucho tiempo, gracias sobre todo a Kim Kardashian a raíz de una foto que subió mostrando como su maquillador contorneaba su rostro. Desde ese momento el contorno a lo Kardashian ha estado de tendencia de manera indudable.
As you may know, the contouring has been a big tendency on makeup, thanks to that famous photo of Kim Kardashian and her face all contoured without blending. From that moment, the Kardashian contour style has been the tendency to sculpt faces.
El contorno, por si acaso no lo sabéis, es una técnica que básicamente se usa para corregir el rostro usando tonos oscuros y claros, creando sombras y luces donde son necesarias para realzar los rasgos y corregir las facciones.
The contouring, just in case you don´t know what it is, is just a technique that helps to correct the features on your face using darker and light colors, creating shades and lights on the face where needed.
Pero ahora el "contouring" (que hasta en España han lanzado los productos que han hecho específicos para ello tanto Maybelline como L´Oréal) tiene un competidor firme, y es el "strobing".
But now, the contouring (that here on Spain recently we got the products from Maybelline and L´Oréal created for that) has a very strong opponent, and that´s the strobing.
[Pequeño inciso: Alex Box es una maquilladora reconocidísima, que ha hecho portadas de muchísimas revistas, ha colaborado con muchas marcas como MAC y es la directora creativa de Illamasqua. Todos sus trabajos son puro arte, y os recomiendo 100% que busquéis sobre ella en Google, porque es impresionante todos y cada unos de sus trabajos.]
[Little aside: Alex Box is a very well known makeup artist, with loads of covers in different magazines, and had worked with a lot of brands like MAC and is the creative director of Illamasqua. All her works are pure art, and I really recommend you to search about her, she´s amazing!]
En la pasarela de Otoño/Invierno celebrada este año en París, la maquilladora Alex Box realizó este look para Issey Miyake, en el cual se veía un rostro contorneado, pero muy luminoso.
On the Fashion Week of Autumn/Winter of this year in Paris, the makeup artist Alex Box created this look for the designer Issey Miyake, where you can see a very light contour and loads of luminosity.
Y eso es el strobing, usar el iluminador para realizar el contorno del rostro, sin usar ningún color oscuro. Se aplica en los puntos donde naturalmente la luz cae en el rostro, y se crea un efecto mucho más natural y fresco en la piel, a parte de dejarlo con una luminosidad increíble. Y solo se necesita un iluminador al gusto de la persona, trabajarlo bien en la piel y listo.
Para verano es una técnica en alza, ya que se usan menos productos que haciendo el contorno clásico y deja un look mucho más natural.
And basically, that´s the strobing technique. Use highlighter instead of darker shades to contour your face. The highlighter is placed on the points of the face where naturally the light hits the skin and you end up with a luminous, radiant and fresh look without using layers and tons of makeup. You just need a highlighter, work it on your skin and you´re ready to go. For summer it´s great, because you use less products and your skin won´t feel as heavy. And the look is ultra natural.
A mi me parece una técnica muy fácil de usar, que el único contra que tiene es que hay que tener un poco de cuidado con la cantidad de iluminador que se usa (para no pasarse) pero creo que es muy natural y para gente que esté empezando a interesarse en el contorno puede ayudarle a coger práctica.
I think that it´s a great technique very easy to use, that the only "dangerous" thing is only that you have to be careful with the amount of highlighter to don´t look like a disco ball. But also I think is great for people who´s starting with contour but they don´t feel ready for the whole process.
Mis productos favoritos para iluminar son el Mineralize Skin Finsh de MAC en Lightscapade y el HD Sculpting Powder #503 de Inglot. El de MAC tiene un brillo mas intenso, y el de Inglot es más sutil, pero ambos quedan espectaculares en la piel.
My favourite products to highlight are the Mineralize Skin Finish from MAC in Lightscapade and the HD Sculpting Powder #503 from Inglot. The MAC one shines more, and the Inglot powder is a little bit more subtle, anyways both look amazingly good on the skin!
Os gusta esta técnica? Nos vemos en el próximo post!
What are your thoughts on this technique? See you on the next post!
Lor.
Mostrando entradas con la etiqueta mua. Mostrar todas las entradas
miércoles, 1 de julio de 2015
lunes, 1 de diciembre de 2014
Azalea&Paradisco: Arab Inspired Look
Hola a todos!
Lo primero, pediros disculpas por haber tardado tanto en subir un look, pero he tenido unas semanas de locos en el trabajo y no he tenido tiempo de nada =S.
Y estoy de vuelta, con un look bien dramático y a lo grande, para celebrarlo por todo lo alto!
Es un look con inspiración árabe (los looks que hacen son siempre muy coloridos y sobre todo MUY dramáticos, cosa la cual me encanta) y con un par de productos nuevos que tenía muchas ganas de enseñaros en acción.
AVISO: casi todas las brochas que uso son de Burlesque, porque son demasiado geniales. Y creo que os gustará ver que resultado dan ;).
Hi there!
Well, first say sorry for being so late on uploading this look that I promised like a million years ago. I have been super busy with work, and I didn´t have time at all.
So, to celebrate that I´m back with makeup looks, I decided to do a arab inspired look (I love their dramatic and super bold makeup, SO MUCH) with some new products that I wanted to you in action.
Let´s get started!
WARNING: Almost all the brushes that I use are from Burlesque because they´re great! And I thought you will love to see the result ;)
Empecemos!
Primero aplicamos la base, primer de sombras y la ojera os recomiendo que la dejéis libre de corrector (en caso de que caiga algo de sombra luego es más fácil de limpiar) y tampoco apliquéis polvo, lo dejamos para el final. También me maquillé las cejas, pero opté por no alargarlas demasiado.
First, apply your foundation and eyeshadow primer. Don´t apply yet you concealer, because if you have any fallout, it´s easier to clean up. Don´t powder either, we´ll do it later. Also, I did my eyebrows (I can´t do any eye makeup if I don´t have my eyebrows done hahahaha).
Como base de ojos he aplicado el Paint Pot "Bare Study" con la brocha de Burlesque Pro-47.
As eyeshadow primer I´ve used the Paint Pot in Bare Study and the Burlesque brush Pro-47.
Después, con la sombra Paradisco y la brocha Pro-37, la he aplicado por todo el párpado móvil sin sobrepasar la cuenca y difumino el borde con la brocha C330 de Crown Brushes.
Later, with the brush Pro-37 and the eyeshadow Paradisco, I apply it all over the lid to the crease, don´t going further. To clean the edge I used the C330 Crown Brush.
Con la sombra #92 de MUFE y la brocha Pro-17 he marcado todo el extremo exterior del ojo hasta mas o menos la mitad del párpado y he integrado bien este color con Paradisco para evitar cortes.
Using eyeshadow #92 and the Pro-17 brush, I marked the outter part of the eye to the half of the eye, blending the colors very well to avoid harsh lines.
Delineamos el ojo con la brocha Pro-12 y teniendo en cuenta que este es un look con inspiración árabe, cuanto mas alarguemos el eyeliner, mejor. Después difuminamos el eyeliner con sombra negra (he usado la Carbon de MAC y la brocha 219 también de MAC) y vamos integrando el negro con el resto de los colores.
I lined my eye with the Pro-12 brush, and because this is a arab inspired look, the further you go with the liner, the better. Then you have to smoke the liner with black eyeshadow (I used Carbon eyeshadow and 219 brush all by MAC) and make sure to blend all together.
Para dar un acabado totalmente "smoky" con un poco de sombra "Parfait Amour" de MAC y la brocha Pro-54, he difuminado el color #92. Y limpiando esta misma brocha, he usado Brulé de MAC para iluminar la ceja y dar un acabado totalmente limpio al difuminado.
To finish with a very smoky look, with a tiny bit of Parfait Amour eyeshadow from MAC and the brush Pro-54 I blended the edge of the color #92. And cleaning this brush, I used it again to apply Brulé as a highlighter on my eyebrow.
Con la brocha MR 1 de Grimas he dibujado el triangulito pequeño en el lagrimal.
With the MR 1 brush by Grimas, I made the little triangle on the tear duct.
En la línea inferior de pestañas, aplicamos liner, difuminamos un poquito con la brocha 219 y sombra negra que hemos usado antes, y el toque final le doy con el colorete Azalea de MAC. Usando de nuevo la brocha Pro-54, lo aplicaremos para dar un toque de color muy intenso.
On the lower lash line, after applying some liner and blending it with black eyeshadow (using Carbon and the 219 brush again), the final touch for the eyes comes with Azalea blush. Taking the Pro-54 brush and some blush, apply it all over the lash line.
Para delinear por dentro, he usado el Highliner Gel Crayon de Marc Jacobs y como máscara la Extended Play Gigablack Lash de MAC.
To tightline my eyes, I used the Highliner Gel Crayon by Marc Jacobs and for mascara the Extended Play Gigablack Lash by MAC.
Y ahora, es cuando aplicamos el polvo para fijar la base.
Now, we powder the face to set our foundation.
Pasamos a las mejillas, como iluminador Lightscapade y la Setting Brush de Real Techniques. He marcado el pómulo usando la brocha Pro-42 y Harmony y como colorete Stay By Me (todos los productos de MAC).
On my cheeks, as a highlighter Lightscapade and I used the Setting Brush by Real Techniques. I did some contour using the Pro-42 brush and Harmony, and as blush Stay By Me, all products by MAC.
Y en los labios, Subculture para delinear y Viva Glam II en el labio.
For the lips, Subculture Lip Liner and Viva Glam II.
Espero que os haya gustado!
Hope you like it!
Nos vemos en el siguiente post,
See you on the next one,
Lor.
Lo primero, pediros disculpas por haber tardado tanto en subir un look, pero he tenido unas semanas de locos en el trabajo y no he tenido tiempo de nada =S.
Y estoy de vuelta, con un look bien dramático y a lo grande, para celebrarlo por todo lo alto!
Es un look con inspiración árabe (los looks que hacen son siempre muy coloridos y sobre todo MUY dramáticos, cosa la cual me encanta) y con un par de productos nuevos que tenía muchas ganas de enseñaros en acción.
AVISO: casi todas las brochas que uso son de Burlesque, porque son demasiado geniales. Y creo que os gustará ver que resultado dan ;).
Hi there!
Well, first say sorry for being so late on uploading this look that I promised like a million years ago. I have been super busy with work, and I didn´t have time at all.
So, to celebrate that I´m back with makeup looks, I decided to do a arab inspired look (I love their dramatic and super bold makeup, SO MUCH) with some new products that I wanted to you in action.
Let´s get started!
WARNING: Almost all the brushes that I use are from Burlesque because they´re great! And I thought you will love to see the result ;)
Empecemos!
Primero aplicamos la base, primer de sombras y la ojera os recomiendo que la dejéis libre de corrector (en caso de que caiga algo de sombra luego es más fácil de limpiar) y tampoco apliquéis polvo, lo dejamos para el final. También me maquillé las cejas, pero opté por no alargarlas demasiado.
First, apply your foundation and eyeshadow primer. Don´t apply yet you concealer, because if you have any fallout, it´s easier to clean up. Don´t powder either, we´ll do it later. Also, I did my eyebrows (I can´t do any eye makeup if I don´t have my eyebrows done hahahaha).
Como base de ojos he aplicado el Paint Pot "Bare Study" con la brocha de Burlesque Pro-47.
As eyeshadow primer I´ve used the Paint Pot in Bare Study and the Burlesque brush Pro-47.
Después, con la sombra Paradisco y la brocha Pro-37, la he aplicado por todo el párpado móvil sin sobrepasar la cuenca y difumino el borde con la brocha C330 de Crown Brushes.
Later, with the brush Pro-37 and the eyeshadow Paradisco, I apply it all over the lid to the crease, don´t going further. To clean the edge I used the C330 Crown Brush.
Con la sombra #92 de MUFE y la brocha Pro-17 he marcado todo el extremo exterior del ojo hasta mas o menos la mitad del párpado y he integrado bien este color con Paradisco para evitar cortes.
Using eyeshadow #92 and the Pro-17 brush, I marked the outter part of the eye to the half of the eye, blending the colors very well to avoid harsh lines.
Delineamos el ojo con la brocha Pro-12 y teniendo en cuenta que este es un look con inspiración árabe, cuanto mas alarguemos el eyeliner, mejor. Después difuminamos el eyeliner con sombra negra (he usado la Carbon de MAC y la brocha 219 también de MAC) y vamos integrando el negro con el resto de los colores.
I lined my eye with the Pro-12 brush, and because this is a arab inspired look, the further you go with the liner, the better. Then you have to smoke the liner with black eyeshadow (I used Carbon eyeshadow and 219 brush all by MAC) and make sure to blend all together.
Para dar un acabado totalmente "smoky" con un poco de sombra "Parfait Amour" de MAC y la brocha Pro-54, he difuminado el color #92. Y limpiando esta misma brocha, he usado Brulé de MAC para iluminar la ceja y dar un acabado totalmente limpio al difuminado.
To finish with a very smoky look, with a tiny bit of Parfait Amour eyeshadow from MAC and the brush Pro-54 I blended the edge of the color #92. And cleaning this brush, I used it again to apply Brulé as a highlighter on my eyebrow.
Con la brocha MR 1 de Grimas he dibujado el triangulito pequeño en el lagrimal.
With the MR 1 brush by Grimas, I made the little triangle on the tear duct.
En la línea inferior de pestañas, aplicamos liner, difuminamos un poquito con la brocha 219 y sombra negra que hemos usado antes, y el toque final le doy con el colorete Azalea de MAC. Usando de nuevo la brocha Pro-54, lo aplicaremos para dar un toque de color muy intenso.
On the lower lash line, after applying some liner and blending it with black eyeshadow (using Carbon and the 219 brush again), the final touch for the eyes comes with Azalea blush. Taking the Pro-54 brush and some blush, apply it all over the lash line.
Para delinear por dentro, he usado el Highliner Gel Crayon de Marc Jacobs y como máscara la Extended Play Gigablack Lash de MAC.
To tightline my eyes, I used the Highliner Gel Crayon by Marc Jacobs and for mascara the Extended Play Gigablack Lash by MAC.
Y ahora, es cuando aplicamos el polvo para fijar la base.
Now, we powder the face to set our foundation.
Pasamos a las mejillas, como iluminador Lightscapade y la Setting Brush de Real Techniques. He marcado el pómulo usando la brocha Pro-42 y Harmony y como colorete Stay By Me (todos los productos de MAC).
On my cheeks, as a highlighter Lightscapade and I used the Setting Brush by Real Techniques. I did some contour using the Pro-42 brush and Harmony, and as blush Stay By Me, all products by MAC.
Y en los labios, Subculture para delinear y Viva Glam II en el labio.
For the lips, Subculture Lip Liner and Viva Glam II.
Y este es el resultado final:
This is the final look:
Espero que os haya gustado!
Hope you like it!
Nos vemos en el siguiente post,
See you on the next one,
Lor.
jueves, 31 de julio de 2014
Touch Of Yellow
Hola a todos!
Como va la semana? Espero que muy bien, y mejor aun que estamos en la frontera con el fin de semana! Tengo unos cuantos planes y la verdad que estoy deseando que llegue ya =).
Bueno, hoy voy a probar un nuevo sistema para enseñaros como hice uno de mis últimos looks, espero que os guste y que sea mas fácil así!
Empecemos!
Estos son algunos de los básicos de siempre. Usé como base la Face and Body en el tono C1, de corrector el HD de Nyx y para fijar todo, los compactos All About Matt de Essence. Como siempre, mi misma rutina de cejas (os gustaría saber como lo hago? Si es así dejadme un comentario y os hago una rutina de cejas) y fijarlas con el Lash Brow Designer de Catrice. Y lo último que usé, la máscara de pestañas de Astor, Seduction Codes.
Después de haber aplicado un primer para sombras, empezamos con el numero 1 (indicado en la foto de abajo también, para que sepáis que he usado). Es el color Ground Brown de MAC y lo usé para marcar la cuenca suavemente y difuminar un poquito en el extremo exterior del ojo. En el párpado usé la sombra con el número 2, es una de las Rainbow de Inglot y cogí el tono mas oscuro. Con el eye paint de NARS, realicé el eyeliner. Y para terminar, el lápiz khol de MAC Teddy en la linea interior y en las pestañas la sombra con el número 4, Outremer de NARS. Y la sombra de tono marfil, en el arco de la ceja, para iluminar (Shroom de MAC).
Para terminar, usé como iluminador el Prime and Fine de Catrice (aunque no iluminó nada, ha perdido el brillo), para contorno Harmony de MAC y de colorete Stay By Me.
Para los labios, un gloss de MUA, el Intense Kisses Sealed With A Kiss. (os dejo una foto de internet, porque no sé donde he dejado el gloss y no lo encuentro! XD)
Y este es el resultado final, espero que os guste!
Nos leemos en el próximo post.
Lor.
---------------------------------------------------
Hello everybody!
How is going your week? Hope that everything is ok, we´re almost on the weekend! I have some plans, so it will be a fun one =).
Today I´m going to try a new way to show you how I did one of my last looks, hope that you find it easy to understand!
Let´s get started.
Some basics (that you can see on the first photo, above). I used as a base the Face and Body in C1 by MAC. As a concealer, the HD by Nyx; and to set everything in place I got the All About Matt by Essence. Then, as usual I did my brows (would you like to know how I do them? Let me a comment! And I will write the post) and fixed them with the Lash Brow Designer by Catrice. The mascara that I used was Secret Codes by Astor.
After applying an eye primer, this is what I did: I took the eyeshadow with #1, and made a light cut crease and blended it on the outter side of the eye (the color is Ground Brown by MAC). On my lid, the eyeshadow with the #2, using the darkest shade of yellow (this one is from the Rainbow line by Inglot). Then, using the gel liner with #3, I made a winged eyeliner (is the eye paint in Black Valley by NARS). On my lower lashes I added some eyeshadow with the #4 (Outremer by NARS) and used some Teddy pencil by MAC on my waterline. Under my eyebrow the champagne eyeshadow, Shroom by MAC to highlight.
On my face, as a highlighter I used the Prime and Fine by Catrice on my cheekbones, I did a light contour with Harmony by MAC and as a blusher I used the Pro Longwear Stay By Me.
On my lips, Intense Kisses Sealed with a Kiss Lipgloss by MUA.
And that´s the finished look!
Hope you liked it, and I´ll see you on the next post.
(Photos, above)
Lor.
jueves, 17 de octubre de 2013
Highlighters
Hi everyone!
Today, I´m here to talk about one of my favourite thing in the makeup (after lipsticks) and that´s the highlighters.
The highlighters, as the same word says, is mean to highlight certain points on your face, but that doesn´t mean that you have to put it all over your face. The right amount of highlighter can have a great effect on your makeup, but too much can really destroy the whole look.
There are a lot of different kinds, in cream, podwer, on pencil, loose podwer...
So I´m going to tell you my favourite products to highlight and how I use them.
One of my favourites ever, is the cream colour base in Pearl (by MAC). I´ve use this for a very long time, and with the tiniest amount applied directly with your fingers on your cheekbones, it creates a really subtle glow that looks very natural. You can apply this one with a brush, but I like more the way that look when I put it with my fingers.
Another very similar to the cream colour base, is one that I used (and I´m not sure if still available) from e.l.f and the name was Shimmering Facial Whip in Spotlight. The effect was so nice too, pretty similar to Pearl. I also applied this one always with my fingers and a very little amount, cause´ was very shiny.
The one that really surprise me a lot was the MUA Undress Your Skin Highlighter Podwer. Very cheap, just 3 pounds, and a very generous amount of product. For me is very pinky, but I still loving it, because it gives to your sking a very nice shine and really shows up when you apply a pink blush, that´s a very great combo for this highlight. This one I always applied it with my setting brush by Real Techniques.
If I am on a rush, my usual highlighter is an eyeshadow from MAC, Shroom. For my skin, by the moment is the color that I like the most for highlighting (I always use this one for highlight my eyebrows and tear ducts) and is always on my eyebrow palette, so is very easy for me to take it and finish my makeup fast. I always apply this with brush (any brush that I have close to me in that moment)
When I do my makeup for special ocassions (and only night looks, this for a day look can look so overdone), sometimes I apply a pigment from Stargazer #31 to give to my cheeks more definition and dimension and very fancy shine. I always apply this with light hand and my setting brush by Real Techniques. I don´t do this very often, but every now and then I like to use this for a very sultry night look.
And this are my favourites highlighters. I really want to use again YSL Touch Eclat (I had this a million years ago and I loved it so much! But is very expensive...) and try Lightscapade by MAC and Candlelight by Kevyn Aucoin (this last one is very, very expensive =S). I think I´ll start saving money for trying new highlighters =D
Hope you like the post, and see you on the next!
Lor.
-----------------------------------------
Hola a todos!
Hoy os vengo a hablar de una de mis cosas favoritas en el maquillaje (detrás de las barras de labios, que es uno de mis mayores vicios en el maquillaje) y son los iluminadores.
Como bien indica la palabra, este producto esta destinado a iluminar ciertas partes de nuestra cara. Pero eso no quiere decir que tengamos que aplicarlo por toda ella, la cantidad exacta de iluminador puede hacer maravillas en un look; pero si nos excedemos podemos llegar a parecer una farola de tanta iluminación puesta en nuestra cara.
Hay muchos tipos de iluminadores: en crema, en polvo, compactos, en lápiz...
Os voy a decir cuales son mis favoritos y como los aplico.
Uno de mis favoritos de hace mucho tiempo (y el cual he usado también una larga temporada) es el cream colour base en el tono Pearl de MAC. Con muy poquito de este producto podemos iluminar perfectamente nuestra mejilla. Da un acabado muy sutil, pero se nota perfectamente la iluminacion y queda muy natural. Normalmente solía aplicarme esto con los dedos, porque me gustaba mas el efecto que quedaba asi que al aplicarlo con una brocha.
Otro muy similar que tuve hace muchos años a Pearl fue uno de e.l.f (no se si seguirá a la venta o lo habrán retirado) y se llamaba Shimmering Facial Whip. También lo aplicaba con los dedos, y en muy poca cantidad (este brillaba mucho mas que Pearl porque tenía purpurina) porque si te excedías un poco, el efecto era horrendo.
El que me ha sorprendido mucho es el Undress Your Skin Highlighting Podwer de MUA. Para mi gusto es un poco rosado, pero aun así me gusta bastante. Suelo combinarlo con coloretes rosas, y queda espectacular. Este, en cambio, me gusta aplicarlo con la setting brush de Real Techniques.
Si tengo prisa y tengo que maquillarme en tiempo récord, el que suelo utilizar es la sombra Shroom de MAC. Suelo tenerlo en mi paleta de cejas, así que siempre lo tengo cerca, y lo aplico con cualquier brocha que tenga a mano.
Cuando el maquillaje es para alguna ocasión especial (sobre todo si es para algún look de noche, para un look de día puede quedar muy recargado) me gusta usar un pigmento de Stargazer #31 para dar mucha mas definición a las mejillas y resaltarlas un poco más de lo normal. Suelo aplicarlo con la setting brush de Real Techniques y muy ligeramente.
Estos son mis iluminadores favoritos. Quiero volver a usar de nuevo el Touch Eclat de YSL (lo tuve hace muchos años y era maravilloso... pero extremadamente caro) y me gustaría probar Lightscapade de MAC y Candlelight de Kevyn Aucoin (este es mucho más caro aún que el Touch Eclat =S) Así que creo que tendré que empezar a ahorrar para poder comprarlos, jajaja.
Fotos, como siempre, un poco más arriba.
Espero que os haya gustado el post y nos vemos en el siguiente!
Lor.
Today, I´m here to talk about one of my favourite thing in the makeup (after lipsticks) and that´s the highlighters.
The highlighters, as the same word says, is mean to highlight certain points on your face, but that doesn´t mean that you have to put it all over your face. The right amount of highlighter can have a great effect on your makeup, but too much can really destroy the whole look.
There are a lot of different kinds, in cream, podwer, on pencil, loose podwer...
So I´m going to tell you my favourite products to highlight and how I use them.
One of my favourites ever, is the cream colour base in Pearl (by MAC). I´ve use this for a very long time, and with the tiniest amount applied directly with your fingers on your cheekbones, it creates a really subtle glow that looks very natural. You can apply this one with a brush, but I like more the way that look when I put it with my fingers.
Another very similar to the cream colour base, is one that I used (and I´m not sure if still available) from e.l.f and the name was Shimmering Facial Whip in Spotlight. The effect was so nice too, pretty similar to Pearl. I also applied this one always with my fingers and a very little amount, cause´ was very shiny.
The one that really surprise me a lot was the MUA Undress Your Skin Highlighter Podwer. Very cheap, just 3 pounds, and a very generous amount of product. For me is very pinky, but I still loving it, because it gives to your sking a very nice shine and really shows up when you apply a pink blush, that´s a very great combo for this highlight. This one I always applied it with my setting brush by Real Techniques.
If I am on a rush, my usual highlighter is an eyeshadow from MAC, Shroom. For my skin, by the moment is the color that I like the most for highlighting (I always use this one for highlight my eyebrows and tear ducts) and is always on my eyebrow palette, so is very easy for me to take it and finish my makeup fast. I always apply this with brush (any brush that I have close to me in that moment)
When I do my makeup for special ocassions (and only night looks, this for a day look can look so overdone), sometimes I apply a pigment from Stargazer #31 to give to my cheeks more definition and dimension and very fancy shine. I always apply this with light hand and my setting brush by Real Techniques. I don´t do this very often, but every now and then I like to use this for a very sultry night look.
And this are my favourites highlighters. I really want to use again YSL Touch Eclat (I had this a million years ago and I loved it so much! But is very expensive...) and try Lightscapade by MAC and Candlelight by Kevyn Aucoin (this last one is very, very expensive =S). I think I´ll start saving money for trying new highlighters =D
Hope you like the post, and see you on the next!
Lor.
-----------------------------------------
Hola a todos!
Hoy os vengo a hablar de una de mis cosas favoritas en el maquillaje (detrás de las barras de labios, que es uno de mis mayores vicios en el maquillaje) y son los iluminadores.
Como bien indica la palabra, este producto esta destinado a iluminar ciertas partes de nuestra cara. Pero eso no quiere decir que tengamos que aplicarlo por toda ella, la cantidad exacta de iluminador puede hacer maravillas en un look; pero si nos excedemos podemos llegar a parecer una farola de tanta iluminación puesta en nuestra cara.
Hay muchos tipos de iluminadores: en crema, en polvo, compactos, en lápiz...
Os voy a decir cuales son mis favoritos y como los aplico.
Uno de mis favoritos de hace mucho tiempo (y el cual he usado también una larga temporada) es el cream colour base en el tono Pearl de MAC. Con muy poquito de este producto podemos iluminar perfectamente nuestra mejilla. Da un acabado muy sutil, pero se nota perfectamente la iluminacion y queda muy natural. Normalmente solía aplicarme esto con los dedos, porque me gustaba mas el efecto que quedaba asi que al aplicarlo con una brocha.
Otro muy similar que tuve hace muchos años a Pearl fue uno de e.l.f (no se si seguirá a la venta o lo habrán retirado) y se llamaba Shimmering Facial Whip. También lo aplicaba con los dedos, y en muy poca cantidad (este brillaba mucho mas que Pearl porque tenía purpurina) porque si te excedías un poco, el efecto era horrendo.
El que me ha sorprendido mucho es el Undress Your Skin Highlighting Podwer de MUA. Para mi gusto es un poco rosado, pero aun así me gusta bastante. Suelo combinarlo con coloretes rosas, y queda espectacular. Este, en cambio, me gusta aplicarlo con la setting brush de Real Techniques.
Si tengo prisa y tengo que maquillarme en tiempo récord, el que suelo utilizar es la sombra Shroom de MAC. Suelo tenerlo en mi paleta de cejas, así que siempre lo tengo cerca, y lo aplico con cualquier brocha que tenga a mano.
Cuando el maquillaje es para alguna ocasión especial (sobre todo si es para algún look de noche, para un look de día puede quedar muy recargado) me gusta usar un pigmento de Stargazer #31 para dar mucha mas definición a las mejillas y resaltarlas un poco más de lo normal. Suelo aplicarlo con la setting brush de Real Techniques y muy ligeramente.
Estos son mis iluminadores favoritos. Quiero volver a usar de nuevo el Touch Eclat de YSL (lo tuve hace muchos años y era maravilloso... pero extremadamente caro) y me gustaría probar Lightscapade de MAC y Candlelight de Kevyn Aucoin (este es mucho más caro aún que el Touch Eclat =S) Así que creo que tendré que empezar a ahorrar para poder comprarlos, jajaja.
Fotos, como siempre, un poco más arriba.
Espero que os haya gustado el post y nos vemos en el siguiente!
Lor.
domingo, 29 de septiembre de 2013
Get Ready With Me!
Hi everyone!
Tody I´m going to make a "Get Ready With Me" post about the makeup that I wear yesterday when I went to the movies with my girlfriends! We saw "Now You See Me..." and it´s amazing!! I recommend you to watch it, you won´t regret it at all.
So, let´s get started!
First, I clean my skin with the "Herbalism" facial mask, later I clean the rests of the mask with my Tea Tree Skin Clearing Facial Wash and apply some Tea Tree Water skin tonic. After the skin tonic was complete absorved by my skin, I apply my Mineralize Charged Water Moisture Gel and wait for a few minutes until my skin was totally dry and not sticky for applying my makeup.
I did a very simple makeup, you can call it naked o washed face.
First, I applied my Face and Body foundation in C1 with a contour brush from Real Techniques. I used this brush because I like the finish that gave to the foundation on my skin, and because is very gentle and soft. After that, I took my 286 Duo Fibre Blending Brush for applying my Illamasqua Concealer in CC 115 and took my Beauty Blender dupe for a total blending (this concealer is very pale in comparison with the foundation that I used, so I don´t wanted to look like a panda but in white concealer haha!) After all, I set everything with my very used (as you can see) Collection Pressed Podwer in 18 Ivory with my 15BJF Inglot brush (is a blush brush, but I love to use it for podwer)
For the rest of the face I kept it simple, just some light cheek contour using Harmony and my 109 Small Contour Brush by MAC (this brush is one of my favourites ever!) and I use Stunner blush (satin finish) with my 168 Large Angled Contour Brush. For highlight, I put a little bit of Shroom with the 227 Large Fluff Brush on top of the cheeks.
After that I took my 212 Flat Definer Brush and with Concrete eyeshadow, for filling and define my eyebrows.
On the eyes, I apply with my ring finger a bit of Bare Study Painpot, and let it set for a minute. Later, with the lightest eyeshadow of this quad by Kiko (Color Fever Eyeshadow Palette, I got this a long time ago) I applied it all over the lid with my 213 Fluff Brush, blending any harsh line. After that I curled my lashes and put some mascara.
For the lips I used Whirl lipliner by MAC and MUA lipstick in shade 14.
Sorry I can put you a finish look photo, I didn´t take any! But this is one photo with the same look from a while ago, with the exact same products (is one of my favourite looks, as you can see)
Hope you like the post!
See you on the next one,
Lor.
<a href="http://www.bloglovin.com/blog/10847141/?claim=eagdsv2x6cy">Follow my blog with Bloglovin</a>
Tody I´m going to make a "Get Ready With Me" post about the makeup that I wear yesterday when I went to the movies with my girlfriends! We saw "Now You See Me..." and it´s amazing!! I recommend you to watch it, you won´t regret it at all.
So, let´s get started!
First, I clean my skin with the "Herbalism" facial mask, later I clean the rests of the mask with my Tea Tree Skin Clearing Facial Wash and apply some Tea Tree Water skin tonic. After the skin tonic was complete absorved by my skin, I apply my Mineralize Charged Water Moisture Gel and wait for a few minutes until my skin was totally dry and not sticky for applying my makeup.
I did a very simple makeup, you can call it naked o washed face.
First, I applied my Face and Body foundation in C1 with a contour brush from Real Techniques. I used this brush because I like the finish that gave to the foundation on my skin, and because is very gentle and soft. After that, I took my 286 Duo Fibre Blending Brush for applying my Illamasqua Concealer in CC 115 and took my Beauty Blender dupe for a total blending (this concealer is very pale in comparison with the foundation that I used, so I don´t wanted to look like a panda but in white concealer haha!) After all, I set everything with my very used (as you can see) Collection Pressed Podwer in 18 Ivory with my 15BJF Inglot brush (is a blush brush, but I love to use it for podwer)
For the rest of the face I kept it simple, just some light cheek contour using Harmony and my 109 Small Contour Brush by MAC (this brush is one of my favourites ever!) and I use Stunner blush (satin finish) with my 168 Large Angled Contour Brush. For highlight, I put a little bit of Shroom with the 227 Large Fluff Brush on top of the cheeks.
After that I took my 212 Flat Definer Brush and with Concrete eyeshadow, for filling and define my eyebrows.
On the eyes, I apply with my ring finger a bit of Bare Study Painpot, and let it set for a minute. Later, with the lightest eyeshadow of this quad by Kiko (Color Fever Eyeshadow Palette, I got this a long time ago) I applied it all over the lid with my 213 Fluff Brush, blending any harsh line. After that I curled my lashes and put some mascara.
For the lips I used Whirl lipliner by MAC and MUA lipstick in shade 14.
Sorry I can put you a finish look photo, I didn´t take any! But this is one photo with the same look from a while ago, with the exact same products (is one of my favourite looks, as you can see)
Hope you like the post!
See you on the next one,
Lor.
<a href="http://www.bloglovin.com/blog/10847141/?claim=eagdsv2x6cy">Follow my blog with Bloglovin</a>
Etiquetas:
beauty blender,
benefit,
brush,
concealer,
dupe,
eyebrow,
fotd,
foundation,
get ready with me,
illamasqua,
kiko,
lipliner,
lipstick,
lush,
mac,
makeup,
mua,
the body shop
Suscribirse a:
Entradas (Atom)


.jpeg)
.jpeg)
.jpeg)
.jpeg)
.jpeg)
.jpeg)
.jpeg)
.jpeg)
.jpeg)
.jpeg)
.jpeg)
.jpeg)


.jpeg)
.jpeg)