Mostrando entradas con la etiqueta eyeliner. Mostrar todas las entradas

jueves, 20 de agosto de 2015

Easy&Fast Look: Summer Edition.

Hola a todos!

Disculpad mi ausencia, pero el trabajo me ha tenido un poco ocupada y no he tenido demasiado tiempo de hacer ningún look que pudiera ser decente para el blog (casi todo era súper simple!) pero hoy estoy de vuelta con un look ultra fácil y rápido, y creo que ideal para verano.
Hi everyone! 
Sorry about being absent, but work kept me very busy and I didn´t have time to do cool makeup looks for the blog, I´ve been doing very simple looks lately due to the lack of time. I´m back today with the easiest and fastest look ever, and super cool for summer!

A vuestra elección dejo el aplicaros base o no, pero este siguiente paso es muy necesario: aplicar una prebase de sombra de ojos.
Lo siguiente es realizar un eyeliner con vuestra sombra de ojos favorita. Os recomiendo ir despacio y a toquecitos, y luego no olvidéis de repasar donde no haya quedado tan saturado el color de la sombra. Para asegurarme 100% que la sombra no se iba a mover, con la misma brocha apliqué un poco de polvo traslúcido encima y ya está hecho. Podéis hacerlo mas corto, mas largo, como siempre eso a gusto de cada uno.
Después un toquecito de colorete, labial, dos buenas capas de máscara de pestañas y ya estáis maquillad@s.
You can apply foundation or not, you have a choice (most of all because if you leave on a country like mine, where we have extremely hot summer, wearing foundation it´s a total nightmare!) but the next step you have to do it, and it´s to apply an eyeshadow base. After that, with your favourite eyeshadow color just draw your eyeliner. Make sure to go slow, and making little strokes. Wing it as much as you want (I went for a very long one) and you´re done. To make sure that the eyeshadow it´s not going anywhere, apply with the same brush some traslucent powder on top.
Then, apply a little bit of blush, some lipstick and two coats of mascara, and that´s all folks!


(Prebase de Inglot, sombra #846 de MUFE y pincel de Burlesque Pro-106)
(Eyeshadow base from Inglot, MUFE eyeshadow #846 and Pro-106 brush from Burlesque)


Creo que es un look muy fácil de hacer, y sobre todo ahorra espacio en el neceser si te vas de viaje y quieres llevar lo justo y necesario.
I think it´s a very simple look, great for summer and also saves a little bit of space on your cosmetic bag if you´re travelling.

Espero que estéis pasando un verano genial!
Nos leemos en el siguiente post =).

I hope you´re having an amazing summer!
See you on the next post =).

Lor.


viernes, 1 de mayo de 2015

Siahi Look.

Hola a todos!

Vengo con un look extremadamente rápido, colorido y genial para estas épocas con buena temperatura (aunque eso de buena, si por mi es, os aseguro que es una temperatura horrible) y más sol.
Hello everyone! 
Here I am today, with a very fast, easy and colorful look for this warm weather that is coming! (but if you ask me, this is the worst weather, I still prefering winter all the way).

Empecemos por lo básico, aplicamos base de maquillaje, corrector (cejas si os la maquillais) y fijamos todo con un poquito de polvo. Esto es lo que he usado: bases de NARS y L´Oréal en los tonos Siberia y 100 Porcelaine (mezcladas, ya os conté el por qué en este post), corrector de MAC Pro Longwear en el tono NC15 y el polvo Primed and Poreless de Too Faced y las brochas Burlesque Pro-41 para base y de MAC la 286 para corrector y la 116 para aplicar el polvo.
Starting from the basics, apply your foundation, concealer (do your eyebrows if you do them) and set everything with a little of powder. This is what I´ve used: foundations from NARS and L´Oréal on shades Siberia and 100 Porcelaine (mixed both, I told you why on this post) Pro Longwear concealer from MAC on NC15 and the Primed and Poreless Powder from Too Faced. The brushes are the Pro-41 for foundation from Burlesque, 286 for concealer and 116 for the powder, both from MAC.


En los ojos aplico el Paint Pot Bare Study, muy sutilmente. Después viene el toque principal de este look, con este eyeliner en gel azul hago el delineado (cualquier color que tengais del estilo os vale), aplico lápiz negro en la línea interior del ojo y un toque de verde lima en las pestañas inferiores para dar expresion al ojo. El eyeliner es el Fluidline en el tono Siahi, el lápiz negro de Marc Jacobs y el lápiz de color verde lima de Make Up Store. Las brocha es la Pro-50 de Burlesque.
On the eyes I applied the Bare Study Paint Pot as a base. With the blue eyeliner create a line and then wing it out as much as you like (any blue eyeliner will do for this), after that there´s only left to do some tightline and apply the lime green color on the lower lashes. The eyeliner is the Siahi fluidline from MAC, the black pencil is from Marc Jacobs and the green lime pencil is Tropical from Make Up Store. The brush is the Pro-50 from Burlesque.


Y terminamos los ojos con un par de capas de máscara de pestañas, esta es la Haute&Naughty Too Black Lash de MAC.
Finishing the eyes with two good coats of mascara. This one is the Haute&Naughty Too Black Lash from MAC.


Para las mejillas, iluminador y un colorete rosa clarito tornasolado. He usado el Mineralize Skinfinish en Lighscapade y el colorete Orgasm de NARS y la brocha Pro-03 de Burlesque.
El toque final de color en los labios, usando un tono entre rojo y rosa. Siempre aplico primer antes de cualquier labial (Prep and Prime) y luego he usado el labial Relentlessly Red de acabado Retro Matte y el delineador Chick Trick.
For the cheeks just a little of highlighter and some pink blush. I´ve used the Mineralize Skinfinish in Lightscapade and the Orgasm blush from NARS. All that applied with the Pro-03 brush from Burlesque.
For the final touch of color on the lips I´ve chosen this coral-pink-red color. Use some primer to make sure it will last the whole day and then line the lips and fill them. The lipstick is Relentlessly Red (retro matte finish) and Chick Trick lip pencil both from MAC.


(el color esta retocado en la foto para que podais apreciar como realmente se ven los colores, porque mi habitacion tiene una iluminacion penosa y se veian fatal!)
(the colors are fixed with some filters so you can really see how they look in person, my room has a very poor lightning and they didn´t show up really good!)


Espero que os guste! Nos leemos pronto!
Hope you like it& see you soon!


Lor.


lunes, 23 de marzo de 2015

Basic Look in Purple.

Hola a todos!!

Estoy de vuelta con uno de mis looks favoritos, más básicos y fáciles de hacer. Y lo mejor de todo, puedes poner cualquier color que te guste, porque combina con todo.

Esta vez opté por el morado, porque es uno de mis colores favoritos.

Comencemos!
Hi everyone!
Here I am, back, with one of my most favourite, easy and simple look. The best thing of this one is that you can use any color of your choice because it matches with everything!
This time I went with the purple, because is one of my faves.
Let´s get started!


Base de maquillaje como normalmente lo haríais, y en mi caso añado las cejas. Después aplico en el ojo el Paint Pot de MAC en Bare Study y marco un poco la cuenca usando la brocha Pro-54 de Burlesque y la sombra "Tease" de la paleta Naked 2. Para la línea inferior de pestañas he aplicado la sombra #610 de Inglot, "Parfait Amour" de MAC y "Blackout" de la Naked 2 usando la brocha 219 de MAC. Y para la delineación interior usé el Highliner Gel Crayon de Marc Jacobs.
Do your foundation routine as you always do, and in my case I add my eyebrow routine too. After that, I applied the "Bare Study" Paint Pot from MAC and worked my crease with a little of the "Tease" eyeshadow from the Naked 2 using my Pro-54 brush by Burlesque. For the lower lash line, I have mixed 3 eyeshadows: #610 from Inglot, Parfait Amour by MAC and Blackout from Urban Decay using the 219 brush by MAC. And on my waterline I used the Highliner Gel Crayon by Marc Jacobs.


Después simplemente es hacer el eyeliner a vuestro gusto. A mi me gusta alargarlo un poquito y hacerlo bien fino.
After that, you only have to do your liner however you like it. I like to do it with a thin end and a little long.


Para terminar los ojos, un poco de máscara de pestañas. y esta vez estoy usando la Haute&Naughty Too Black Lash de MAC.
For finishing the eyes, add mascara. I used the Haute&Naughty Too Black Lash by MAC.


En los pómulos hice un mix de coloretes en tonos rosados y uno de color marrón. Sin olvidar por supuesto un toque de iluminador, este es Lightscapade de MAC.
On my cheeks I have a mix of rosy blushes and one on a brownish shade. And of course, a light touch of highlighter, this one is Lightscapade by MAC.


En los labios, para terminar el look, delineador en el tono Currant muy difuminado y el labial Heroine encima.
On my lips, Currant Lip Liner blended with my own lip and Heroine lipstick on top.


Y este es el producto final!
Espero que os haya gustado.
This is the final result! I hope you like it =).


Nos vemos en el siguiente post!
See you on the next post!

Lor.


jueves, 31 de julio de 2014

Touch Of Yellow

Hola a todos!

Como va la semana? Espero que muy bien, y mejor aun que estamos en la frontera con el fin de semana! Tengo unos cuantos planes y la verdad que estoy deseando que llegue ya =).

Bueno, hoy voy a probar un nuevo sistema para enseñaros como hice uno de mis últimos looks, espero que os guste y que sea mas fácil así!

Empecemos!


Estos son algunos de los básicos de siempre. Usé como base la Face and Body en el tono C1, de corrector el HD de Nyx y para fijar todo, los compactos All About Matt de Essence. Como siempre, mi misma rutina de cejas (os gustaría saber como lo hago? Si es así dejadme un comentario y os hago una rutina de cejas) y fijarlas con el Lash Brow Designer de Catrice. Y lo último que usé, la máscara de pestañas de Astor, Seduction Codes.


Después de haber aplicado un primer para sombras, empezamos con el numero 1 (indicado en la foto de abajo también, para que sepáis que he usado). Es el color Ground Brown de MAC y lo usé para marcar la cuenca suavemente y difuminar un poquito en el extremo exterior del ojo. En el párpado usé la sombra con el número 2, es una de las Rainbow de Inglot y cogí el tono mas oscuro. Con el eye paint de NARS, realicé el eyeliner. Y para terminar, el lápiz khol de MAC Teddy en la linea interior y en las pestañas la sombra con el número 4, Outremer de NARS. Y la sombra de tono marfil, en el arco de la ceja, para iluminar (Shroom de MAC).
Para terminar, usé como iluminador el Prime and Fine de Catrice (aunque no iluminó nada, ha perdido el brillo), para contorno Harmony de MAC y de colorete Stay By Me.
Para los labios, un gloss de MUA, el Intense Kisses Sealed With A Kiss. (os dejo una foto de internet, porque no sé donde he dejado el gloss y no lo encuentro! XD)

Y este es el resultado final, espero que os guste!


Nos leemos en el próximo post.
Lor.

---------------------------------------------------

Hello everybody!

How is going your week? Hope that everything is ok, we´re almost on the weekend! I have some plans, so it will be a fun one =).

Today I´m going to try a new way to show you how I did one of my last looks, hope that you find it easy to understand!

Let´s get started.

Some basics (that you can see on the first photo, above). I used as a base the Face and Body in C1 by MAC. As a concealer, the HD by Nyx; and to set everything in place I got the All About Matt by Essence. Then, as usual I did my brows (would you like to know how I do them? Let me a comment! And I will write the post) and fixed them with the Lash Brow Designer by Catrice. The mascara that I used was Secret Codes by Astor.

After applying an eye primer, this is what I did: I took the eyeshadow with #1, and made a light cut crease and blended it on the outter side of the eye (the color is Ground Brown by MAC). On my lid, the eyeshadow with the  #2, using the darkest shade of yellow (this one is from the Rainbow line by Inglot). Then, using the gel liner with #3, I made a winged eyeliner (is the eye paint in Black Valley by NARS). On my lower lashes I added some eyeshadow with the #4 (Outremer by NARS) and used some Teddy pencil by MAC on my waterline. Under my eyebrow the champagne eyeshadow, Shroom by MAC to highlight.
On my face, as a highlighter I used the Prime and Fine by Catrice on my cheekbones, I did a light contour with Harmony by MAC and as a blusher I used the Pro Longwear Stay By Me.
On my lips, Intense Kisses Sealed with a Kiss Lipgloss by MUA.

And that´s the finished look!
Hope you liked it, and I´ll see you on the next post.
(Photos, above)
Lor.


miércoles, 19 de marzo de 2014

Get Ready With Me!

Hola a todos!

Que tal va la semana? Espero que muy bien, y que este calor repentino no os este molestando mucho (la verdad es que yo estoy muerta con la alergia por este maravilloso tiempo primaveral que no tiene razón de ser xD). Hoy os vengo con un look que suelo usar mucho, para mi de lo mas socorrido, pero con un toque de color y eyeliner un poco dramático. Podría decirse que tiene un toque "Pin Up" pero para mi no acaba de serlo del todo.

Empezamos!

He usado la Face And Body de MAC en el tono C1 y de corrector el HD de Nyx. Para aplicar la base he utilizado la brocha F80 de Sigma y para el corrector una esponjilla similar al Beauty Blender.


Para fijar la base, Collection Pressed Powder (que se me cayó y está destrozado en cachitos, pero aun sirve perfectamente!) en el tono 18 Ivory y la brocha 15BJF de Inglot. De iluminador en la mejilla, el Prime and Fine de Catrice, con la brocha Setting Brush de Real Techniques. De colorete, Stay by Me de MAC (colección Pro Longwear) y la brocha de Burlesque.


Como base en los ojos experimente un poco, sinceramente. Siempre suelo usar paintpot, pero esta vez apliqué el correcto de Nyx y lo fijé con los mismos polvos compactos que usé en el resto de la cara. Después, apliqué el color Naked con la brocha 239 de MAC en todo el párpado. Marqué la cuenca con el color DarkHorse y la brocha 213. Con el tono Virgin iluminé debajo de la ceja y en el lagrimal, y debajo de las pestañas inferiores apliqué el color Smog para dar profundidad. Usé el eyeliner de Maybelline en gel y la brocha 264 para delinear. Mis cejas las hice como siempre, la sombra es Concrete y la brocha recta que podéis ver en la foto, la 212. La brocha roja que podéis ver también, la usé para difuminar cualquier trazo que pudiera quedar (es la #10 de Smashbox). Apliqué un par de capas de máscara de pestañas y los ojos están terminados.


Para terminar, en los labios utilicé el delineador Cherry (que se ha convertido en uno de mis favoritos ahora mismo) y mezclé dos tonos de labiales, Lady Danger (rojo anaranjado) y So Chaud (un tono naranja con base roja). Como ambos son acabado mate, no hay que preocuparse por matificarlo ni nada.


Y este es el look final, espero que os guste!


(solo es media cara, porque he sido tan original de no hacerme una foto en condiciones... Así soy, que se le va a hacer jajajaja)


Nos leemos pronto!
Lor.
PD: en breves os tendré un post dedicado a la paleta Naked 3, que ya está en mis manos!

-----------------------------------------------

Hello everyone!
How are you? Hope the week is going well, and you don´t have this horrible weather that we have here in Spain (from extremely warm to cold in just one day) that is getting crazy everybody.

Today I am here with a very simple look, but as always with a pop of color. I wanted red/orange lips for today, and this is the result. Hope you like it!

Let´s get started:

For the face I applied Face and Body (by MAC, shade C1) with the F80 Sigma brush. As concealer, HD from Nyx and my fake Beauty Blender.

To set everything in place, Collection Pressed Powder in 18 Ivory and the 15BJF brush by Inglot. And the highlighting on my cheeks was Catrice Prime and Fine applied with the Setting brush from Real Techniques. For blush, Stay by Me from MAC and the brush from Burlesque.

On my eyes, as a primer I used the Nyx concealer and set it with the Collection Powder (just to try if it works too as a primer). I put the color Naked all over my lid with a 239 brush. On my crease, I used the color DarkHorse and the brush 213. For highlighter in my brow I put a little of the color Virgin and also on my tear duct. Under my lower lashes I put Smog to give to the look a little bit of depth. Then I lined my eyes with the Maybelline Gel Liner and a 264 brush. All the brushes are from MAC, excepting the one that I used to blend any harsh line, that is #10 by Smashbox. And of course, mascara and my eyebrows with the 212 brush and the eyeshadow Concrete.

For the lips, Cherry lip liner and a mix of Lady Danger and So Chaud. The result is a very bright orange color (and I loved it so much!)

All the photos, above.

Hope you like the look, and I will see you soon!
Lor.
PS: Soon I will have a post dedicated to the Naked 3 =), finally I got it!

miércoles, 8 de enero de 2014

Gel Eyeliner (part 2)

Hola a todos!!

Que tal estáis? Espero que muy bien, y que los Reyes Magos se hayan portado muy bien con todos! Yo no me puedo quejar, he debido de ser muy buena por todas las cositas que me han regalado =).

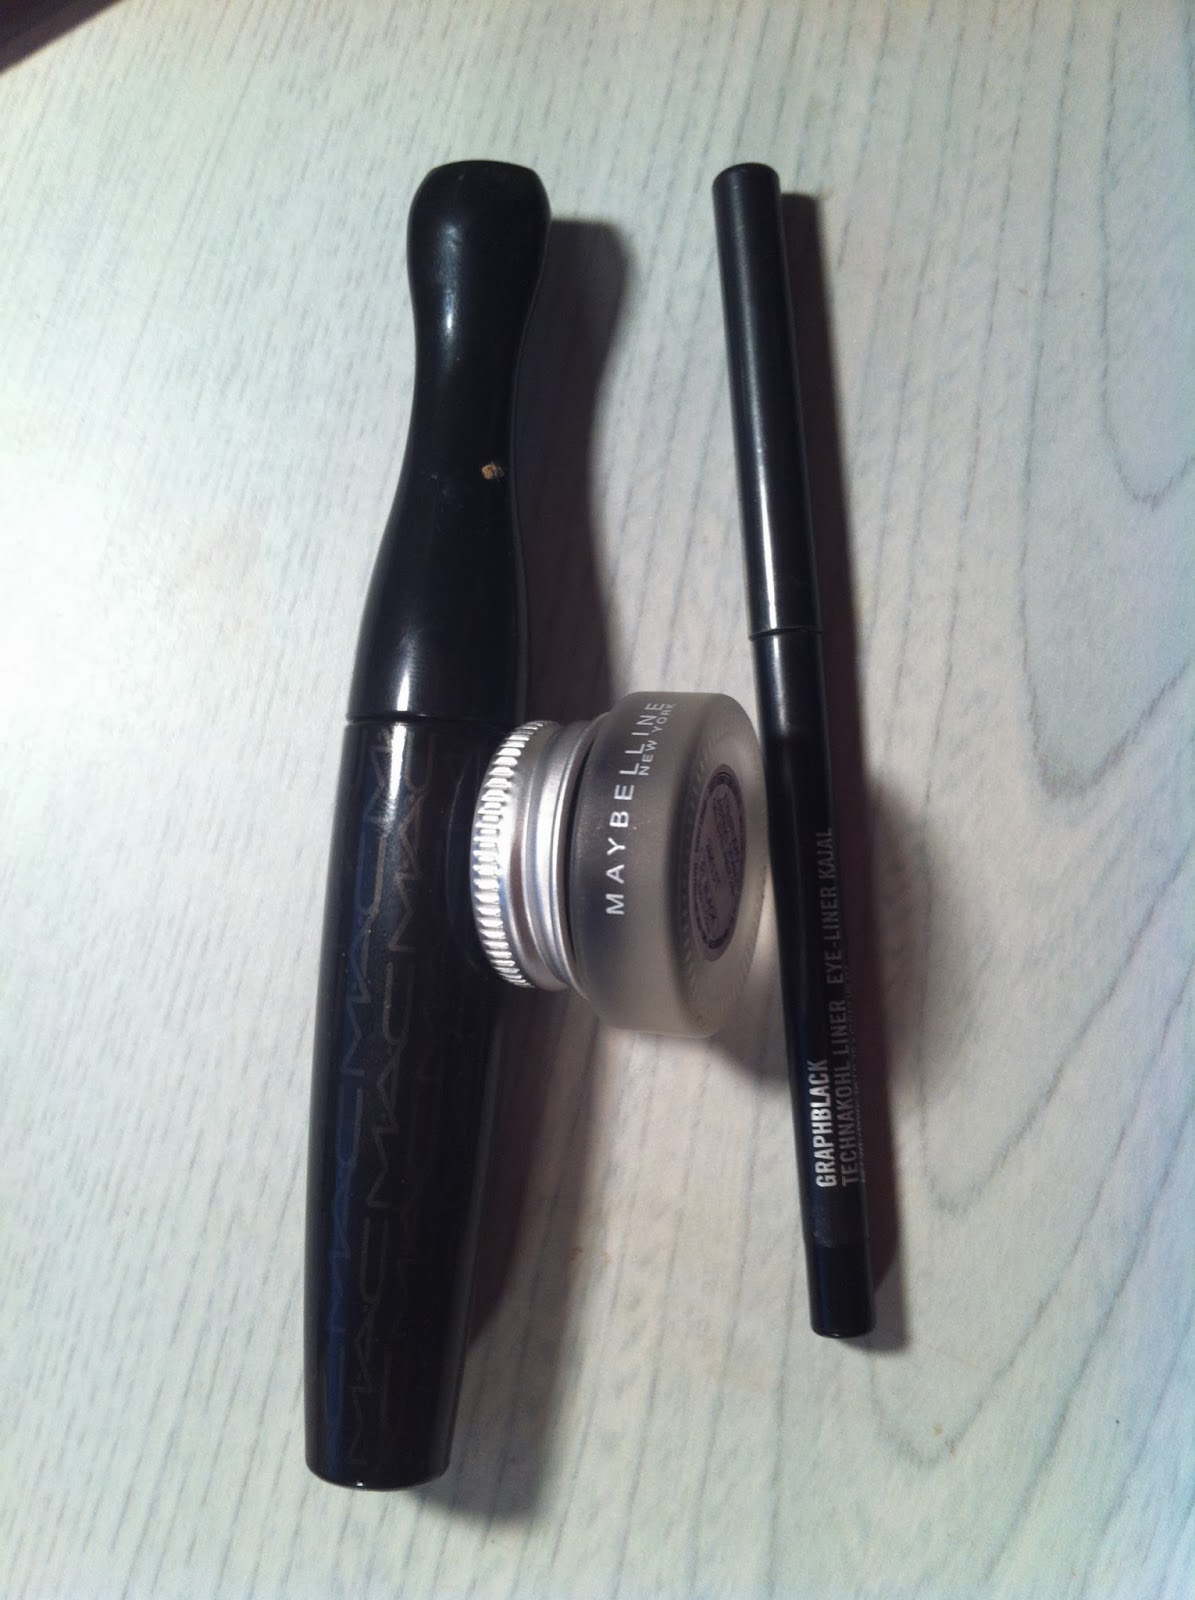
Bueno, hoy vengo con un review. Hace como dos meses, publiqué una entrada en la cual os hablaba de mi nuevo eyeliner en gel, de Maybelline. Tenía unas expectativas muy altas con este producto, ya que me habían hablado maravillas de el, y todo el mundo lo recomienda como sustituto del famoso Blacktrack de MAC.

Después de dos meses de uso, os puedo dar una opinión firme del producto.


Siempre lo he usado con un primer en el parpado, que conste.

No es tan bueno como dicen. Si, las primeras veces queda bien, después de unas cuantas horas se empieza a emborronar, lo cual puede llegar a ser un poco normal. Pero a la cuarta vez de uso, empezó la cosa a empeorar. Cada vez que lo he aplicado, para conseguir una buena intensidad de negro he tenido que aplicar de 2 a 3 capas de producto y yo creo que debido a tanta cantidad de producto, es lo que posiblemente produzca que en menos de dos horas empiece a emborronarse en el ojo. Para un acabado limpio y muy fino, o aplicas sombra negra encima, o no conseguirás ese acabado nunca.
Lo malo es que tus sombras en el ojo se ven perfectas, y el eyeliner esta borroso. Es frustrante ver ese acabado después de haber dedicado un rato a crear un look. Ademas, luego para desmaquillarlo, hay veces que se convierte en una odisea (porque al llevar 3 capas de producto, la primera capa esta muy seca y bien adherida a la piel).

Investigué una vez me comenzó a dar problemas, y aparentemente lo de la poca duración está debido a que Maybelline ha reformulado el producto, lo cual ha hecho que pierda calidad y duración en el párpado.

Sinceramente pensé que era una buena inversión, pero no lo ha sido para nada. En cuanto pueda, voy a volver a Blacktrack de MAC o Caviar Ink de Bobbi Brown, que hasta el momento son los dos que me han dado el acabado que realmente busco.

Lo habeis probado? Que opinion teneis sobre el? Y habeis utilizado algun otro eyeliner en gel que os guste?

Espero que os guste el post, y nos vemos en el siguiente!
Lor.

---------------------------------------------------

Hello there!!!

Today I am here for a review. A few months ago I told you about my new gel eyeliner on a post. I really had a big expectation on this product, because everybody said it was a perfect dupe for MAC´s Blacktrack, so I wanted to try it and see if it really works.

After two months of use, I can tell you something: it´s not a dupe for Blacktrack.

The first couple of times that I used it, the liner stayed on very well. Maybe at the end of the day it started to look blurred, but it could be normal after a lot of hours. But the funny thing is that everytime I used it, the blurred effect was everytime worst. Normally, after less than two hours with the liner on the eyes, it started to get blurry and dirty.
If you don´t apply black eyeshadow on top, forget to have clean edges and lines. And then, we have the pay-off of the color. You need at least 3 layers, which makes later a nightmare to remove the eyeliner from the eye when you take off your makeup.

I made a little bit of research after all this stuff, and a lot of people says that Maybelline reformulate the product and now it´s worst. It has less quality and is way less long lasting on the eye.

Now, I don´t think I made a good purchase. Probably, very soon I will be back to the Blacktrack or Caviar Ink by Bobbi Brown.

Have you tried this product? Do you like it? Which gel eyeliner do you use?

See you soon on the next post!
Lor.


lunes, 16 de diciembre de 2013

Inspired Look with Cranberry

Hola a todos!

Bueno, hoy estaba empeñada de usar la sombra Cranberry de MAC (en cuanto abro alguna paleta y me fijo en algún color, siempre acabo usándola, aunque al principio llevase otra idea). Pero no encontraba la manera de combinarla, y no me apetecía usarla para hacer solo un ahumado en ese tono, cuando mi solución apareció de manos de Youtube. Vi este vídeo de Sharon Farrell (Una de mis maquilladoras favoritas de todo Youtube, explica genial, y usa muchos de mis colores favoritos) y decidí que iba a tomarlo de inspiración, pero usando algunas cosas diferentes.

La forma en la que ella pone los productos es la misma, simplemente os voy a decir que colores cambié. Os aviso que casi todas las cosas que uso son de MAC, menos un par de sombras de Inglot.

El lápiz marrón que utiliza como guía y base para Cranberry, he usado Teddy. Es un marrón un poco mas oscuro que el que ella usa, pero aún así hace la misma función (Y a mi me gusta mucho mas, jaja). Después aplique Cranberry encima del lápiz, y di un par de toques mas con el para que fuera más oscuro el acabado.


El tono que usa en el centro no le tengo (y es uno de mis colores pendientes de sombra, porque la verdad es que es muy bonito) así que opté por mezclar dos sombras de mi paleta de Inglot (rosa y naranja) hasta conseguir una tonalidad coral, pero tirando mas a naranja que rosa. Para mi gusto, quedó mejor así que mas rosado, ya que chocaría bastante con Cranberry. y la verdad que me gustó mucho el tono que quedó con la mezcla de las dos sombras.


Para difuminar Cranberry en el párpado usé Mulch muy suavemente, difuminando el contorno.


En la línea inferior de pestañas, delineé con Teddy y despues difuminé con Cranberry, dejando el lagrima libre donde puse las sombras de Inglot rosa y naranja de nuevo, mezcladas. En la ceja, para iluminarla, usé Shroom.


El eyeliner que he usado es el de Maybelline, alargándolo para que fuera un poquito más dramático. Y para rematar los ojos, un par de capas de máscara de pestañas. Y lápiz negro por la línea interna.


El resto de la cara simple, un poco de contorno con Harmony y de colorete Stay By Me. De iluminador, Prime and Fine de Catrice. En los labios, delineador rosa pálido de Catrice, con labial de NYX y brillo de Inglot encima.


Espero que os haya gustado el look!


Nos vemos en el siguiente post =)
Lor.


----------------------------------------------

Hello everyone!

Today I was with one thought for my makeup: I had to use Cranberry from MAC in any possible way, don´t know why. I didn´t use that color on a while, and I saw it on the palette... So, while I was thinking in some looks to do, I saw this tutorial by Sharon Farrell and I loved it so much! And I decided to recreate it, but with some different things (she´s one of my favourite gurus in Youtube =D)

I did the same eye shape, and almost every product that I used is from MAC, excepting two eyeshadows by Inglot.

Instead of that brown pencil, I used Teddy, that gave to the look more darkness. I put on top Cranberry, and I apply a little more of Teddy pencil with a brush. I added some Mulch eyeshadow to blend all together.

I don´t have Expensive Pink (but it´s on my list of next color from MAC!), for getting a similar shade I mixed two eyeshadows by Inglot (pink and orange) but I added more orange than pink. I prefer more orange, because I don´t like how it looks Cranberry with a pink shade.

For the lower lash line, I applied Teddy and blend it with some Cranberry and Mulch eyeshadow. On the tear duct I put again the Inglot eyeshadows. For highlight the eyebrow I used Shroom, and on my waterline Graphblack.

To finish the eyes, long eyeliner (using Maybelline Gel Eyeliner) and two coats of mascara.

On the rest of the face, I kept it simple. Some Harmony for contour and Stay by Me blush, Prime and Fine by Catrice for highlighter in the cheeks.

The lips are a nude pink lipliner by catrice, a baby pink lipstick by NYX and some shine with a Inglot Ice Cube.

And that´s all! Hope you like it!

(photos on the top!)
See you on the next post!
Lor.


sábado, 26 de octubre de 2013

Gel Eyeliner

Hi everyone!

Not so long ago, I ran out of gel eyeliner. And I´ve been looking in different brands, to try another one new (my heart belongs to the fluidline in Blacktrack by MAC, is just amazing!) and after a lot of investigation, I decided to try the Maybelline Eyestudio Lasting Drama Gel Eyeliner (such a long name!).


When I took it the other day, there was a kind of offer that makes the Maybelline products cheaper, and I paid 9.80€ for it. Not so much (obviously Catrice has one much cheaper than this, but I didn´t find it anywhere) comparing to the MAC or Inglot ones.


The packaging, as you can see, so catch-eye, with that looong name and saying everywhere in the box that includes a brush for the eyeliner. The brush, I think is for people who doesn´t have any brush, because I did not find that was special or something .... (in fact I think that people who is not used to use brushes they´re not going to find it easy to use)


I find that is a normal black, and if you don´t apply it a second layer, it can look so poor of color. But is very long lasting, I wear it for 6 hours and stayed perfectly on my eye.
I didn´t use the brush that comes with it, I use (as almost everytime I do my eyeliner) the 263 brush by MAC. And it was very easy to work it on the eye (the Blacktrack dries so fast!)


(top: one layer, bottom: 2 layers)
(Línea de arriba: una capa, Línea de abajo: dos capas)


Is not a bad product, and I think is very affordable. I think I did a good purchase!

Hope you like the post, and I will see you on the next one!
Lor.

---------------------------------------

Hola a todos!

No hace mucho, terminé my eyeliner en gel. Y desde ese momento empecé una búsqueda que parecía que nunca iba a acabar, para probar uno nuevo de diferente marca (el que me tiene conquistada desde hace mucho tiempo es el fluidline de MAC en Blacktrack, porque es de lo mejor que nunca he probado!) y después de mucho buscar, mirar y comparar, me decidí por coger el Eyestudio Lasting Drama Gel Eyeliner de Maybelline (para mi gusto, un nombre deeeemasiado largo).

El día que lo compré, había en la tienda una promoción que los productos de Maybelline tenían descuento, y se quedó en unos 9.80€. No me pareció excesivamente caro (Catrice tiene uno que creo que no pasa de los 5€, pero no está en ningún sitio, de hecho muchas tiendas me dijeron que lo querían retirar o algo parecido) en comparación pro ejemplo con el eyeliner en gel de MAC o Inglot.

Como podeis ver, usan un packaging muy llamativo, con el nombre del producto taaaaan largo ocupando un buen cacho de la caja e indicando por toda la caja también que contiene una brocha para eyeliner. Y sinceramente no le veo nada especial a la brocha para que insistan tanto en ella... alguien que este acostumbrado a usar este tipo de eyeliner no creo que la encuentre útil y para aquellos que estén empezando, tampoco sera fácil de usar.

En cuanto al color, dice en la caja que es negro intenso. En mi parpado, la primera pasada quedo negro, y para conseguir un negro intenso, tuve que repasarlo de nuevo. Pero la duración es bastante decente, 6 horas sin desplazarse en el párpado.
Para aplicarlo en mi ojo usé la brocha 263 de MAC  (que es la que suelo usar casi todas las veces) y fue muy fácil trabajar el producto en el ojo (no seca tan rápido como el Blacktrack).

Fotos, más arriba.

Espero que os haya gustado este post, y nos vemos en el siguiente!
Lor.

martes, 1 de octubre de 2013

Blue Winged Eyeliner

Hi everyone!

For today I wear a twisted look. Bright eyeliner and dark lower lash line, but with the colors on trend this fall (or at least one of them!).

I did my usual foundation routine, nothing changed this time. After that I apply on my eyelid a very light skin color eyeshadow (Omega by MAC) and then, using the Eyeliner Gel from Inglot in #87 I lined the whole upper lash line, creating a winged eyeliner. This eyeliner is matte, so it doesn´t shine and dries super fast! For that, to work with it more comfortably, I used Duraline by Inglot too (this product makes the eyeliner to stay longer and much easier to work it!).


Then, I applied some eyeshadow on top of the eyeliner, because sometimes breaks and look so caky, and for that I used 435 Turquoise Tempest by Covergirl.


On the lower lash line I applied with a 214 brush a little bit of Satin Taupe (both things by MAC). On my waterline some black pencil, and later some lash curler and mascara, that´s all.
For the lips, some gloss by M.U.A (Sealed with a Kiss)

Here´s a picture of the look (I usually put the picture of the look on instagram before the post, so if you want to check it out a little sneak peak, is always there! Link on the top part of the blog).


Hope you like it and see you on the next one!
Lor.

--------------------------------------------------------

Hola a todos!!

Hoy me hice un maquillaje de los que yo llamo "a la inversa". Un eyeliner muy colorido en el parpado superior y la linea inferior de pestañas en oscuro, todo ello usando colores que están muy de moda ahora mismo para el Otoño.

Hice mi rutina usual de base de maquillaje, no usé nada diferente esta vez. Despues, apliqué en el parpado una sombra de color muy claro, casi de mi tono de piel (Omega de MAC) y después, con el Eyeliner Gel de Inglot (número 87) delineé toda la línea de pestañas superior, creando un delineado terminado en punta muy fina. Este eyeliner es mate, asi que no tiene nada de brillo y se seca muy rápido (lo cual puede llegar a ser una tortura). Para hacerlo más fácil, usé Duraline de Inglot, que ayuda a que el eyeliner se fije mejor y dure mucho mas tiempo, a parte de hacer más cómodo el trabajar el eyeliner.

Después apliqué por encima del delineado una sombra del mismo tono (435 Turquoise Tempest de Covergirl) porque a veces este eyeliner se seca y se empieza a romper, y para evitar eso lo repaso con sombra. Y en caso de que se rompa, se notará mucho menos.

En la línea inferior de pestañas apliqué Satin Taupe con la brocha 214 (ambos productos de MAC) y  la delineación interior con lápiz negro, sin olvidar rizas las pestañas y aplicar máscara.
Para los labios de nuevo usé un gloss de M.U.A (Sealed with a Kiss).

Las fotos de los productos y el look final lo tenéis arriba (Casi siempre suelo subir la foto del look a instagram antes de publicar el post, así que si queréis ver un adelanto, os recomiendo que lo visitéis de vez en cuando =D, link en la parte superior del blog).

Espero que os guste, nos leemos en el próximo post!
Lor.

sábado, 31 de agosto de 2013

Eyeko Skinny Mini Liquid Eyeliner

Hi everyone!

Well, I am here today with another review. The last issue of Marie Claire (of August) have as a gift this month a Skinny Mini Liquid Eyeliner by Eyeko, and after hearing a lot of comments about it, I decided to get the magazine and try out the eyeliner.


I have to say that all the things that I heard, read and watch about this eyeliner where amazing. Everybody says the same thing "this eyeliner is great", so why not give it a chance?
At first I was a little bit insecure, because I´m so used to do my eyeliner with my fluidline from MAC (the classic Blacktrack) and I always love how it looks with the fluidline. Others felt tip liners that I´ve tried along the years never look good on my and most of the times the liner got caky and totally dissappear from my eyes. So I want to be very careful with the Eyeko one, because I already have big expectations.


As you can see, the point of this liner is very thin, so I supposed that in the moment that you want to line the upper lash line, going thinner on the tear duct and gradually getting thicker to the end of the lashes would make it easy, and it really worked. And when I created the wing for my eyeliner it was easier than ever, In just two strokes with the liner pencil I got it done.
The first layer of liner seems to be black enough, but I like the liner very, extremely black on the eyes, so I applied another coat, and it was amazingly black.

It last for more than 6 hours, with perfect color and in shape. After 8 hours it was a little bit blurry on the ends, but stay very well on my tear duct. So, I was really happy with the first result.
I´ve using it for this month, and I have to say, that when I finish this one, I will get another! I really loved it even though is a felt tip liner.

So, if you´re looking for a good liner, easy to use, with good color and long lasting, here´s one that really will be good for you!


Eyeko Website

Hope you like the post, and see you on the next one!
Lor.