Mostrando entradas con la etiqueta inglot. Mostrar todas las entradas

jueves, 20 de agosto de 2015

Easy&Fast Look: Summer Edition.

Hola a todos!

Disculpad mi ausencia, pero el trabajo me ha tenido un poco ocupada y no he tenido demasiado tiempo de hacer ningún look que pudiera ser decente para el blog (casi todo era súper simple!) pero hoy estoy de vuelta con un look ultra fácil y rápido, y creo que ideal para verano.
Hi everyone! 
Sorry about being absent, but work kept me very busy and I didn´t have time to do cool makeup looks for the blog, I´ve been doing very simple looks lately due to the lack of time. I´m back today with the easiest and fastest look ever, and super cool for summer!

A vuestra elección dejo el aplicaros base o no, pero este siguiente paso es muy necesario: aplicar una prebase de sombra de ojos.
Lo siguiente es realizar un eyeliner con vuestra sombra de ojos favorita. Os recomiendo ir despacio y a toquecitos, y luego no olvidéis de repasar donde no haya quedado tan saturado el color de la sombra. Para asegurarme 100% que la sombra no se iba a mover, con la misma brocha apliqué un poco de polvo traslúcido encima y ya está hecho. Podéis hacerlo mas corto, mas largo, como siempre eso a gusto de cada uno.
Después un toquecito de colorete, labial, dos buenas capas de máscara de pestañas y ya estáis maquillad@s.
You can apply foundation or not, you have a choice (most of all because if you leave on a country like mine, where we have extremely hot summer, wearing foundation it´s a total nightmare!) but the next step you have to do it, and it´s to apply an eyeshadow base. After that, with your favourite eyeshadow color just draw your eyeliner. Make sure to go slow, and making little strokes. Wing it as much as you want (I went for a very long one) and you´re done. To make sure that the eyeshadow it´s not going anywhere, apply with the same brush some traslucent powder on top.
Then, apply a little bit of blush, some lipstick and two coats of mascara, and that´s all folks!


(Prebase de Inglot, sombra #846 de MUFE y pincel de Burlesque Pro-106)
(Eyeshadow base from Inglot, MUFE eyeshadow #846 and Pro-106 brush from Burlesque)


Creo que es un look muy fácil de hacer, y sobre todo ahorra espacio en el neceser si te vas de viaje y quieres llevar lo justo y necesario.
I think it´s a very simple look, great for summer and also saves a little bit of space on your cosmetic bag if you´re travelling.

Espero que estéis pasando un verano genial!
Nos leemos en el siguiente post =).

I hope you´re having an amazing summer!
See you on the next post =).

Lor.


lunes, 23 de marzo de 2015

Basic Look in Purple.

Hola a todos!!

Estoy de vuelta con uno de mis looks favoritos, más básicos y fáciles de hacer. Y lo mejor de todo, puedes poner cualquier color que te guste, porque combina con todo.

Esta vez opté por el morado, porque es uno de mis colores favoritos.

Comencemos!
Hi everyone!
Here I am, back, with one of my most favourite, easy and simple look. The best thing of this one is that you can use any color of your choice because it matches with everything!
This time I went with the purple, because is one of my faves.
Let´s get started!


Base de maquillaje como normalmente lo haríais, y en mi caso añado las cejas. Después aplico en el ojo el Paint Pot de MAC en Bare Study y marco un poco la cuenca usando la brocha Pro-54 de Burlesque y la sombra "Tease" de la paleta Naked 2. Para la línea inferior de pestañas he aplicado la sombra #610 de Inglot, "Parfait Amour" de MAC y "Blackout" de la Naked 2 usando la brocha 219 de MAC. Y para la delineación interior usé el Highliner Gel Crayon de Marc Jacobs.
Do your foundation routine as you always do, and in my case I add my eyebrow routine too. After that, I applied the "Bare Study" Paint Pot from MAC and worked my crease with a little of the "Tease" eyeshadow from the Naked 2 using my Pro-54 brush by Burlesque. For the lower lash line, I have mixed 3 eyeshadows: #610 from Inglot, Parfait Amour by MAC and Blackout from Urban Decay using the 219 brush by MAC. And on my waterline I used the Highliner Gel Crayon by Marc Jacobs.


Después simplemente es hacer el eyeliner a vuestro gusto. A mi me gusta alargarlo un poquito y hacerlo bien fino.
After that, you only have to do your liner however you like it. I like to do it with a thin end and a little long.


Para terminar los ojos, un poco de máscara de pestañas. y esta vez estoy usando la Haute&Naughty Too Black Lash de MAC.
For finishing the eyes, add mascara. I used the Haute&Naughty Too Black Lash by MAC.


En los pómulos hice un mix de coloretes en tonos rosados y uno de color marrón. Sin olvidar por supuesto un toque de iluminador, este es Lightscapade de MAC.
On my cheeks I have a mix of rosy blushes and one on a brownish shade. And of course, a light touch of highlighter, this one is Lightscapade by MAC.


En los labios, para terminar el look, delineador en el tono Currant muy difuminado y el labial Heroine encima.
On my lips, Currant Lip Liner blended with my own lip and Heroine lipstick on top.


Y este es el producto final!
Espero que os haya gustado.
This is the final result! I hope you like it =).


Nos vemos en el siguiente post!
See you on the next post!

Lor.


miércoles, 24 de septiembre de 2014

Plum Autumn Look

Hola a todos!

Por fin, despues de haber perdido las fotos del primer intento del look, y tener que repetirlo dos veces mas, he consegido terminar el look que os llevo prometiendo por lo que parecen ya siglos!

Es un look con mucha inspiración en el Otoño, que para mi es todo un alivio que haya llegado porque odio el verano demasiado y ya estaba siendo demasiado largo.

He usado un tono marrón y un tono ciruela, y la combinación creo que ha quedado muy bonita.

Hi there!

After loosing the pictures of the first try for this look, and repeat it for two times, finally I got what I really wanted! After what it seems to be centuries now... XD.

It´s a look with a lot of Autumn inspiration, that thankfully is coming to my country and the horrible summer is going away (and I hope it never comes back again).

I just used two colors, a brown and a plum. But I think, the combo looks amazing.

Let´s get into it!


Empecemos!

Como siempre, primero base (a vuestra elección) y corrector, porque mis ojeras están que lo dan todo. Fijé con el polvo All About Matt! de Essence y la Powder Brush de Real Techniques.

As always, first foundation (whatever you want to use) and some concealer, because my undereye circles are masive!. I set everything in place with All about Matt! Powder by Essence using the Powder Brush by Real Techniques.


Esta vez apliqué encima del corrector HD de Nyx un poco de los Banana Powder de Ben Nye, porque se me queda el corrector demasiado rosado y como que no me gusta el efecto. Pero con los Banana se neutraliza el color y queda perfecto, usé la brocha 224 de MAC para aplicarlos.

This time, on top of my concealer I put some Banana powder from Ben Nye to set it and change a little bit the color, because it was looking so pink under my eyes and I didn´t like it.  To apply it I used the 224 brush by MAC.


Después, por manía mía, tengo que hacerme las cejas, me es mucho mas fácil maquillar el ojo si tengo la ceja ya hecha.

This is a pat peeve of mine, but before doing my eyes, I have to do my eyebrows. It helps me to get better references while I do my eyeshadow.


La sombra es la Charcoal Brown, aplicada con la brocha 212 de MAC y fijado con el Brow Set en Red Chesnut.

The eyeshadow is Charcoal Brown, applied with the 212 brush and set in place with the Brow Set in Red Chesnut, all by MAC.


Empezamos el ojo. De base apliqué el Paint Pot de MAC en Bare Study por todo el párpado (en cualquier de los post anteriores podéis verlo, que se me olvido hacerle una foto!) y estas son las sombras.

For the eyes, I started applying Bare Study Paint Pot all over the eye (if you want to see it, on previous posts I have pictures of it, today I forgot to take one of it!) And this are the eyeshadows.


En todo el párpado usé el color Factory de la Naked 3 con la brocha Pro-37 de Burlesque. Después, con la brocha Pro-17 y poco a poco, fui marcando la cuenca con el colorete de Inglot #63 y difuminando a la vez. Despues con la sombra Brulé y la brocha C330 de Crown difuminé los bordes, y con la ultima sombra que veis, Shroom, iluminé el arco de la ceja y el lagrimal. Con el Eye Paint de NARS delineé la línea interior de pestañas y la superior (difuminando después con la brocha 219 de MAC). 

All over the lid I put some Factory (from the Naked 3 Palette) with the Burlesque brush Pro-37. After, using the Pro-17 brush by Burlesque and very slowly I started putting the blush #63 from Inglot all over my crease. With the eyeshadow Brulé and the C330 brush by Crown I blended the blush perfectly with the skin to avoid any harsh lines. to highlight my tear duct and the arch of my brow I used Shroom and again the Pro-37 brush (but clean). With the Eye Paint by NARS I lined my waterline and the upper lashes (and after I blend it with the brown on the lid using the 219 brush by MAC).


Para terminar, como siempre máscara de pestañas (Extended Play Gigablack Lash de MAC), un toque de iluminador en los pómulos con la sombra Shroom y la Setting Brush de Real Techniques y finalizando con el colorete de los Simpsons en el tono Pink Sprinkles aplicado con la Contour Brush de Real Techniques.

To finish the look, add some mascara (Extended Play Gigablack Lash by MAC), as a cheek highlighter againg the eyeshadow Shroom using the Setting Brush by Real Techniques and as a blush, Pink Sprinkles from The Simpsons collection using the Contour Brush by Real Techniques.


Para los labios, primero apliqué un primer (usad el que mas os guste) y después delineé con el lápiz Currant y apliqué el labial Sin, ambos de MAC. Y luego pulí los bordes del labio con la brocha Pro-14 de Burlesque.

For the lips I used a primer, then I lined with Currant Lip Pencil and applied on top Sin lipstick. And to make the edges of my lips perfect, I used the Pro-14 brush by Burlesque.


Y este es el look terminado! Espero que os guste.

This is the finished look, I hope you like it!


Sin flitros para que podais ver bien los colores. Nos leemos pronto!

No filters so you can see the colors as they really look. See you soon!

Lor.


jueves, 31 de julio de 2014

Touch Of Yellow

Hola a todos!

Como va la semana? Espero que muy bien, y mejor aun que estamos en la frontera con el fin de semana! Tengo unos cuantos planes y la verdad que estoy deseando que llegue ya =).

Bueno, hoy voy a probar un nuevo sistema para enseñaros como hice uno de mis últimos looks, espero que os guste y que sea mas fácil así!

Empecemos!


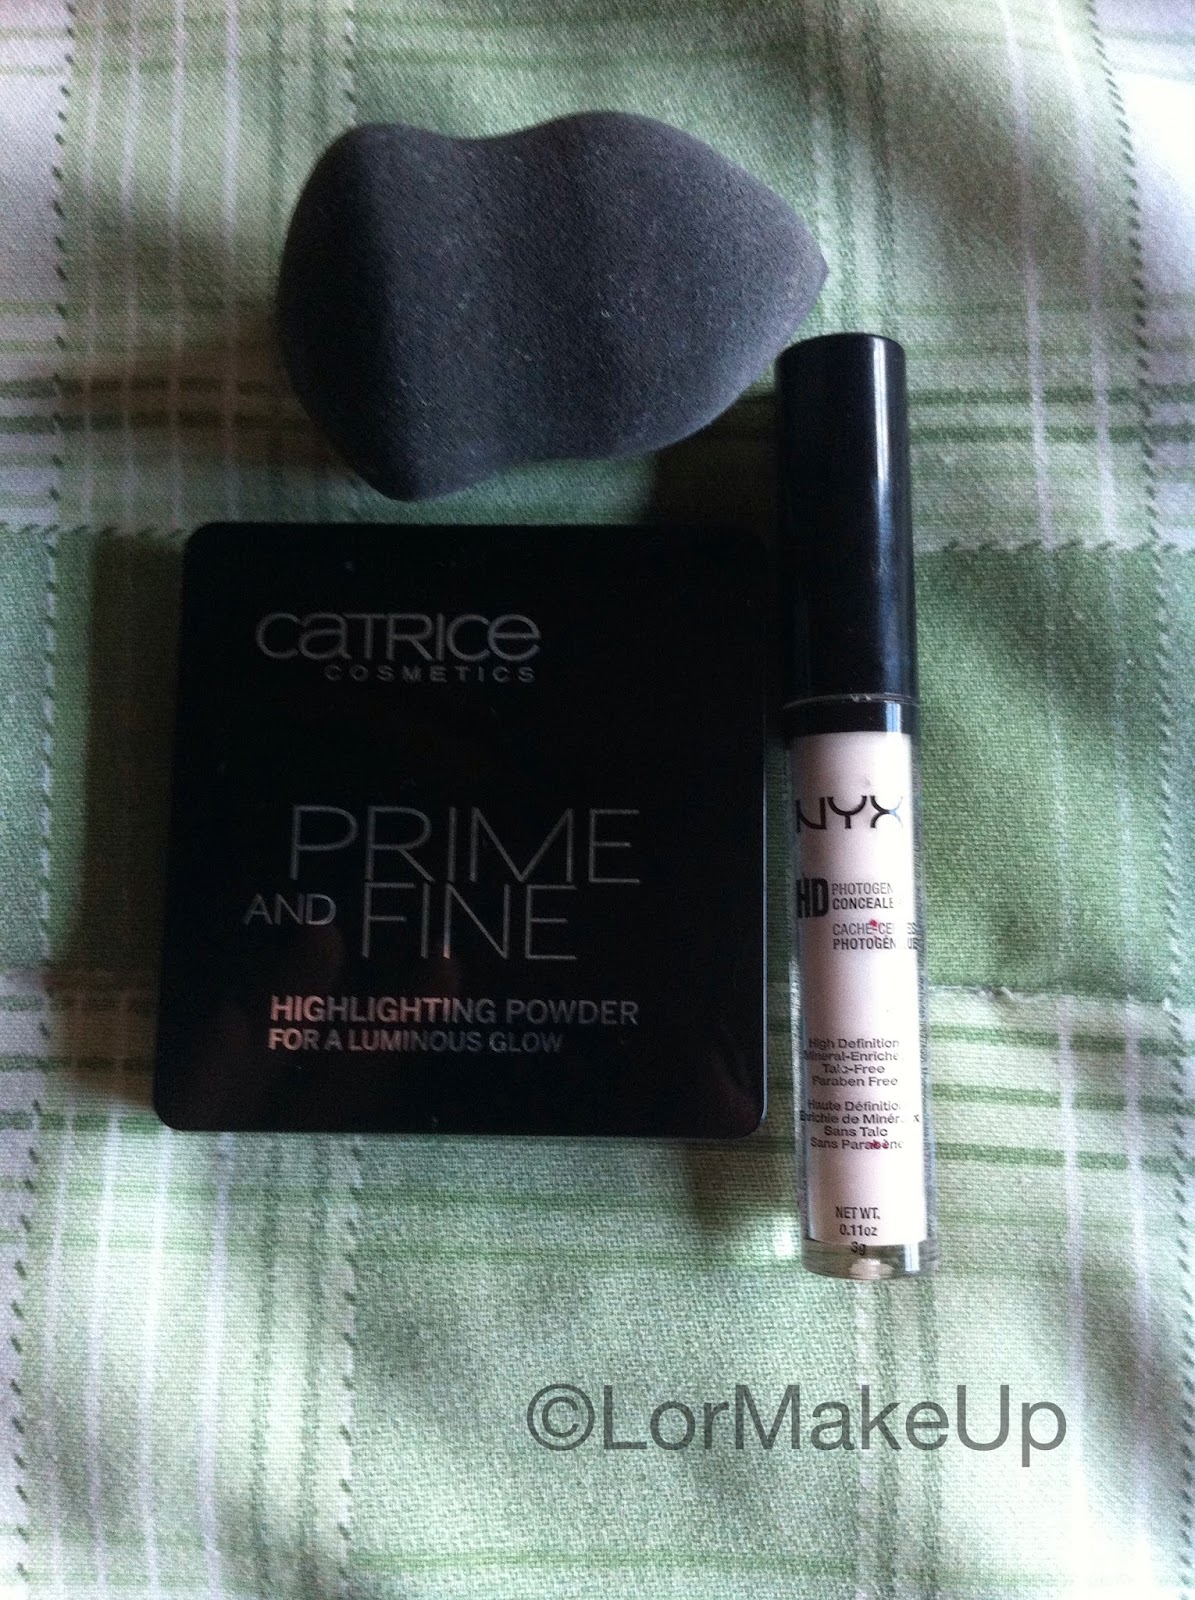
Estos son algunos de los básicos de siempre. Usé como base la Face and Body en el tono C1, de corrector el HD de Nyx y para fijar todo, los compactos All About Matt de Essence. Como siempre, mi misma rutina de cejas (os gustaría saber como lo hago? Si es así dejadme un comentario y os hago una rutina de cejas) y fijarlas con el Lash Brow Designer de Catrice. Y lo último que usé, la máscara de pestañas de Astor, Seduction Codes.


Después de haber aplicado un primer para sombras, empezamos con el numero 1 (indicado en la foto de abajo también, para que sepáis que he usado). Es el color Ground Brown de MAC y lo usé para marcar la cuenca suavemente y difuminar un poquito en el extremo exterior del ojo. En el párpado usé la sombra con el número 2, es una de las Rainbow de Inglot y cogí el tono mas oscuro. Con el eye paint de NARS, realicé el eyeliner. Y para terminar, el lápiz khol de MAC Teddy en la linea interior y en las pestañas la sombra con el número 4, Outremer de NARS. Y la sombra de tono marfil, en el arco de la ceja, para iluminar (Shroom de MAC).
Para terminar, usé como iluminador el Prime and Fine de Catrice (aunque no iluminó nada, ha perdido el brillo), para contorno Harmony de MAC y de colorete Stay By Me.
Para los labios, un gloss de MUA, el Intense Kisses Sealed With A Kiss. (os dejo una foto de internet, porque no sé donde he dejado el gloss y no lo encuentro! XD)

Y este es el resultado final, espero que os guste!


Nos leemos en el próximo post.
Lor.

---------------------------------------------------

Hello everybody!

How is going your week? Hope that everything is ok, we´re almost on the weekend! I have some plans, so it will be a fun one =).

Today I´m going to try a new way to show you how I did one of my last looks, hope that you find it easy to understand!

Let´s get started.

Some basics (that you can see on the first photo, above). I used as a base the Face and Body in C1 by MAC. As a concealer, the HD by Nyx; and to set everything in place I got the All About Matt by Essence. Then, as usual I did my brows (would you like to know how I do them? Let me a comment! And I will write the post) and fixed them with the Lash Brow Designer by Catrice. The mascara that I used was Secret Codes by Astor.

After applying an eye primer, this is what I did: I took the eyeshadow with #1, and made a light cut crease and blended it on the outter side of the eye (the color is Ground Brown by MAC). On my lid, the eyeshadow with the  #2, using the darkest shade of yellow (this one is from the Rainbow line by Inglot). Then, using the gel liner with #3, I made a winged eyeliner (is the eye paint in Black Valley by NARS). On my lower lashes I added some eyeshadow with the #4 (Outremer by NARS) and used some Teddy pencil by MAC on my waterline. Under my eyebrow the champagne eyeshadow, Shroom by MAC to highlight.
On my face, as a highlighter I used the Prime and Fine by Catrice on my cheekbones, I did a light contour with Harmony by MAC and as a blusher I used the Pro Longwear Stay By Me.
On my lips, Intense Kisses Sealed with a Kiss Lipgloss by MUA.

And that´s the finished look!
Hope you liked it, and I´ll see you on the next post.
(Photos, above)
Lor.


miércoles, 23 de julio de 2014

H A U L (I)

Hola a todos!!

Como va el verano? Espero que muy bien y que no estéis pasando mas calor del necesario. Antes que nada, pedir perdón por esta ausencia por el blog! Estuve unos días fuera de mi ciudad, y cuando volví me fui de nuevo unos días a la playa. Tenía un post preparado, pero a última hora cambié de idea y preferí esperar a estar de vuelta y visitar un par de sitios de los que sabía que iba a traer cosillas.

Voy a empezar con un post dedicado a las compras de maquillaje acumuladas de un par de meses, son cosas sueltas pero creo que os van a gustar =).

En MAC me compré el pigmento Melon en tamaño de viaje, fue verlo y cogerlo, porque llevo años detras de ese pigmento!. El color es precioso, un melocotón con toques dorados que favorece mucho. Y un familiar me regalo un pintalabios a mi elección, y elegí el Lipmix en Blue, para hacer mezclas con los que ya tengo. También cogí un delineador de labios en el tono Dervish (otro regalillo =D).


En Burlesque, compré una esponjita para maquillaje y una brocha plana de sombra, la Pro-37.


De Sleek Makeup me decidí a probar los Matte Me, y compré el Rioja Red. Un color muy bonito, de pigmentación impresionante y una duración que me ha dejado alucinada.


Y de vuelta en Madrid, me topé con dos sorpresas, Inglot ya ha llegado a la calle Fuencarral y el Sephora de Gran Vía estaba liquidando todo, por cierre. Hice una parada obligatoria en ambas tiendas, en Inglot he cogido dos labiales de paleta, uno en tono morado perteneciente a la línea Color Play y uno de línea regular en un tono granate con brillo un poco metalizado (ahora mismo en toda la tienda tienen un 25% de descuento). En Sephora, la verdad es que ya no hay gran surtido, casi todos los stands están vacíos pero mirando encontré una sombra muy bonita de NARS que llevaba tiempo con ella en mente y me he dado un capricho con ella. Es un tono que la marca define como un azul primario, en mate y muy pigmentado (en Sephora el descuento es del 30% en firmas y 50% en marca Sephora).


En mis vacaciones me encontré con la colección de Rita Ora para Rimmel London de uñas, y me cogí el tono 313 Rita Rouge, un borgoña muy intenso que queda muy bonito. Es de secado rápido y tiene mucho brillo, la duración en las uñas es bastante buena, casi una semana entera!


Para terminar, en mi paso por Mojácar me dejé caer por una tienda que recomendó Ángela de My Secret Journal (post aquí), Siroco Mojácar. Es una tienda con ropa estilo boho chic, toques hippies y una bisutería preciosa. Llevaba bastante tiempo detrás de conseguir unos pendientes así, de inspiración india, y estos me robaron el corazón. Como casi siempre voy en tonos oscuros, me decanté por tonos llamativos y que así resalten bien. Los precios de los pendientes iban de 8€ en adelante, pero no vi ninguno mas caro de 18€. Si os pasáis por la zona de Mojácar, os recomiendo que visitéis la tienda si os gusta este estilo de ropa, complementos y bisutería; no os arrepentiréis.


Y esto es todo de momento, en breves tendré otro haul con un poquito de ropa de rebajas y cosmética corporal!
Nos vemos en el siguiente post!
Lor.

------------------------------------------------------------

Hey there!

How is going your summer, guys? Mine has been a little busy lately, I´ve been traveling and having a few days on the beach, for that I didn´t update as much as I would like to. But anyways, here I am, back to the routine!

Today I come with a Haul with accumulated makeup stuff from 2 months or so. There are just a few things, but I think that you may like some of them =).

From MAC I got the pigment Melon on travel size, and I was extremely excited because I´ve been wanting this pigment for ages. Is a lovely peachy color with gold reflections, very shiny. And a member of my family gave to me the option to choose a lipstick from MAC as a gift, and I picked up a Lipmix in Blue, to mix with my others Lipmix. And I got Dervish Lip liner, I was looking for a neutral color.

From Burlesque I got a new makeup sponge for my kit and a new shadow brush, the Pro-37.

From Sleek Makeup I decided to try the Matte Me lipstick in Rioja Red, and is a very lovely red color!

When I came back to Madrid I found out some curious news, we had a new Inglot store and one of the biggest Sephora is closing down. I visited both places and this is what I got: two lipsticks from Inglot in purple and a dark maroon with metallic shine (the purple one is from the Color Play line). And in Sephora I got a NARS eyeshadow (they had 30% off discount on every brand!) in a matte real blue, called Outremer.

On my holidays I saw the new colors that Rita Ora launched for Rimmel London, and I got this nail polish in the color 313 Rita Rouge. Is a very deep burgundy color, fast dry and last a lot on the nails!

To finish this haul, I visited a lovely town here on Spain (in Almería) called Mojácar. Thanks to a post from Ángela of My Secret Journal, I went to a store that she recomended, and I have to tell that if you like boho and hippie style, you will love it! The store is Siroco, and I got a beautiful pair of earrings, very hindi style. I wanted something very colorful, to contrast with my dark clothes, and this are the earrings.

Photos, above.

And that´s all, folks! Soon I will have a little haul again, with some clothes from the sales and body cosmetic!

See you on the next post!
Lor.


lunes, 5 de mayo de 2014

Blue & Brown Look

Hola a todos!!

Que tal estais? Espero que lo hayáis pasado muy bien este puente si habéis estado de vacaciones, yo me quede en mi ciudad y la verdad que me lo he pasado muy bien =).

Antes de empezar con el look me gustaría darle las gracias de nuevo a Laura del blog Sayfa, porque el otro día tuvo un detallazo enorme y me invito a una quedada con mas bloggers y youtubers, en la cual me lo pase genial y conocí a mucha gente, os dejo el link del post (pinchad en post y os lleva directo a la entrada) que hizo Laura en el que podéis leer con quien estuvimos y encontrar todos sus links por si queréis echarle un ojo. Muchas gracias Laura!!!! Eres todo un amor =). Y por supuesto gracias a todas las demás también, porque fue un gusto conocer a todas!

Hoy vengo con un look colorido, que una amiga mía (Cristina) me pidió para que la pudiera inspirar, ya que tenia un evento en breves. Así que me puse manos a la obra y este fue el resultado.


Aplicar la base de vuestra elección, y en estas fechas os recomiendo que uséis un primer para evitar que la base se quede mal por el calor. Con el primer conseguiremos que dure lo máximo posible intacta y que no tengamos que retocarnos tan frecuentemente.
Como el look es bastante colorido, apliqué el corrector HD de Nyx y cuando fijé la base, en esa zona usé el Prime and Fine de Catrice (suelo usarlo como iluminador) y como ya no tiene tanto brillo como al principio me sirvió para fijar y a la vez iluminar la ojera.


Como base en los ojos usé el paintpot de MAC Bare Study. Apliqué la sombra Fresh Water de MAC hasta la cuenca del ojo y después, hice un corte de cuenca usando la brocha de Crown Brushes y la sombra Ground Brown. Fui marcándola poco a poco, ya que este color es muy intenso, y cuando conseguí la intensidad que buscaba, difuminé bien los bordes con la sombra Omega. Como iluminador en mi ceja, Shroom. Decidí que quería un azul un poco diferente, así que cogí el pigmento #46 de Inglot y humedeciendo la brocha en un poco de Duraline (un liquido similar al mixing medium de mac, que sirve para fijar pigmentos) apliqué este azul por encima del que ya tenía aplicado.


(Colorete Harmony, sombras de izda. a dcha.: Fresh Water, Ground Brown, Omega y Shroom)

(Blush Harmony, eyeshadowos from left to right: Fresh Water, Ground Brown, Omega, Shroom)

(Paint Pot Bare Study, eyeliner Black Valley, Duraline, lápiz Graphblack y gloss Pink Lemonade)

(Bare Study Paint Pot, Black Valley eyeliner, Duraline, Graphblack pencil and Pink Lemonade gloss)


En las pestañas inferiores usé una sombra de Covergirl "Turquoise Tempest", y delineé por dentro el ojo en negro con el lápiz Graphblack.


Para darle mas expresión al ojo, lo único que añadí fue eyeliner y lo difuminé con el azul del parpado, consiguiendo dejar las pestañas mucho mas marcadas.
Ya para terminar, dos capas de máscara (podéis poner pestañas postizas, yo no lo hice ese día porque mi alergia estaba muy rebelde y no me dejaban de llorar los ojos) usé de colorete Harmony de MAC y el brillo Pink Lemonade para dar un color muy suave a los labios.


(Brochas usadas para los ojos, de izda. a dcha. : 263 de MAC, Crown C330, 213 y 214 de MAC, #10 Smashbox)
(Brushes used on the eyes from left to right: 263 by MAC, Crown C330, 213 and 214 by MAC and #10 by Smashbox)

La brocha de Crown Brushes está disponible en Burlesque// Brush from Crown Brushes avalaible in Burlesque.

Es un look muy colorido, y favorecedor para todos los colores de ojos. Lo único que no es un look para hacer en 5 minutos, hay que tomarse su tiempo, jajaja.

Espero que os haya gustado, y nos vemos en el próximo post!
Lor.

-------------------------------------------

Hello there!

First of all, Happy Cinco de Mayo! Hope you all are having a great day =).

And now, tell you that this days I met some youtubers and bloggers from my city, and I had a very awesome evening with all of them! It´s always nice to know people that share same interest and are in the same area of blogger than you. Thank you to the lovely Laura from Sayfa to invite me, it was so lovely to meet all of them!

After a few days of holidays here in Spain, I´m back with this look that my friend Cristina requested me to get inspired. The main color was blue, so it was easy to came out with something.

As always, do your foundation and concealer routine. I changed this time, that for setting the under eye area, I used the Prime and Fine from Catrice to give some light to the eyes (and because this product has lost a lot of shine). Then I applied my Bare Study Paint Pot as a primer, all over the lid.
I took some Fresh Water eyeshadow and applied it on the lid, but not going further. And I did a cut crease using Ground Brown, slowly building up the color until I got the intensity that I was looking for. Then I blended the edges with some Omega eyeshadow and put Shroom under my eyebrow as a highlighter.
For my lower lash line I used Turquoise Tempest.
Black pencil all over the waterline.
And because I wanted to have a very shiny blue color, I took my #46 pigment from Inglot (Pure Pigment Eyeshadow) an added on top of the Fresh Water color using my Duraline too to make it shine more. I did a winged eyeliner and blend it on the blue too, to give some depth to the eye.

For the rest of the face I kept it simple: Harmony blush and Pink Lemonade gloss.

Photos, above.

And this is the final look, hope you like it.
See you on the next one!
Lor.


jueves, 6 de febrero de 2014

Purple and Smoky Silver

Hola a todos!

Que tal estáis? Espero que muy bien y que vayáis cogiendo fuerzas para el finde =), aunque este el clima lluvioso y a ratos soleado... (al menos por aquí en Madrid no hace mas que llover y llover, pero de la nada sale el sol).

Hoy os voy a enseñar como he hecho un look muy rápido y socorrido (para esos días que no tienes tiempo ni para respirar casi) pero que queda muy bien e incluso se puede usar para salir de fiesta.

La base, la misma rutina de siempre.

En los ojos he delineado, pero esta vez no he sacado rabillo, solo he llegado hasta el final de las pestañas. También he delineado por las pestañas inferiores, y después con una brocha  difuminadora (la de estilo boli o lápiz) he difuminado el delineado con sombra gris plata. Para difuminar un poquito mas los bordes he usado una brocha difuminadora mas grande y he difuminado hasta que no ha quedado rastro alguno de corte de sombra. En el lagrimal y en el arco de la ceja he aplicado un pigmento de muestra que tengo, Vanilla de MAC. Después he delineado la "waterline" y he aplicado máscara de pestañas.

El colorete ha sido un tono suavito, en rosa. Y las cejas esta vez usé de Makeup Forever en el tono #30.


(Productos: Graphblack lápiz de ojos de MAC, delineador Nightmoth de MAC, eyeliner en gel de Maybelline, labial Violetta de MAC, Aquabrow de Make Up For Ever, pigmento Vanilla de MAC y sombra de Inglot en el tono gris plata, debajo tenéis la referencia de la sombra)


Para los labios he usado un delineador de tono ciruela muy oscuro y lo he ido degradando hacia dentro, y en el centro del labio he aplicado un labial violeta.
Como veis, muy simple, pero muy socorrido y elegante =).


Espero que os guste, nos vemos en el próximo post!
Lor.
Pd: os dejo una foto de una camiseta que encontré el otro día en las rebajas y no tuve mas remedio que comprarla ;)

----------------------------------------------------

Hi everyone!

Hope you all are doing well and getting ready for the weekend! Here the weather is a little bit crazy, but I hope that maybe the weekend helps to stop the rain a little bit.

Today I´m going to show you a very easy look, that you can rock at any time! And even for a fancy party it could work. It will take you just a few minutes, I promise.

My foundation routine was the same as always.

Then, on the eyes (after applying some paintpot by MAC, this time Bare Study) I just applied gel liner all over the lash line, and on the lower lash line too. Then, with a pencil brush and some silver eyeshadow by Inglot (on the picture above you can see wich one is) I blended it with the liner. To prevent any harsh line, I took a big fluffy blending brush and make any possible line dissapear. On the tear duct and the arch of the brow I applied as a highlighter some of the Vanilla pigment by MAC (I got a sample the other day, and is incredibly GORGEOUS!), lined my waterline with black pencil and put some mascara.

For blush I used a very light rose pink color.

On the lips I used a very dark plum color, and faded it to the center of the lips, and then on the center I put some violet lipstick (it looked like a little bit of a gradient lip).

And that´s the finished look! I hope you like it =D, see you on the next post!

Lor.

(Products on the picture: Graphblack eye pencil by MAC, Nightmoth lip pencil by MAC, Gel liner by Maybelline, Violetta lipstick by MAC, Aquabrow #30 by Make Up For Ever, Vanilla pigment by MAC and Silver eyeshadow by Inglot)

PS: I leave you a picture of a t-shirt that I got the other day on the sales, I love it!