Hola a todos!!
Hoy vengo con un mini haul, no son muchas cosas, pero os las quería enseñar, porque un par de cosas creo que os pueden gustar.
La primera es un pegamento para pestañas postizas sin látex. El último que he usado es de eylure y me gusto mucho el sistema porque el bote era de cristal y tenia un aplicador muy cómodo para poner la cantidad justa de pegamento. Pero las ultimas veces que lo he usado se me ha irritado bastante la piel y era una tortura llevar las pestañas.
La mayoría de los problemas con el pegamento de pestañas suele ser siempre por el látex, porque es un producto que suele producir muchísimas reacciones alérgicas
Investigué para encontrar alguno sin látex y estaba el de la marca DUO y de Urban Decay (UD aquí en España me dijeron que no lo tenían disponible). No hace mucho me dejé caer por Burlesque y me dijeron que ellos tenían el de DUO sin látex, así que la búsqueda estaba terminada. Viene con un aplicador de pincel, cosa que no me acaba de convencer demasiado, pero bueno al menos no tiene látex y espero que este no me de problemas de irritación. Seca en color transparente.
El precio creo que eran 9-10€, no recuerdo exactamente la cantidad y el ticket lo he tirado (cosa rara en mi, porque siempre los guardo!)
Lo siguiente también es de Burlesque, de la línea de brochas de la marca Crown. Ya llevaba tiempo queriendo probar alguna brocha de esta marca, y después de mucho pensarlo me decidí por una brocha para difuminar, estilo a la 224 de MAC.
Esta es un poco mas puntiaguda, y a pesar de que es muy blandita, es bastante firme luego a la hora de usarla. Para definir la cuenca y difuminarla es genial, o para difuminar zonas precisas.
Su precio rondaba los 7€. Y su nombre es C330 Pro Blending Crease.
Y la última cosa que me cogí, fue un eyeliner en gel. Después del look ahumado que os enseñé por aquí, en el que usé el eyeliner en gel de Maybelline, tuve una reacción brutal en los ojos. Mis párpados estaban totalmente irritados, rojos y picaban de manera mortal. Decidí que era momento de cambiar de eyeliner porque alguna vez anterior a esta también he tenido problemas y me dediqué a buscar (ser alérgica y que tu piel sea extremadamente sensible es un soberano rollo y una tortura).
Acabé cogiendo el eyeliner en gel de NARS, porque el de Bobbi Brown y el de MAC (son caros, pero de los pocos que me han dado resultado y nada de alergia) ya los he probado. Su precio son 25€, pero tuve suerte que tenía una tarjeta regalo y no fue tanto =), además que me regalaron tras la compra una sesión de maquillaje gratis (en breves tendréis swatches y un look con el eyeliner). Es waterproof y válido para usar en la línea interior de pestañas.
No es gran cosa, pero como siempre, por si andáis en la búsqueda de algo similar, espero que os sirva de ayuda.
Nos vemos en el próximo post!
Lor.
--------------------------------------------------
Hello everyone!!
How´s the week going? Mine a little busy, but here I am today with a little haul. There are just 3 things, but maybe if you´re looking for something similar it can be helpful.
The first thing is something so simple, but here on Spain is so hard to find, latex free lash glue. I´ve seen this one in the UK, but here I couldn´t find it anywhere. That was until I visit Burlesque (they always have what I want and need, my absolutely favourite store!) and they told me that they had this latex free glue. The price was around 9-10€ (same as other brands).
It has a tiny brush aplicator, that doesn´t convince me at all, but I´ll give it a chance to see how it works. Bye allergy and irritation!
The next thing is a Crown brush (also got this one on Burlesque). I was looking to try one of them, and finally got a crease blending one, very similar to the 224 from MAC. But this one is a little bit more pointy and very good for blending (more than I expected it to be!). Is so soft and stiff too.
The price was around 7€.
And the last thing is a gel eyeliner. On my last look I used the Maybelline one, and I had like the worst reaction to the product. My eyelids were so red and irritated, and extremely itchy. So I decided to try a new one, and finally I got the NARS one (I´ve already use the Bobbi Brown and MAC ones, it was time for a change). I´m so excited to try this one, and see how it works. It´s waterproof and you can use it on the waterline.
(Soon you will have a look with it and swatches)
All the photos, above.
Hope you like it, and see you on the next one!
Lor.
Mostrando entradas con la etiqueta brush. Mostrar todas las entradas
miércoles, 2 de abril de 2014
jueves, 5 de diciembre de 2013
Contour Favourites!
Hi there!!
Sorry I´ve been a little lost, but here I am again =).
Today, I decided I was going to make a post showing you my favourite products to contour (high end and drugstore brands).
Lately I´ve been contouring my face a little bit more than usual. I love how people contour their whole face and look amazing, but I am so pale, and everytime I contour my whole face, it looks weird (like a very bad fake tan all over my face, and that´s not so cool). My usual contour routine is very simple, a little bit of countour on my cheeks and I´m done. If I feel extra fancy I maybe do some nose contour, but that´s only on VERY special ocasions. (I´ve never contour my forehead and my jaw line, I don´t like how it looks on me... I am very weird for contouring!)
Another reason that I have to be very lazy about contouring my face is, that normally, it´s so hard to find a good color for contour on pale skins. Usually, the colors look or so orangy or so grey (so you look like a weird person with orange lines on your face, or you seem to be a living zombie for the grey tone), it took me a lot to find colors that really suits my skin, and here they are.
(Remember, this are for pale skin, if you´re darker, maybe it doesn´t match your skin!)
Let´s start with drugstore:
Sleek makeup:
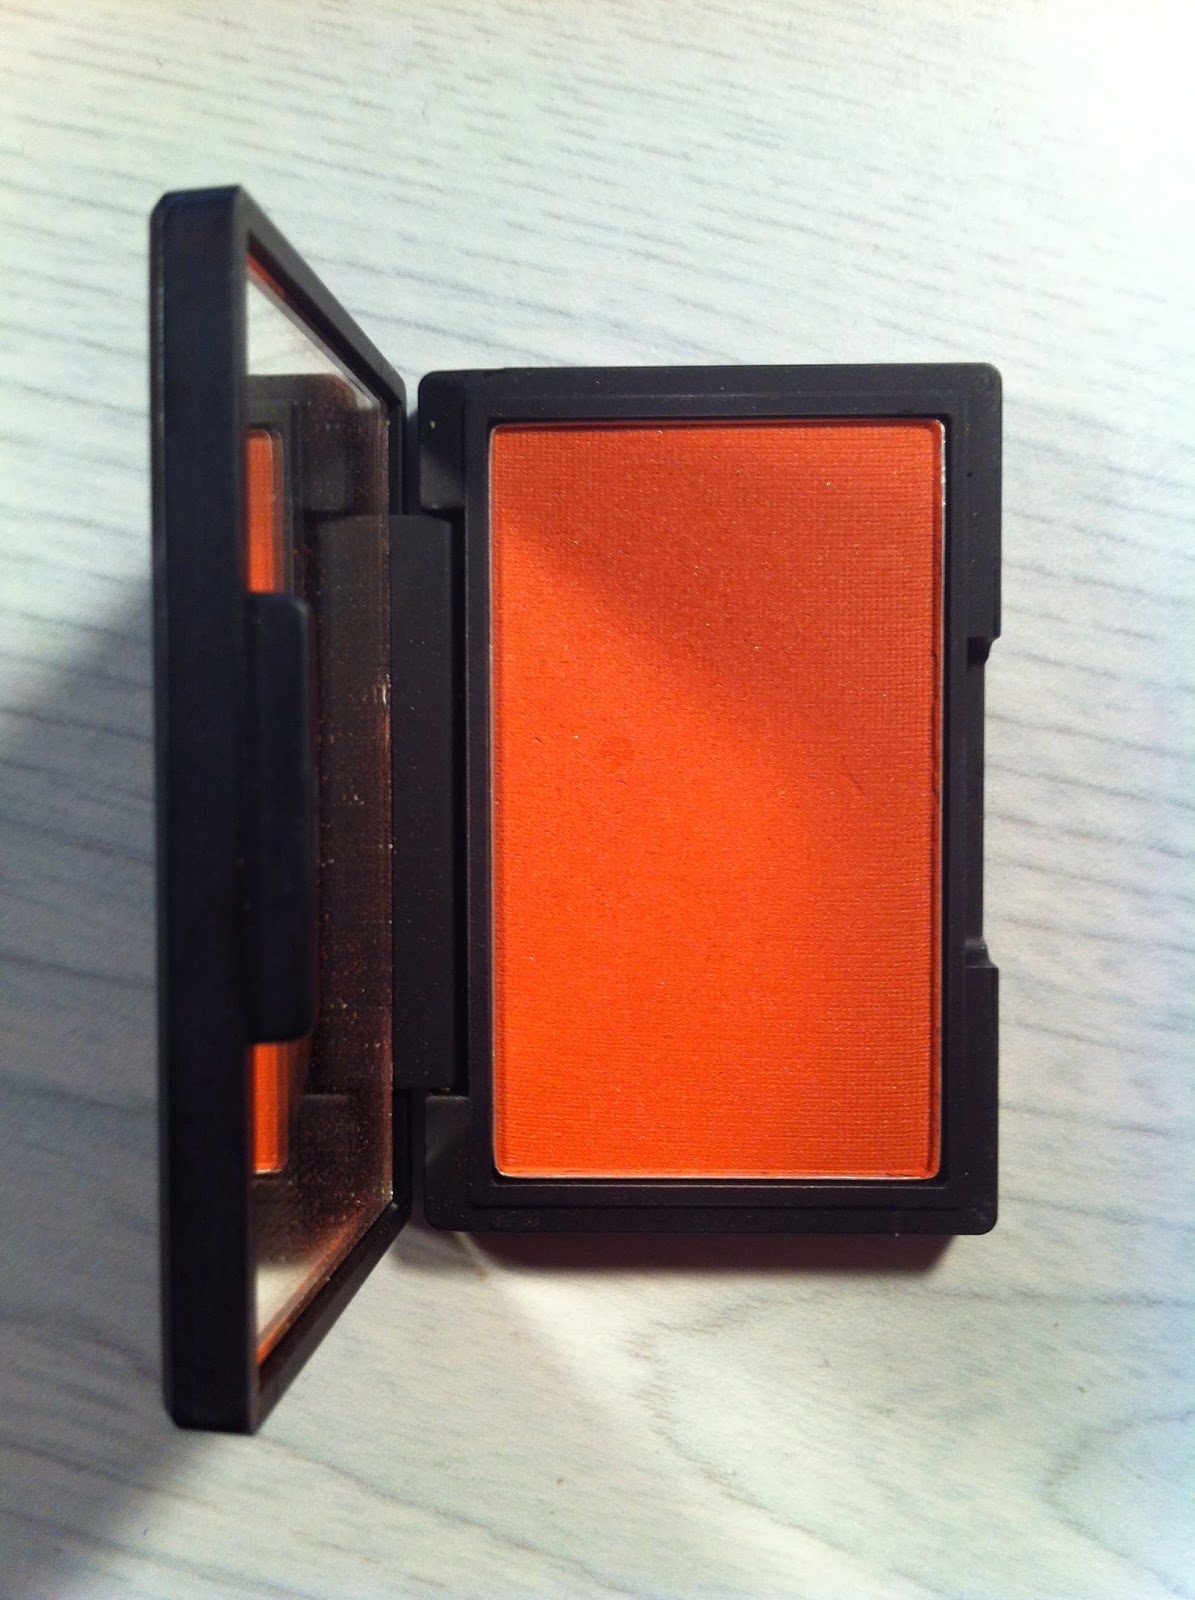
I used two blushes, Coral and Sahara.
Coral I used it very light, because is a orangy coral and if you put too much, it looks so orange. Applying just a tiny bit, it gives you a very nice light contour and looks so natural.
Sahara is a dark brown. I love this color as a blush, but I used this one a lot too for contouring. Again, I just applied a very tiny amount, and worked perfect as contour.
(On the photos look more orange thatn they really are!// En las fotos parecen mucho mas naranjas de lo que realmente son!)
Kiko:
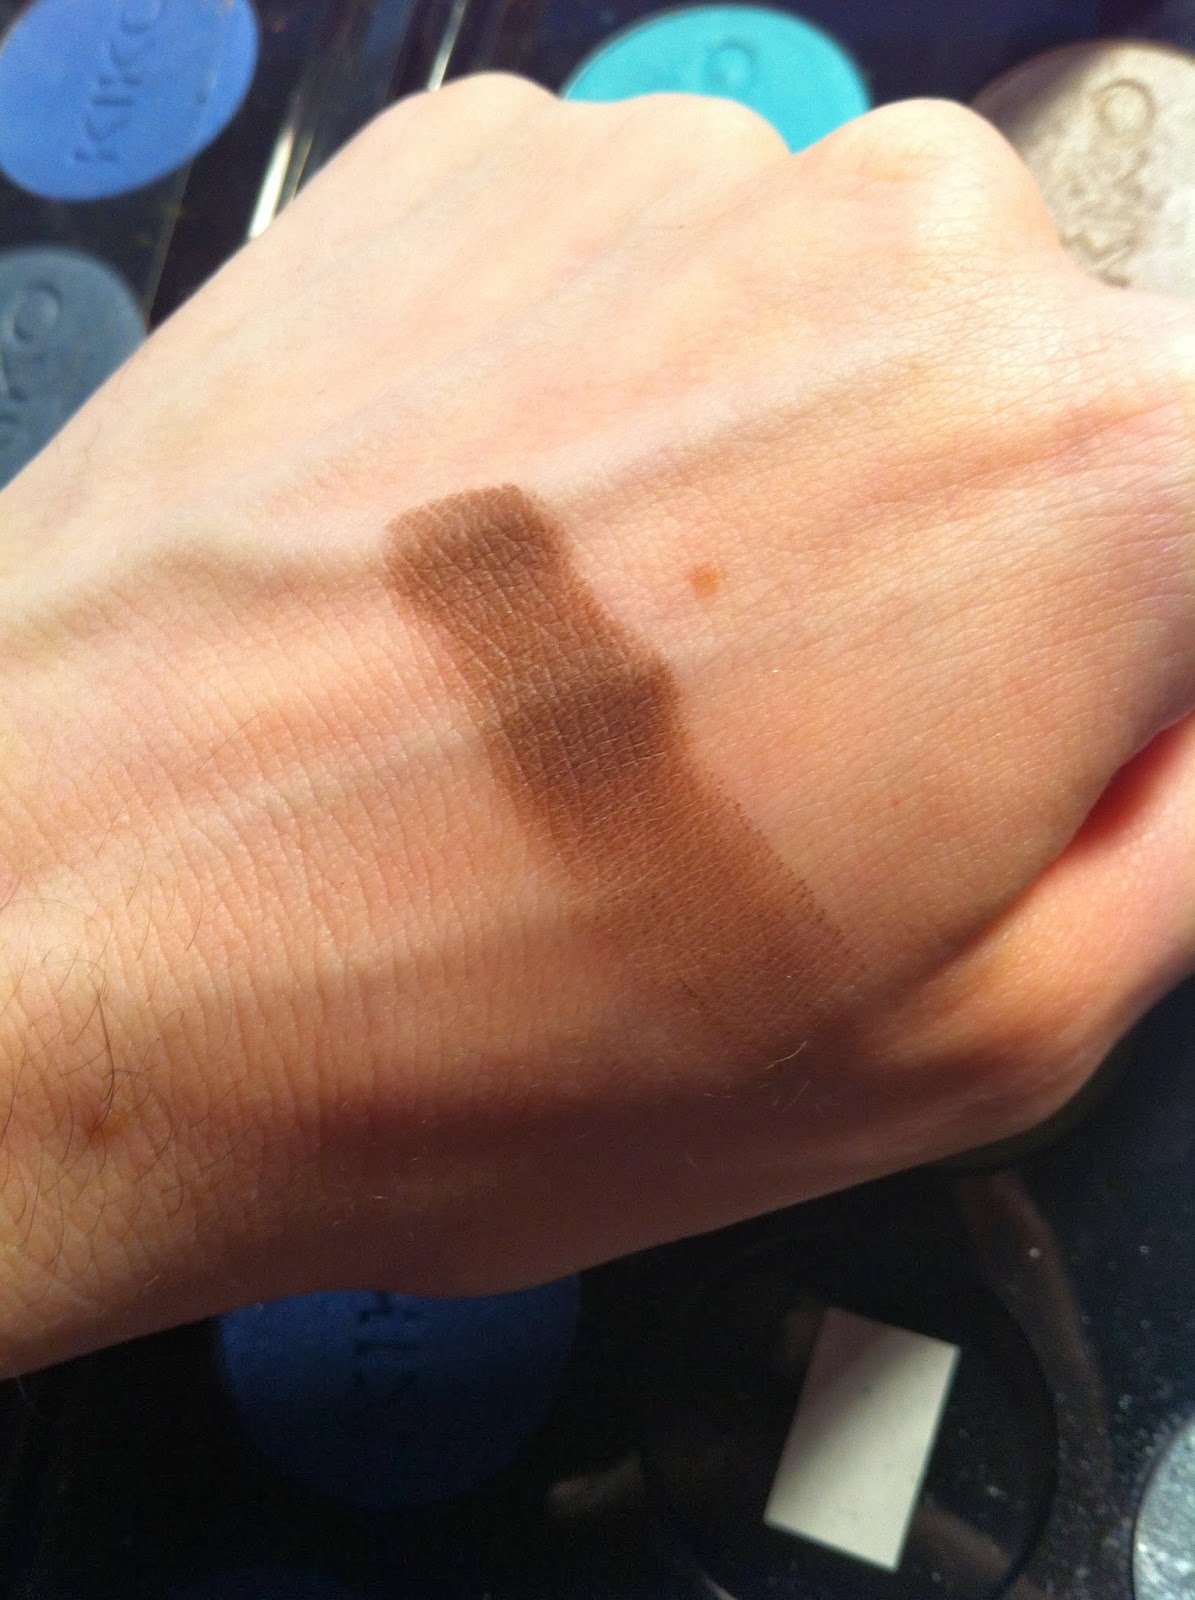
A long time ago, when I just barely contour my skin, I had this brown eyeshadow from Kiko. The number is from the old formula of the eyeshadows (now they look absolutely different). As I told you before, I applied only a little bit, and really looked good as contour.
(On photo look less dark// en foto parece menos oscuro)
High end contour stuff.
Inglot:
I made a palette of blushes from Inglot (it was a birthday gift from two years ago) and I got this dark brown color, that works too as contour. But if you ever get an Inglot blush, be very careful! They´re extremely pigmented, and with just a little bit of product you can contour both cheeks! And they have an incredible soft texture. It has a orange base.
Guerlain:
I have this one from a very long time, and it´s my favourite. It´s the Terracota Bronzer in number 1. It´s so nautral and really melts with your skin, giving a very nice glow finish. I use this one almost every day.
MAC:
My favourite contour products from MAC are Omega eyeshadow (for pale skins works amazing! It looks so natural and subtle, and doesn´t look orange at all) and Harmony blush (this one is a very famous one, almost every makeup artist that I´ve ever known have this, because it works for a lot of skin tones and it looks again so natural)
Kryolan:
I didn´t use this one in a long time, but I really liked it. Usually, I put this before my foundation, making sure it was totally blended. This technique can work very good if you´re looking for a heavy contour (You apply on top of that previous cream contour and foundation a podwer bronzer and it will look so good!)
Of course there are a lot of contouring products that you can use, a lot of brands... But this ones that I told you really worked for me. I don´t like at all contouring colors that look orange on the skin, so is a very hard battle to find one.
As you can see, excepting one, all are podwer formula and matte finish. I have oily skin, and whenever I tried a cream bronzer, my skin ruined it. So I prefer the podwer, cause´ obviously, for my skin type they stay way longer and the matte finish because it looks more natural for me.
My favourite brushes to contour are the 109 by MAC and the Contour Brush by Real Tehcniques
Hope you like the post and find it helpful, see you on the next one!
Lor.
----------------------------------------------------------
Hola a todos!!
Perdón por haber estado un poco perdida estos días, pero ya estoy de vuelta!
Decidí que hoy os voy a contar cuales son mis productos favoritos para realizar el contorno, y os voy a hablar de marcas de "droguería" y de los productos que tengo de firma también.
Últimamente he estado haciendo un contorno un poco mas intenso de lo normal para mí ( ya que tengo bastante suerte, mis pómulos no necesitan demasiado contorno). Me encanta ver como la gente puede realizar un contorno bestial de su cara y que el resultado final sea genial, pero mi problema es que soy muy pálida y si hago un contorno muy masivo puedo quedar como un payaso (o como si llevase un bronceador a parches. Mi rutina de contorno es muy básica la verdad, un poco para marcar el pómulo y ya está. Y si es una ocasión muy, pero que muy especial, entonces me hago un poco de contorno en la nariz (jamás me hago contorno en la frente o en la mandíbula, no me gusta nada como me queda!)
Otra de las razones por las que casi no he usado contorno en mucho tiempo, es por que al ser tan pálida, la mayoría de los colores son o demasiado naranjas, o demasiado grises. El efecto que ese tipo de colores tiene en mi es que puedo parecer una loca que ha decidido hacerse lineas naranjas en su cara, o parecer un zombie por el tono grisáceo. Me ha costado mucho encontrar colores que me queden bien y no parecer un Oompa Loompa, asi que vamos a ello!
Marcas de "Droguería".
Sleek Makeup:
Suelo usar dos coloretes, Coral y Sahara.
Coral lo uso con muy poca cantidad en la brocha, ya que al tener un subtono naranja, puede quedar muy anaranjado en la piel. Al usarlo muy ligero, deja un efecto muy bonito en la piel y queda muy natural y sutil. Sahara es un marrón oscuro. Como colorete es uno de mis favoritos, y de contorno, también. De nuevo, lo aplico con muy poca cantidad en la brocha para que no se quede demasiado anaranjado y queda muy bonito.
Kiko:
Hace bastante tiempo (años posiblemente) que no uso esta sombra. Tiene la numeración antigua, asi que no os puedo decir a cual corresponde ahora. Aplicaba esta sombra muy ligeramente, y la verdad es que hacía la función perfecta de contorno.
Ahora firmas.
Inglot:
Hace un par de años me regalaron una paleta de sombras y otra de colorete de esta marca. La de colorete la hice con los colores que mas me gustaron, y entre ellos hay un tono marrón perfecto para contorno y bronceador. Eso sí, si alguna vez usais coloretes de Inglot, usad muy poca cantidad! Tienen una pigmentación increíble y como pongas un poco más de lo necesario, no hay manera de arreglar el desastre. Con poca cantidad tendreis de sobra para hacer el contorno en ambas mejillas.
Guerlain:
Este fue mi primer bronceador, y le tengo desde tiempos inmemoriales. Es el Terracota en el número 1. Es muy suave y sutil, aunque si quieres, aplicando mas cantidad, puedes hacer más intenso el color. Se funde perfectamente con la piel y deja un efecto sutil de bronceado muy bonito.
MAC:
De MAC uso dos productos, la sombra Omega (que para gente con piel clara es un tono muy bueno para contorno, queda muy natural) y el colorete Harmony (este colorete es bastante famoso, y todos los maquilladores que he conocido lo tienen, porque puede usarse en bastante tonos de piel y tiene un efecto muy natural también).
Kryolan:
No he usado este en mucho tiempo, pero era de mis favoritos hace unos años. Antes de aplicar la base realizaba el contorno, y después, una vez aplicada la base quedaba un efecto muy natural. Si queréis un contorno bastante marcado, con aplicar encima de este producto, un bronceador en polvo, lo podéis conseguir.
Obviamente, vosotras podéis usar marcas diferentes, productos diferentes... hay muchas opciones respecto a los bronceadores! Estos que os pongo aquí son los que mejor efecto me han dejado en mi (demasiado pálida) piel sin quedar demasiado naranja. A veces es toda una batalla encontrar un bronceador que no se quede naranja en mi piel!
Habréis observado que casi todos, exceptuando uno, son en polvo. Mi piel es bastante grasa, por lo cual, cuando aplico bronceadores en crema, mi piel lo destroza y parece una mancha en medio de la cara. Por eso prefiero los bronceadores en polvo, ya que duran mucho más tiempo en mi piel y el acabado siempre mate (a mi ver, queda más natural que un bronceador con brillo)
Mis brochas favoritas para el contorno son la 109 de MAC y la Contour Brush de Real Techniques.
Espero que os haya gustado el post y que os sirva de ayuda por si estáis en búsqueda de un producto para el contorno.
Fotos de todos los productos nombrados, más arriba.
Nos vemos en el siguiente post!
Lor.
Sorry I´ve been a little lost, but here I am again =).
Today, I decided I was going to make a post showing you my favourite products to contour (high end and drugstore brands).
Lately I´ve been contouring my face a little bit more than usual. I love how people contour their whole face and look amazing, but I am so pale, and everytime I contour my whole face, it looks weird (like a very bad fake tan all over my face, and that´s not so cool). My usual contour routine is very simple, a little bit of countour on my cheeks and I´m done. If I feel extra fancy I maybe do some nose contour, but that´s only on VERY special ocasions. (I´ve never contour my forehead and my jaw line, I don´t like how it looks on me... I am very weird for contouring!)
Another reason that I have to be very lazy about contouring my face is, that normally, it´s so hard to find a good color for contour on pale skins. Usually, the colors look or so orangy or so grey (so you look like a weird person with orange lines on your face, or you seem to be a living zombie for the grey tone), it took me a lot to find colors that really suits my skin, and here they are.
(Remember, this are for pale skin, if you´re darker, maybe it doesn´t match your skin!)
Let´s start with drugstore:
Sleek makeup:
I used two blushes, Coral and Sahara.
Coral I used it very light, because is a orangy coral and if you put too much, it looks so orange. Applying just a tiny bit, it gives you a very nice light contour and looks so natural.
Sahara is a dark brown. I love this color as a blush, but I used this one a lot too for contouring. Again, I just applied a very tiny amount, and worked perfect as contour.
(On the photos look more orange thatn they really are!// En las fotos parecen mucho mas naranjas de lo que realmente son!)
(Coral on top, Sahara bottom// Coral arriba y Sahara abajo)
Kiko:
A long time ago, when I just barely contour my skin, I had this brown eyeshadow from Kiko. The number is from the old formula of the eyeshadows (now they look absolutely different). As I told you before, I applied only a little bit, and really looked good as contour.
(On photo look less dark// en foto parece menos oscuro)
High end contour stuff.
Inglot:
I made a palette of blushes from Inglot (it was a birthday gift from two years ago) and I got this dark brown color, that works too as contour. But if you ever get an Inglot blush, be very careful! They´re extremely pigmented, and with just a little bit of product you can contour both cheeks! And they have an incredible soft texture. It has a orange base.
Guerlain:
I have this one from a very long time, and it´s my favourite. It´s the Terracota Bronzer in number 1. It´s so nautral and really melts with your skin, giving a very nice glow finish. I use this one almost every day.
MAC:
My favourite contour products from MAC are Omega eyeshadow (for pale skins works amazing! It looks so natural and subtle, and doesn´t look orange at all) and Harmony blush (this one is a very famous one, almost every makeup artist that I´ve ever known have this, because it works for a lot of skin tones and it looks again so natural)
(Harmony) (Omega)
Kryolan:
I didn´t use this one in a long time, but I really liked it. Usually, I put this before my foundation, making sure it was totally blended. This technique can work very good if you´re looking for a heavy contour (You apply on top of that previous cream contour and foundation a podwer bronzer and it will look so good!)
Of course there are a lot of contouring products that you can use, a lot of brands... But this ones that I told you really worked for me. I don´t like at all contouring colors that look orange on the skin, so is a very hard battle to find one.
As you can see, excepting one, all are podwer formula and matte finish. I have oily skin, and whenever I tried a cream bronzer, my skin ruined it. So I prefer the podwer, cause´ obviously, for my skin type they stay way longer and the matte finish because it looks more natural for me.
My favourite brushes to contour are the 109 by MAC and the Contour Brush by Real Tehcniques
Hope you like the post and find it helpful, see you on the next one!
Lor.
----------------------------------------------------------
Hola a todos!!
Perdón por haber estado un poco perdida estos días, pero ya estoy de vuelta!
Decidí que hoy os voy a contar cuales son mis productos favoritos para realizar el contorno, y os voy a hablar de marcas de "droguería" y de los productos que tengo de firma también.
Últimamente he estado haciendo un contorno un poco mas intenso de lo normal para mí ( ya que tengo bastante suerte, mis pómulos no necesitan demasiado contorno). Me encanta ver como la gente puede realizar un contorno bestial de su cara y que el resultado final sea genial, pero mi problema es que soy muy pálida y si hago un contorno muy masivo puedo quedar como un payaso (o como si llevase un bronceador a parches. Mi rutina de contorno es muy básica la verdad, un poco para marcar el pómulo y ya está. Y si es una ocasión muy, pero que muy especial, entonces me hago un poco de contorno en la nariz (jamás me hago contorno en la frente o en la mandíbula, no me gusta nada como me queda!)
Otra de las razones por las que casi no he usado contorno en mucho tiempo, es por que al ser tan pálida, la mayoría de los colores son o demasiado naranjas, o demasiado grises. El efecto que ese tipo de colores tiene en mi es que puedo parecer una loca que ha decidido hacerse lineas naranjas en su cara, o parecer un zombie por el tono grisáceo. Me ha costado mucho encontrar colores que me queden bien y no parecer un Oompa Loompa, asi que vamos a ello!
Marcas de "Droguería".
Sleek Makeup:
Suelo usar dos coloretes, Coral y Sahara.
Coral lo uso con muy poca cantidad en la brocha, ya que al tener un subtono naranja, puede quedar muy anaranjado en la piel. Al usarlo muy ligero, deja un efecto muy bonito en la piel y queda muy natural y sutil. Sahara es un marrón oscuro. Como colorete es uno de mis favoritos, y de contorno, también. De nuevo, lo aplico con muy poca cantidad en la brocha para que no se quede demasiado anaranjado y queda muy bonito.
Kiko:
Hace bastante tiempo (años posiblemente) que no uso esta sombra. Tiene la numeración antigua, asi que no os puedo decir a cual corresponde ahora. Aplicaba esta sombra muy ligeramente, y la verdad es que hacía la función perfecta de contorno.
Ahora firmas.
Inglot:
Hace un par de años me regalaron una paleta de sombras y otra de colorete de esta marca. La de colorete la hice con los colores que mas me gustaron, y entre ellos hay un tono marrón perfecto para contorno y bronceador. Eso sí, si alguna vez usais coloretes de Inglot, usad muy poca cantidad! Tienen una pigmentación increíble y como pongas un poco más de lo necesario, no hay manera de arreglar el desastre. Con poca cantidad tendreis de sobra para hacer el contorno en ambas mejillas.
Guerlain:
Este fue mi primer bronceador, y le tengo desde tiempos inmemoriales. Es el Terracota en el número 1. Es muy suave y sutil, aunque si quieres, aplicando mas cantidad, puedes hacer más intenso el color. Se funde perfectamente con la piel y deja un efecto sutil de bronceado muy bonito.
MAC:
De MAC uso dos productos, la sombra Omega (que para gente con piel clara es un tono muy bueno para contorno, queda muy natural) y el colorete Harmony (este colorete es bastante famoso, y todos los maquilladores que he conocido lo tienen, porque puede usarse en bastante tonos de piel y tiene un efecto muy natural también).
Kryolan:
No he usado este en mucho tiempo, pero era de mis favoritos hace unos años. Antes de aplicar la base realizaba el contorno, y después, una vez aplicada la base quedaba un efecto muy natural. Si queréis un contorno bastante marcado, con aplicar encima de este producto, un bronceador en polvo, lo podéis conseguir.
Obviamente, vosotras podéis usar marcas diferentes, productos diferentes... hay muchas opciones respecto a los bronceadores! Estos que os pongo aquí son los que mejor efecto me han dejado en mi (demasiado pálida) piel sin quedar demasiado naranja. A veces es toda una batalla encontrar un bronceador que no se quede naranja en mi piel!
Habréis observado que casi todos, exceptuando uno, son en polvo. Mi piel es bastante grasa, por lo cual, cuando aplico bronceadores en crema, mi piel lo destroza y parece una mancha en medio de la cara. Por eso prefiero los bronceadores en polvo, ya que duran mucho más tiempo en mi piel y el acabado siempre mate (a mi ver, queda más natural que un bronceador con brillo)
Mis brochas favoritas para el contorno son la 109 de MAC y la Contour Brush de Real Techniques.
Espero que os haya gustado el post y que os sirva de ayuda por si estáis en búsqueda de un producto para el contorno.
Fotos de todos los productos nombrados, más arriba.
Nos vemos en el siguiente post!
Lor.
domingo, 24 de noviembre de 2013
Naked Palettes
Hi everyone!
As you may know, Naked 3 is already on the market, and of course, out of stock. I know for sure that is avalaible on the U.S.A, but Europe as always (more exactly, Spain) has to wait a little bit longer to have it on the stores.
Here in Spain, you can get UD in Sephora stores and counters, and of course you can get it from their website (I was reading the other day the conditions of international shipping and is a little bit confusing). The other day I went to a Sephora store and I asked them when we would have the Naked 3 on Spain, and they didn´t know the exact day, so I must keep waiting.
Meanwhile, I though it would be nice to do a review on the other 2 Naked palettes, for those who wants to know what are the differences between the palettes, similiar stuff, etc.
Let´s get started with the Naked.
This one was a bomb. A palette of warm neutral colors, it was very nice to have something like this on the market. In just one palette you have a lot of neutral colors, that you can use in everybody. Even me, lover of bold bright colors, can´t help but fall in love with this palette. What I love the most of this palette was that it contains some dark shades (Darkhorse, Hustle, Creep and Gunmetal), the brush that came with (Good Karma Shadow Brush) and the little sample of the Primer Potion. It became very fast one of my favourites for me, and for my kit. But the mirror was so tiny... And the velvet of the packaging got dirty very easily.
Then it came the Naked 2.
And I loved this one even more. It was again a neutral palette, but more on the cool warm tones. And the mix of the two palettes was a very nice collection of warm shades. I had used this one much more than the Naked, because I do prefer more cool tones than warm tones. And the mirror in this one was just perfect! With metallic packaging, cleaner and betterfor the use. This one came again with a brush, this time a double side one (Good Karma Shadow/Crease) and instead of a Primer Potion, this one came with a Lip Junkie in the shade Naked. I love so much the Lip Junkie! But the double brush... I don´t like them because they are so hard to store, and in the end you always end up ruining one side of the brush. (I´ve lost my lip junkie, sorry I don´t have a picture!)
I love this palettes so much, I had use them on myself a lot, in makeup works, and everybody seems to love the result when you do their makeup with this colors. The pigmentation of the colors is just amazing, even the most light shades shows up a lot. When I got the Naked 2, my favourite black shadow was Carbon by MAC, since that day, my favourite black is Blackout. Is just amazing, I promise. For a trip there are perfect to take with you, because it has enough colors to create any look from the simple washed eye look to a bold smoky eye.
Here are the swatches of the two palettes, no flash/flash.
Naked:
The Naked 3 is more on the pink shades. And all the colors are brand new, so that makes even more interesting this palette if that´s possible. It contains too a new double brush and samples of their four Primer Potions. I just put this palette on my Christmas list, and I am so excited to get it!
I hope you like this little show and tell, see you soon!
Lor.
------------------------------------------
Hola a todos!
Como ya sabreis, la paleta Naked 3 de Urban Decay está a la venta. Se que ya en Estados Unidos la pueden conseguir sin problemas, pero Europa aún tiene que esperar un poco más, como siempre.
Aquí en España podemos conseguir los productos de Urban Decay en tiendas Sephora y generalemente en los stands que tienen también suele estar disponible, si no toda la gama, gran parte. Otra opción es ir a su página web y hacer el pedido. El otro día estuve mirando como hacen los envíos internacionales, y la verdad es que son un poco liosos (tienes que registrarte en una compañía que te da una dirección en USA, donde UD envía tu pedido y después esta empresa te lo envía a tu dirección). Pregunté en una tienda Sephora si sabían una fecha aproximada de llegada, pero me dijeron que aún no hay nada confirmado y que posiblemente fuera a finales de Navidad.
Mientras, para matar la espera, he pensado que para todos aquellos que puedan estar preguntandose sobre las Naked, que misterio tienen, colores que tienen, etc, podría ser interesante hacer un pequeño review sobre las paletas.
Empecemos con la Naked.
Esta paleta fue todo un acontecimiento. Era una de las primeras en contener sólo tonos neutrales. Y tonos compatibles con todo tipo de pieles. Incluso yo, fan de los colores intensos a muerte, me enamoré de esta paleta. La he usado bastante, pero como siempre, mi parte favorita de la paleta son los colores oscuros (Dark Horse, Hustle, Creep y Gunmetal) que he usado mucho para ojos ahumados. La brocha que venía con la paleta también me gusto mucho (nunca antes había probado las brochas de UD) y la muestra que venía del Primer Potion también me gusto mucho (aunque yo ya tenía Primer Potion, pensé que era todo un detalle que lo incluyeran). Se convirtió en mi paleta favorita durante una gran temporada tanto para mí, como para mi kit de trabajo. Lo malo era el terciopelo de la caja, que se ensuciaba con mirarlo, y el espejo era muy pequeñito...
Y después, llegó la Naked 2.
Esta paleta me gustó mucho mas que la Naked. Pero mucho, mucho más. De nuevo se repetía la formula de colores neutros, pero esta vez en tonos fríos. Y creo que ese pequeño hecho, fue lo que la convirtió en mi favorita de un plumazo, por los tonos neutros fríos (ya que me gustan mas ese tipo de tonos que los cálidos). Otro gran punto a favor en esta paleta fue que era una caja metálica y con un espejo enorme. Con esta paleta venía una brocha exclusiva doble (Good Karma Shadow/Crease) y una muestra de uno de sus Lip Junkies (los cuales adoro) en el tono Naked. La brocha no es de mi total agrado... Simplemente porque de guardarla en la manta de pinceles, hay uno de los lados que se me ha estropeado y eso es algo que no me gusta nada. Me hubiera gustado otra brocha similar a la de la Naked, pero bueno.
Estas paletas, en resumen, me encantan. Son muy útiles para tener en un kit de trabajo, para usar con una misma. Y si tienes las dos, pues tienes una amplia gama de tonos neutros tanto fríos como cálidos, perfectamente combinables. La pigmentación de los colores es buenísima, cosa que me sorprendió mucho. Hasta que tuve la Naked 2, mi sombra negra favorita era Carbon de MAC; pero cuando probé Blackout se convirtió en mi sombra negra por excelencia. Además, si sueles viajar, tiene el tamaño perfecto para llevartela de viaje y te da opción a crear looks de cualquier tipo.
Mis colores favoritos de la Naked son Sin, Buck, Darkhorse, Hustle, Creep y Gunmetal. De la Naked 2, no podría elegir, sinceramente, me gustan todos!
Perdonadme que no tenga foto del Primer Potion ni del Lip Junkie, el primer le acabé y no sé que hice con el bote, y el Lip Junkie no le encuentro por ningún lado XD.
La Naked 3 está centrada en tonos rosados. Y los doce colores que vienen en esta paleta son totalmente nuevos, lo que hace que sea muy tentadora. Incluye de nuevo una brocha doble (también nueva y exclusiva de la paleta) y muestras de sus 4 tipos de Primer Potion. Yo ya la he puesto en mi lista de Navidad, y estoy deseando que llegue para poder probarla!
Espero que os haya gustado este post, nos vemos en el siguiente!
Fotos, arriba, como siempre =).
Lor.
As you may know, Naked 3 is already on the market, and of course, out of stock. I know for sure that is avalaible on the U.S.A, but Europe as always (more exactly, Spain) has to wait a little bit longer to have it on the stores.
Here in Spain, you can get UD in Sephora stores and counters, and of course you can get it from their website (I was reading the other day the conditions of international shipping and is a little bit confusing). The other day I went to a Sephora store and I asked them when we would have the Naked 3 on Spain, and they didn´t know the exact day, so I must keep waiting.
Meanwhile, I though it would be nice to do a review on the other 2 Naked palettes, for those who wants to know what are the differences between the palettes, similiar stuff, etc.
Let´s get started with the Naked.
This one was a bomb. A palette of warm neutral colors, it was very nice to have something like this on the market. In just one palette you have a lot of neutral colors, that you can use in everybody. Even me, lover of bold bright colors, can´t help but fall in love with this palette. What I love the most of this palette was that it contains some dark shades (Darkhorse, Hustle, Creep and Gunmetal), the brush that came with (Good Karma Shadow Brush) and the little sample of the Primer Potion. It became very fast one of my favourites for me, and for my kit. But the mirror was so tiny... And the velvet of the packaging got dirty very easily.
Then it came the Naked 2.
And I loved this one even more. It was again a neutral palette, but more on the cool warm tones. And the mix of the two palettes was a very nice collection of warm shades. I had used this one much more than the Naked, because I do prefer more cool tones than warm tones. And the mirror in this one was just perfect! With metallic packaging, cleaner and betterfor the use. This one came again with a brush, this time a double side one (Good Karma Shadow/Crease) and instead of a Primer Potion, this one came with a Lip Junkie in the shade Naked. I love so much the Lip Junkie! But the double brush... I don´t like them because they are so hard to store, and in the end you always end up ruining one side of the brush. (I´ve lost my lip junkie, sorry I don´t have a picture!)
I love this palettes so much, I had use them on myself a lot, in makeup works, and everybody seems to love the result when you do their makeup with this colors. The pigmentation of the colors is just amazing, even the most light shades shows up a lot. When I got the Naked 2, my favourite black shadow was Carbon by MAC, since that day, my favourite black is Blackout. Is just amazing, I promise. For a trip there are perfect to take with you, because it has enough colors to create any look from the simple washed eye look to a bold smoky eye.
The brushes/ Las brochas.
Here are the swatches of the two palettes, no flash/flash.
Naked:
Colors (From bottom to top): Virgin, Sin, Naked, Sidecar, Buck and Half Baked.
(Colores: de abajo a arriba)
Colors (from bottom to top): Smog, Darkhorse, Toasted, Hustle, Creep, Gunmetal.
Colores (de arriba a abajo)
Naked 2:
Colors (From bottom to top): Foxy, Half Baked, Bootycall, Chopper, Tease, Snakebite
Colores (de abajo a arriba)
Colors (from bottom to top): Suspect, Pistol, Verve, YDK, Busted, Blackout.
Colores (de arriba a abajo).
My favourite shades are Sin, Buck, Darkhorse, Hustle, Creep and Gunmetal from the Naked. And from the Naked 2 all of them. I can´t choose!
The Naked 3 is more on the pink shades. And all the colors are brand new, so that makes even more interesting this palette if that´s possible. It contains too a new double brush and samples of their four Primer Potions. I just put this palette on my Christmas list, and I am so excited to get it!
I hope you like this little show and tell, see you soon!
Lor.
------------------------------------------
Hola a todos!
Como ya sabreis, la paleta Naked 3 de Urban Decay está a la venta. Se que ya en Estados Unidos la pueden conseguir sin problemas, pero Europa aún tiene que esperar un poco más, como siempre.
Aquí en España podemos conseguir los productos de Urban Decay en tiendas Sephora y generalemente en los stands que tienen también suele estar disponible, si no toda la gama, gran parte. Otra opción es ir a su página web y hacer el pedido. El otro día estuve mirando como hacen los envíos internacionales, y la verdad es que son un poco liosos (tienes que registrarte en una compañía que te da una dirección en USA, donde UD envía tu pedido y después esta empresa te lo envía a tu dirección). Pregunté en una tienda Sephora si sabían una fecha aproximada de llegada, pero me dijeron que aún no hay nada confirmado y que posiblemente fuera a finales de Navidad.
Mientras, para matar la espera, he pensado que para todos aquellos que puedan estar preguntandose sobre las Naked, que misterio tienen, colores que tienen, etc, podría ser interesante hacer un pequeño review sobre las paletas.
Empecemos con la Naked.
Esta paleta fue todo un acontecimiento. Era una de las primeras en contener sólo tonos neutrales. Y tonos compatibles con todo tipo de pieles. Incluso yo, fan de los colores intensos a muerte, me enamoré de esta paleta. La he usado bastante, pero como siempre, mi parte favorita de la paleta son los colores oscuros (Dark Horse, Hustle, Creep y Gunmetal) que he usado mucho para ojos ahumados. La brocha que venía con la paleta también me gusto mucho (nunca antes había probado las brochas de UD) y la muestra que venía del Primer Potion también me gusto mucho (aunque yo ya tenía Primer Potion, pensé que era todo un detalle que lo incluyeran). Se convirtió en mi paleta favorita durante una gran temporada tanto para mí, como para mi kit de trabajo. Lo malo era el terciopelo de la caja, que se ensuciaba con mirarlo, y el espejo era muy pequeñito...
Y después, llegó la Naked 2.
Esta paleta me gustó mucho mas que la Naked. Pero mucho, mucho más. De nuevo se repetía la formula de colores neutros, pero esta vez en tonos fríos. Y creo que ese pequeño hecho, fue lo que la convirtió en mi favorita de un plumazo, por los tonos neutros fríos (ya que me gustan mas ese tipo de tonos que los cálidos). Otro gran punto a favor en esta paleta fue que era una caja metálica y con un espejo enorme. Con esta paleta venía una brocha exclusiva doble (Good Karma Shadow/Crease) y una muestra de uno de sus Lip Junkies (los cuales adoro) en el tono Naked. La brocha no es de mi total agrado... Simplemente porque de guardarla en la manta de pinceles, hay uno de los lados que se me ha estropeado y eso es algo que no me gusta nada. Me hubiera gustado otra brocha similar a la de la Naked, pero bueno.
Estas paletas, en resumen, me encantan. Son muy útiles para tener en un kit de trabajo, para usar con una misma. Y si tienes las dos, pues tienes una amplia gama de tonos neutros tanto fríos como cálidos, perfectamente combinables. La pigmentación de los colores es buenísima, cosa que me sorprendió mucho. Hasta que tuve la Naked 2, mi sombra negra favorita era Carbon de MAC; pero cuando probé Blackout se convirtió en mi sombra negra por excelencia. Además, si sueles viajar, tiene el tamaño perfecto para llevartela de viaje y te da opción a crear looks de cualquier tipo.
Mis colores favoritos de la Naked son Sin, Buck, Darkhorse, Hustle, Creep y Gunmetal. De la Naked 2, no podría elegir, sinceramente, me gustan todos!
Perdonadme que no tenga foto del Primer Potion ni del Lip Junkie, el primer le acabé y no sé que hice con el bote, y el Lip Junkie no le encuentro por ningún lado XD.
La Naked 3 está centrada en tonos rosados. Y los doce colores que vienen en esta paleta son totalmente nuevos, lo que hace que sea muy tentadora. Incluye de nuevo una brocha doble (también nueva y exclusiva de la paleta) y muestras de sus 4 tipos de Primer Potion. Yo ya la he puesto en mi lista de Navidad, y estoy deseando que llegue para poder probarla!
Espero que os haya gustado este post, nos vemos en el siguiente!
Fotos, arriba, como siempre =).
Lor.
Suscribirse a:
Entradas (Atom)


.jpeg)
.jpeg)


.jpeg)