Hola a todos!!!
Como estáis? Espero que la semana vaya muy bien, y que ya esteis preparando el fin de semana! A mi me espera uno un poco ocupado (y yo encantada por ello!).
Hoy vengo con un review pequeñito sobre una de mis últimas compras.
No hace mucho (dos semanas, tres a lo sumo) han abierto una tienda Primor en un centro comercial muy cerquita de mi casa, "La Gavia". El otro día finalmente pude ir a darme una vuelta para ver la tienda, que me sorprendió bastante, porque es muy grande! Y la verdad que tenían de todo.
Como no, acabé en la sección de maquillaje, que era lo que mas me interesaba. Llegué la verdad que un poco tarde, porque estaba desmantelado absolutamente todo. Sobre todo Nyx, Sleek Makeup y Wet n Wild. Después de un rato de curiosear, acabé cogiendo el labial Cherry Bomb, muy conocido por ser uno de los clones mas exactos al labial Diva de MAC. Sinceramente me picaba la curiosidad probarlo (Diva sigue en mi lista de próximos pintalabios de MAC, porque siempre acabo cogiendo uno diferente) y como tuve la suerte de que aún quedaban, me lancé a por el.
El packaging del pintalabios me gusta bastante, es muy simple y la verdad que a mi son los que mas me gustan. Pero lo que no me acabó de convencer es que parte de la barra de labios se quede fuera, me da la sensación de que está desprotegida. Pero en general, no esta nada mal.
Al haber oído que era el clon, cuando lo probé, me esperaba una textura mas mate (ya que Diva es mate) pero me resulto un poco mas satinada de lo que yo tenía en mente. El color es muy bonito (es una de mis gamas favoritas la verdad) pero la pigmentación, no se por que, me esperaba que fuera mucho mayor. De todas maneras, insisto, no esta nada mal.
(En la foto: una capa de pintalabios, dos abajo sin flash y con flash/ On the photo: One layer of lipstick on top, two layers bottom without and with flash)
El precio, obviamente, que ni punto de comparación 2.99€ comparado con los 19€ de MAC, pues la verdad que se agradece mucho!
En cuanto a duración, la verdad que me sorprendió (usé un delineador de labios debajo, porque este tipo de colores tan oscuros no me gusta llevarlos sin delineación, concretamente Nightmoth de MAC). Y sin salirse de los bordes aguantó como 3 horas perfectamente, y eso que puse dos capas de labial. Después, ya empezaba a verse que el pintalabios había caído bastante.
Después de haber probado Diva (no le tengo, vuelvo a decirlo, pero me lo han dejado para que lo pruebe un par de veces), estoy de acuerdo totalmente en que es igual el color, pero la textura no del todo. Prefiero la textura de Diva, sinceramente.
Si os gustan ese tipo de colores, os lo recomiendo totalmente. Si queréis un acabado mas mate (como yo) siempre queda la opción de matificarlo un poquito con polvos sueltos traslúcidos y solucionado el problema.
Os dejo una foto con el look que lo llevé. Casi ni se aprecia, pero era un ojo estilo años 50.
Espero que os haya gustado!
Antes de irme, os cuento una cosita: he hecho una colaboración con Rouge, una blogger de Washington. Nos conocimos a través de Instagram y a raíz de ahí hemos llegado a esta colaboración. Yo he hecho un par de looks primaverales para su blog y ella está preparando un post para mi blog, que en breves lo tendreis publicado! Os recomiendo totalmente que os paseis por su blog, tiene recaps de pasarelas, outfits, reviews... Y es un amor de chica.
Y ahora si que sí, nos vemos en el siguiente post!
Lor.
-----------------------------------------
Hello there!!
How´s going the week? I hope that you´re having a great time, and getting ready for the weekend! Mine is going to be a little busy =).
Well, today I am here with a little review about something I bought not so long ago.
Wet n Wild is a brand that recently came to my country (Spain) and is just avalaible in a few stores. Lucky me, on the mall that is very close to my house, one of this stores opened not so long ago, and the other day I made a little visit to see all the makeup.
There were more brands like Nyx and Sleek Makeup (again, so hard to find on my country, feel sometimes like if we were in Narnia) but the stands were almost empty! So I just checked what it was left. I was lucky enough to find a lipstick that I was very curious about it. It´s the Cherry Bomb lipstick by Wet n Wild, a famous clone for Diva by MAC.
When I first tried it, I was surprised, the color is very similar, but I don´t know why, I expected a more matte texture. I´ve tried Diva before (I don´t have it yet, but is on my list!) and maybe for that I was looking for a texture maybe a little bit more matte.
The price was so cheap, 2.99€ in comparison for the 19€ of MAC.
The packaging was lovely, but I will prefer that the whole lipstick will hide inside the bullet.
I wore it for 4 hours, almost 5. It was perfect for the first 3, later it started bleeding a little (I used a lip pencil down the lipstick, Nightmoth by MAC).
I totally recommend this lipstick if you don´t want to spend a lot of money, is a very good one. And if you want it matte, you can always put some loose powder on top and there you have your matte lipstick.
Photos, above, as always.
I was wearing on the photo a 50´s inspired look.
Before leaving, I want to tell you about something. I just made a collab with the lovely Rouge (click on the name and it will take you to her blog!). She´s a blogger form Washington and we met through Instagram. The other day she asked if someone wanted to collaborate with her, and I volunteer (as a tribute! hahahaha). So I just made a post for her blog of two spring inspired looks, and she will make a post for my blog so soon too =). I am so happy!! Is my first collab, and she´s so lovely to let me colaborate with her =D. Don´t forget to check her blog! Is full of awesome fashion, makeup and outfit stuff!
I will see you wery soon!
Lor.
Mostrando entradas con la etiqueta dupe. Mostrar todas las entradas
martes, 22 de abril de 2014
martes, 11 de marzo de 2014
Beauty Blender Dupe!
Hola a todos!
Cómo va la semana? Espero que muy bien, y cargando fuerzas para el fin de semana que ya casi lo tenemos aquí.
Hoy os vengo a hablar de una esponja de maquillaje. Va a ser un pequeño review.
Todo el mundo está loco con la Beauty Blender, y si es como la esponja que os enseño hoy, lo entiendo totalmente. A mí, bajo mi opinión personal, lo que me parece una brutalidad es el precio. Hace unos 4 años, cuando visité USA estuve a punto de comprarla, pero eran 25$, y me parecía demasiado para una esponja, por muy buena que sea. Después, aquí en España salió a la venta, entre 20 y 30 € de precio (la he visto en Sephora y otra cadena de perfumerías que ahora mismo no recuerdo) y sigue pareciéndome muy cara.
Como podéis ver es como si fuera la famosa Beauty Blender, pero en vez de ser en forma de huevo tiene una curva en el centro (que resulta muy cómodo para coger la esponja y tener mejor manejo). La parte inferior de la esponja es mas redondeada, perfecta para aplicar base y difuminar. La parte superior es mas en punta, perfecta para áreas pequeñas y muy cómoda para difuminar también.
Lo primero, tengo que reconocer que no soy una gran fan de las esponjas de maquillaje (bueno, a estas alturas mejor decir que no lo era) hasta que probé esta. Me la dieron los chicos de Burlesque Madrid, para que la probase, hace ya un tiempo.
La he usado en sesiones de fotos, mayoritariamente, y sobre todo en chicos. Me gustaba mucho el acabado que le daba a la piel, y los chicos me decían que les gustaba mucho el tacto de la esponja. Eso, quieras que no, le da muchos puntos a un producto. Cada vez que he tenido una sesión, ha sido una herramienta imprescindible en mi maletín. En las chicas, sobre todo la he usado para difuminar contorno facial y aplicar el corrector o iluminador en crema.
Y ahora, se ha convertido imprescindible en mi rutina de maquillaje, para aplicar el corrector (no la uso húmeda). Siempre he aplicado el corrector o con el dedo o la brocha de Sigma (porque para difuminar sombras no me gusta el acabado que deja). Últimamente no me acababa de convencer el acabado que tenía mi corrector, así que me decidí por usar la esponja, y ha sido toda una revolución para mi. Ha mejorado la duración de mi corrector (uso el Pro Longwear de MAC y el HD de Nyx, suelo alternarlos) a pesar de que ambos tienen una duración tremenda, y el producto queda mucho más fundido con mi piel.
A parte de eso, lo que me gusta es que esta esponja absorbe lo justo de producto y no es como otras que tienes que aplicar kilos y kilos de producto para que llegue algo a la piel.
Para limpiarla, uso un jabón suave y la dejo secar de pie, apoyada en la pared. En una noche esta totalmente seca y como nueva para usarla.
Así que si sois como yo, y os parece un poco excesivo el precio del Beauty Blender, os recomiendo que os paséis por Burlesque (pinchando en el nombre más arriba os sale su facebook oficial) y le deis una oportunidad a esta esponjita. Merece totalmente la pena!
Espero que os guste, nos leemos en el siguiente post!
Lor.
Si queréis ver mas cositas diarias de maquillaje y un montón de fotos sin sentido, os recomiendo mi Instagram, tenéis un link en la barra principal =)!
No me quiero ir, sin mandar todo mi apoyo y cariño a todos aquellos que se vieron afectados en el atentado del 11-M. Han pasado 10 años, y aun puedo recordar ese día perfectamente, uno de los trenes estalló muy cerca de mi casa. Pero hay que seguir adelante, por todos aquellos que nos dejaron.
-----------------------------------
Hello everyone!
I hope you are having a great start of the week and you´re getting ready for the weekend =).
Today I´m coming with a little review, about a makeup sponge.
As you can see, is like the beauty blender, but with a curve in the middle, that makes easier to hold it and use it.
Everybody is crazy right now about the Beauty Blender, but I don´t think I´ve never been a fan of that one. First, I think is very overpriced just for a sponge to cost more than 20$, and the main reason is because I´m not a big fan of sponges for makeup. A while ago, when I visited the U.S.A I almost bought it, but the price was like 25$ and I didn´t buy it. Now, here in Spain is avalaible in Sephora and more places if I´m not wrong, but it cost more than 20€, still being expensive for me.
This one I got it from one of my favourite stores here, Burlesque Madrid, they gave it to me to try it. And I was very surprised, I liked it a lot.
I mainly used this sponge for shoots, mostly on guys. I loved the finish of the skin was so natural and flawless, and the guys love the feeling of the sponge on their faces. That was a very good thing to me. And on the girls, I used it a lot for cream contouring and highlighting too. It was a must-have on my kit.
And now, it´s a must-have on my normal makeup routine. I´ve always used brushes to apply my concealer or my finger, but lately I didn´t like so much how it looks on my skin. I started using the sponge on myself and I loved it! The finish of the concealer is more natural, it blends much more on my skin and last even longer! (I usually use Pro Longwear by MAC and HD concealer by Nyx, alternating).
Another thing that I love about this sponge is that it doesn´t absorb a lot of product, just a little amount, which is very nice, cause´ you don´t waste a lot of product.
For cleaning the sponge, I just use a soft soap and let it dry for a whole night. It gets totally dry and ready to use it again!
So if you´re looking for a different option instead of the Beauty Blender, I really recommend you this one.
Photos, above.
Hope you like the post, see you on the next one!
Lor.
And just in case you want to see more photos of makeup and random stuff, you can check my Instagram, link on the main bar!
Cómo va la semana? Espero que muy bien, y cargando fuerzas para el fin de semana que ya casi lo tenemos aquí.
Hoy os vengo a hablar de una esponja de maquillaje. Va a ser un pequeño review.
Todo el mundo está loco con la Beauty Blender, y si es como la esponja que os enseño hoy, lo entiendo totalmente. A mí, bajo mi opinión personal, lo que me parece una brutalidad es el precio. Hace unos 4 años, cuando visité USA estuve a punto de comprarla, pero eran 25$, y me parecía demasiado para una esponja, por muy buena que sea. Después, aquí en España salió a la venta, entre 20 y 30 € de precio (la he visto en Sephora y otra cadena de perfumerías que ahora mismo no recuerdo) y sigue pareciéndome muy cara.
Como podéis ver es como si fuera la famosa Beauty Blender, pero en vez de ser en forma de huevo tiene una curva en el centro (que resulta muy cómodo para coger la esponja y tener mejor manejo). La parte inferior de la esponja es mas redondeada, perfecta para aplicar base y difuminar. La parte superior es mas en punta, perfecta para áreas pequeñas y muy cómoda para difuminar también.
Lo primero, tengo que reconocer que no soy una gran fan de las esponjas de maquillaje (bueno, a estas alturas mejor decir que no lo era) hasta que probé esta. Me la dieron los chicos de Burlesque Madrid, para que la probase, hace ya un tiempo.
La he usado en sesiones de fotos, mayoritariamente, y sobre todo en chicos. Me gustaba mucho el acabado que le daba a la piel, y los chicos me decían que les gustaba mucho el tacto de la esponja. Eso, quieras que no, le da muchos puntos a un producto. Cada vez que he tenido una sesión, ha sido una herramienta imprescindible en mi maletín. En las chicas, sobre todo la he usado para difuminar contorno facial y aplicar el corrector o iluminador en crema.
Y ahora, se ha convertido imprescindible en mi rutina de maquillaje, para aplicar el corrector (no la uso húmeda). Siempre he aplicado el corrector o con el dedo o la brocha de Sigma (porque para difuminar sombras no me gusta el acabado que deja). Últimamente no me acababa de convencer el acabado que tenía mi corrector, así que me decidí por usar la esponja, y ha sido toda una revolución para mi. Ha mejorado la duración de mi corrector (uso el Pro Longwear de MAC y el HD de Nyx, suelo alternarlos) a pesar de que ambos tienen una duración tremenda, y el producto queda mucho más fundido con mi piel.
A parte de eso, lo que me gusta es que esta esponja absorbe lo justo de producto y no es como otras que tienes que aplicar kilos y kilos de producto para que llegue algo a la piel.
Para limpiarla, uso un jabón suave y la dejo secar de pie, apoyada en la pared. En una noche esta totalmente seca y como nueva para usarla.
Así que si sois como yo, y os parece un poco excesivo el precio del Beauty Blender, os recomiendo que os paséis por Burlesque (pinchando en el nombre más arriba os sale su facebook oficial) y le deis una oportunidad a esta esponjita. Merece totalmente la pena!
Espero que os guste, nos leemos en el siguiente post!
Lor.
Si queréis ver mas cositas diarias de maquillaje y un montón de fotos sin sentido, os recomiendo mi Instagram, tenéis un link en la barra principal =)!
No me quiero ir, sin mandar todo mi apoyo y cariño a todos aquellos que se vieron afectados en el atentado del 11-M. Han pasado 10 años, y aun puedo recordar ese día perfectamente, uno de los trenes estalló muy cerca de mi casa. Pero hay que seguir adelante, por todos aquellos que nos dejaron.
-----------------------------------
Hello everyone!
I hope you are having a great start of the week and you´re getting ready for the weekend =).
Today I´m coming with a little review, about a makeup sponge.
As you can see, is like the beauty blender, but with a curve in the middle, that makes easier to hold it and use it.
Everybody is crazy right now about the Beauty Blender, but I don´t think I´ve never been a fan of that one. First, I think is very overpriced just for a sponge to cost more than 20$, and the main reason is because I´m not a big fan of sponges for makeup. A while ago, when I visited the U.S.A I almost bought it, but the price was like 25$ and I didn´t buy it. Now, here in Spain is avalaible in Sephora and more places if I´m not wrong, but it cost more than 20€, still being expensive for me.
This one I got it from one of my favourite stores here, Burlesque Madrid, they gave it to me to try it. And I was very surprised, I liked it a lot.
I mainly used this sponge for shoots, mostly on guys. I loved the finish of the skin was so natural and flawless, and the guys love the feeling of the sponge on their faces. That was a very good thing to me. And on the girls, I used it a lot for cream contouring and highlighting too. It was a must-have on my kit.
And now, it´s a must-have on my normal makeup routine. I´ve always used brushes to apply my concealer or my finger, but lately I didn´t like so much how it looks on my skin. I started using the sponge on myself and I loved it! The finish of the concealer is more natural, it blends much more on my skin and last even longer! (I usually use Pro Longwear by MAC and HD concealer by Nyx, alternating).
Another thing that I love about this sponge is that it doesn´t absorb a lot of product, just a little amount, which is very nice, cause´ you don´t waste a lot of product.
For cleaning the sponge, I just use a soft soap and let it dry for a whole night. It gets totally dry and ready to use it again!
So if you´re looking for a different option instead of the Beauty Blender, I really recommend you this one.
Photos, above.
Hope you like the post, see you on the next one!
Lor.
And just in case you want to see more photos of makeup and random stuff, you can check my Instagram, link on the main bar!
domingo, 29 de septiembre de 2013
Get Ready With Me!
Hi everyone!
Tody I´m going to make a "Get Ready With Me" post about the makeup that I wear yesterday when I went to the movies with my girlfriends! We saw "Now You See Me..." and it´s amazing!! I recommend you to watch it, you won´t regret it at all.
So, let´s get started!
First, I clean my skin with the "Herbalism" facial mask, later I clean the rests of the mask with my Tea Tree Skin Clearing Facial Wash and apply some Tea Tree Water skin tonic. After the skin tonic was complete absorved by my skin, I apply my Mineralize Charged Water Moisture Gel and wait for a few minutes until my skin was totally dry and not sticky for applying my makeup.
I did a very simple makeup, you can call it naked o washed face.
First, I applied my Face and Body foundation in C1 with a contour brush from Real Techniques. I used this brush because I like the finish that gave to the foundation on my skin, and because is very gentle and soft. After that, I took my 286 Duo Fibre Blending Brush for applying my Illamasqua Concealer in CC 115 and took my Beauty Blender dupe for a total blending (this concealer is very pale in comparison with the foundation that I used, so I don´t wanted to look like a panda but in white concealer haha!) After all, I set everything with my very used (as you can see) Collection Pressed Podwer in 18 Ivory with my 15BJF Inglot brush (is a blush brush, but I love to use it for podwer)
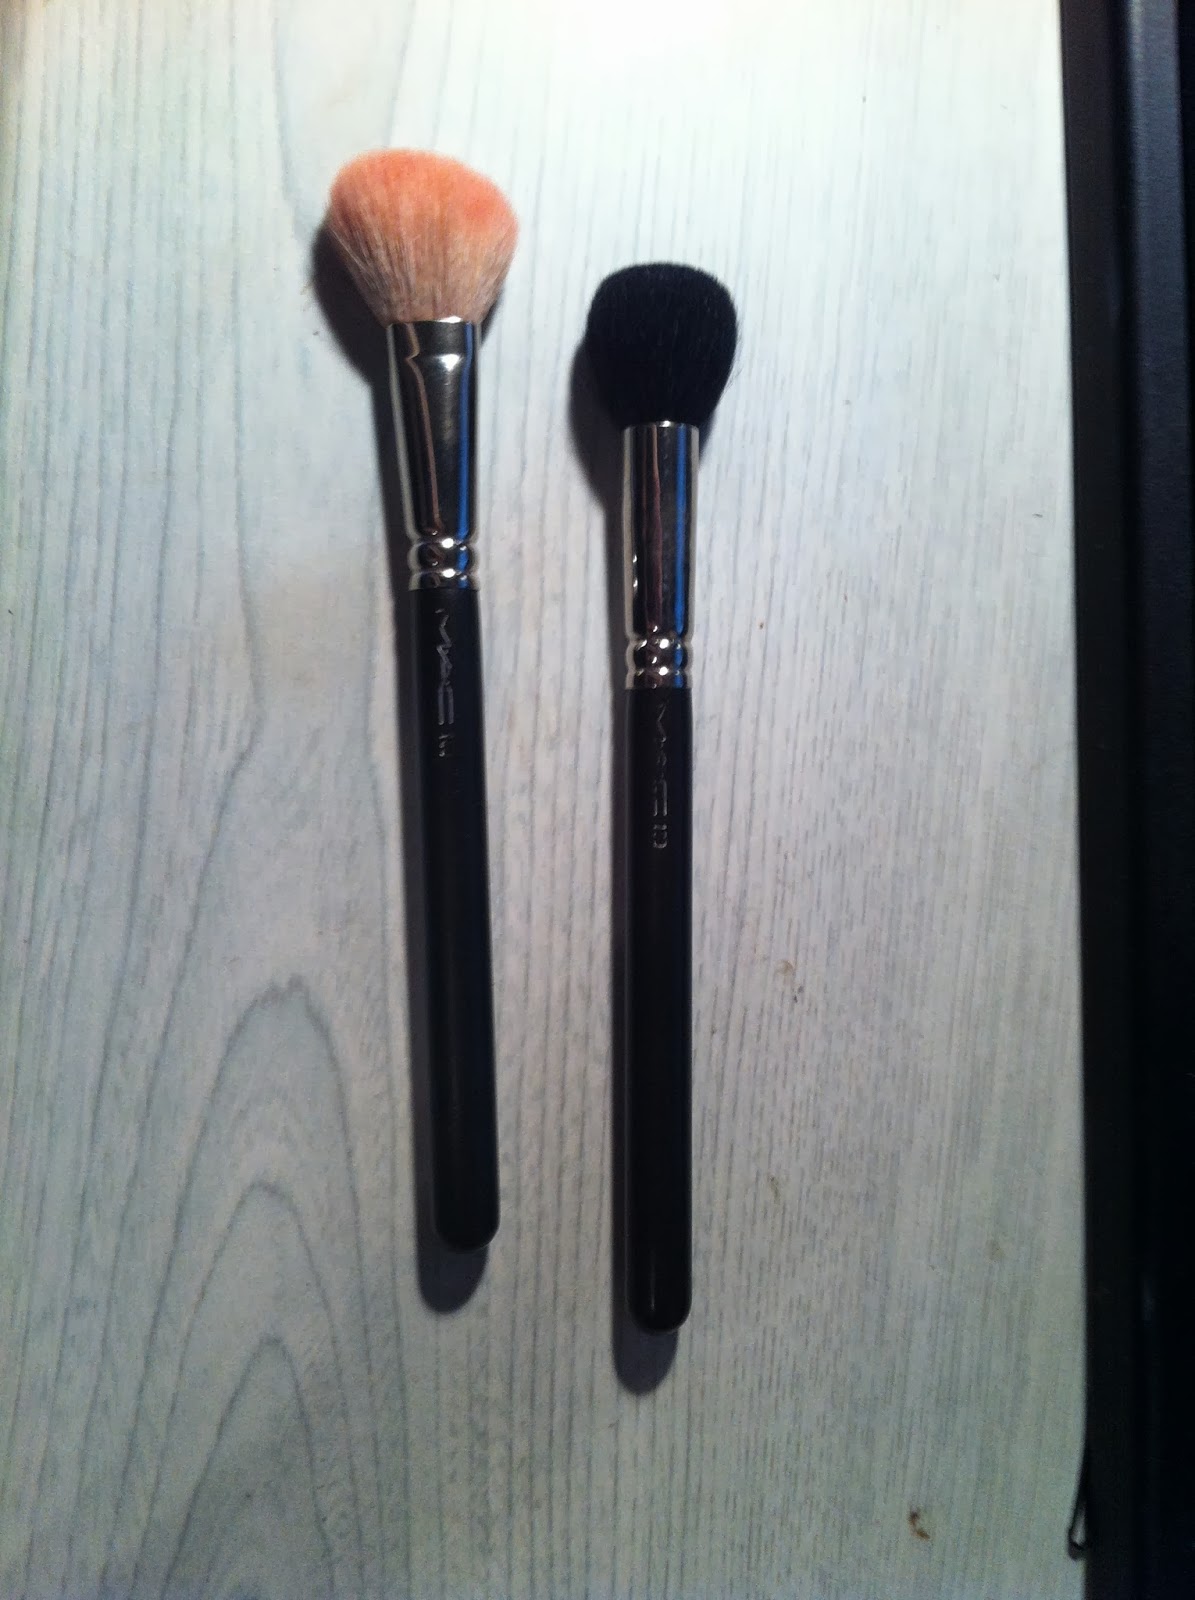
For the rest of the face I kept it simple, just some light cheek contour using Harmony and my 109 Small Contour Brush by MAC (this brush is one of my favourites ever!) and I use Stunner blush (satin finish) with my 168 Large Angled Contour Brush. For highlight, I put a little bit of Shroom with the 227 Large Fluff Brush on top of the cheeks.
After that I took my 212 Flat Definer Brush and with Concrete eyeshadow, for filling and define my eyebrows.
On the eyes, I apply with my ring finger a bit of Bare Study Painpot, and let it set for a minute. Later, with the lightest eyeshadow of this quad by Kiko (Color Fever Eyeshadow Palette, I got this a long time ago) I applied it all over the lid with my 213 Fluff Brush, blending any harsh line. After that I curled my lashes and put some mascara.
For the lips I used Whirl lipliner by MAC and MUA lipstick in shade 14.
Sorry I can put you a finish look photo, I didn´t take any! But this is one photo with the same look from a while ago, with the exact same products (is one of my favourite looks, as you can see)
Hope you like the post!
See you on the next one,
Lor.
<a href="http://www.bloglovin.com/blog/10847141/?claim=eagdsv2x6cy">Follow my blog with Bloglovin</a>
Tody I´m going to make a "Get Ready With Me" post about the makeup that I wear yesterday when I went to the movies with my girlfriends! We saw "Now You See Me..." and it´s amazing!! I recommend you to watch it, you won´t regret it at all.
So, let´s get started!
First, I clean my skin with the "Herbalism" facial mask, later I clean the rests of the mask with my Tea Tree Skin Clearing Facial Wash and apply some Tea Tree Water skin tonic. After the skin tonic was complete absorved by my skin, I apply my Mineralize Charged Water Moisture Gel and wait for a few minutes until my skin was totally dry and not sticky for applying my makeup.
I did a very simple makeup, you can call it naked o washed face.
First, I applied my Face and Body foundation in C1 with a contour brush from Real Techniques. I used this brush because I like the finish that gave to the foundation on my skin, and because is very gentle and soft. After that, I took my 286 Duo Fibre Blending Brush for applying my Illamasqua Concealer in CC 115 and took my Beauty Blender dupe for a total blending (this concealer is very pale in comparison with the foundation that I used, so I don´t wanted to look like a panda but in white concealer haha!) After all, I set everything with my very used (as you can see) Collection Pressed Podwer in 18 Ivory with my 15BJF Inglot brush (is a blush brush, but I love to use it for podwer)
For the rest of the face I kept it simple, just some light cheek contour using Harmony and my 109 Small Contour Brush by MAC (this brush is one of my favourites ever!) and I use Stunner blush (satin finish) with my 168 Large Angled Contour Brush. For highlight, I put a little bit of Shroom with the 227 Large Fluff Brush on top of the cheeks.
After that I took my 212 Flat Definer Brush and with Concrete eyeshadow, for filling and define my eyebrows.
On the eyes, I apply with my ring finger a bit of Bare Study Painpot, and let it set for a minute. Later, with the lightest eyeshadow of this quad by Kiko (Color Fever Eyeshadow Palette, I got this a long time ago) I applied it all over the lid with my 213 Fluff Brush, blending any harsh line. After that I curled my lashes and put some mascara.
For the lips I used Whirl lipliner by MAC and MUA lipstick in shade 14.
Sorry I can put you a finish look photo, I didn´t take any! But this is one photo with the same look from a while ago, with the exact same products (is one of my favourite looks, as you can see)
Hope you like the post!
See you on the next one,
Lor.
<a href="http://www.bloglovin.com/blog/10847141/?claim=eagdsv2x6cy">Follow my blog with Bloglovin</a>
Etiquetas:
beauty blender,
benefit,
brush,
concealer,
dupe,
eyebrow,
fotd,
foundation,
get ready with me,
illamasqua,
kiko,
lipliner,
lipstick,
lush,
mac,
makeup,
mua,
the body shop
miércoles, 11 de septiembre de 2013
Lash Glue nightmares are over!
Hello there!
I know that probably a lot of you knew about this, but I didn´t and I am so excited!
I was in need, but really in a big need of lash glue. My last one, I don´t know why, start smelling so bad (normally the lash glue smells horrible, but my glue, everytime I opened it can kill people just with the smell!) and it had this weird yellow going to grey color that wasn´t very normal thing, so I thought that was time to get a new one.
When I buy the lash glue in Madrid, I usually go to Burlesque (I will put in the end their facebook page, they are amazing! Incredible people with the most amazing products in makeup and wigs that you can imagine), they have the dupe of the DUO Adhesive for just 6€, so I prefer to get this one instead of paying 12€ for the same product in MAC.
But here in London I don´t have my beloved Burlesque store... So I went into the hunt of a new lash glue.
Obviously I knew that in MAC I can get the DUO for 10 pounds, but I wanted to find something else. Here in the UK the people wear way more lashes than we do in Spain, so here there is a lot more of lash models, and of course, more glue types!
In YouTube I saw a lot of gurus using the black lash glue, the one with brush, for single lashes, but in Spain if you don´t order that from the internet, it´s impossible to get it on a store.
And finally I found the perfect lash glue. Or at least for me it is! Is the Eyelure Lashfix. It comes in a crystal bottle, and the thing that I like the most from this glue is the applicator. Is a bar that allows you to put as much glue as you want. The regular bottle for me it was sometimes a nightmare, because when I pressed it to get a little bit of glue, usually came out a lot of glue... but with this applicator is more easy for me, and I think that for everyone (and for beginners is perfect)
So for those that didn´t know about this glue, or for the people that never give it a chance to it, you must try it, is really good!
Don´t forget to visit Burlesque Facebook Page and give it a like!
Hope you like the post, and see you on the next one.
Lor.
I know that probably a lot of you knew about this, but I didn´t and I am so excited!
I was in need, but really in a big need of lash glue. My last one, I don´t know why, start smelling so bad (normally the lash glue smells horrible, but my glue, everytime I opened it can kill people just with the smell!) and it had this weird yellow going to grey color that wasn´t very normal thing, so I thought that was time to get a new one.
When I buy the lash glue in Madrid, I usually go to Burlesque (I will put in the end their facebook page, they are amazing! Incredible people with the most amazing products in makeup and wigs that you can imagine), they have the dupe of the DUO Adhesive for just 6€, so I prefer to get this one instead of paying 12€ for the same product in MAC.
But here in London I don´t have my beloved Burlesque store... So I went into the hunt of a new lash glue.
Obviously I knew that in MAC I can get the DUO for 10 pounds, but I wanted to find something else. Here in the UK the people wear way more lashes than we do in Spain, so here there is a lot more of lash models, and of course, more glue types!
In YouTube I saw a lot of gurus using the black lash glue, the one with brush, for single lashes, but in Spain if you don´t order that from the internet, it´s impossible to get it on a store.
And finally I found the perfect lash glue. Or at least for me it is! Is the Eyelure Lashfix. It comes in a crystal bottle, and the thing that I like the most from this glue is the applicator. Is a bar that allows you to put as much glue as you want. The regular bottle for me it was sometimes a nightmare, because when I pressed it to get a little bit of glue, usually came out a lot of glue... but with this applicator is more easy for me, and I think that for everyone (and for beginners is perfect)
So for those that didn´t know about this glue, or for the people that never give it a chance to it, you must try it, is really good!
Don´t forget to visit Burlesque Facebook Page and give it a like!
Hope you like the post, and see you on the next one.
Lor.
Suscribirse a:
Entradas (Atom)