Mostrando entradas con la etiqueta nails. Mostrar todas las entradas

martes, 28 de octubre de 2014

Halloween: Silver Stitches Nails

Hola a todos!
Hoy os traigo una manicura muy simple, fácil de hacer y creo que bastante llamativa.
Empecemos!

Hi There!
Today I´m here with a very easy to do and very catchy manicure. Let´s get started!


Primero, preparar las uñas. Limar a vuestro gusto, aplicar una prebase y dos capas de un esmalte color plata (o de un color que os guste y pueda combinar con Halloween).
First, get your nails ready: file them, apply a base coat and when it dries, two coats of a silver nail polish (or any other color that you like for Halloween).


Después, con la parte mas fina del punzón, iremos cogiendo esmalte negro y trazaremos líneas cruzando la uña, no tienen que estar perfectas en absoluto!
After that, with the skinny part of the dooting tool, pick some black nail polish and create some horizontal lines on your nail. It doesn´t have to be perfect at all!


Y para terminar, con el borde del palito de naranjo, vamos haciendo las líneas verticales a las horizontales que hemos hecho antes (que no sean demasiado largas, para que no se os junten). Aplicamos un top coat, limpiamos los bordes y listo.
To finish, with the edge of the woodstick, draw some vertical lines on top of the other we just made again using black and be careful to don´t do them so long, they will get together with the next line. Clean your nails, apply top coat and we´re done.

Aquí teneis la manicura finalizada. Espero que os guste!
Here´s the finished manicure, hope you like it!


Lor.


martes, 13 de mayo de 2014

Black and Red Acrylic Nails

Hola a todos!

Perdonad la falta de post esta semana pasada, pero he estado unos dias fuera de mi ciudad debido a un compromiso familiar, y la verdad que no he tenido demasiado tiempo para escribir una entrada. Tenía un par preparadas, pero digamos que Word me la ha jugado y guardó mal los documentos, y falta mucho de lo que había escrito... Conclusión, me toca empezar de nuevo lo que tenía.

Mientras que estoy en ello, quería enseñaros las uñas acrílicas de porcelana que me puso el otro día mi amiga Desirée (la pobre se merece un monumento por aguantarme, jajaja) ya que yo a mi misma me cuesta un poco hacérmelas y a parte de que así tenía una excusa perfecta para ir a verla =).

Después de días buscando un diseño, encontré uno con purpurina, pero tanto Desirée como varias personas de mi familia me dijeron que no me pegaba nada en absoluto (es malo que te conozcan tanto) Así que cuando llegué a casa de Desirée, nos pusimos a buscar diseños y me gustaron unos cuantos diseños que Kylie Jenner llevaba en sus uñas.


(De esta nos gustó el pulgar derecho)


(de esta nos gustó el efecto mate, pero lo hicimos al revés)


(de esta solo las gotitas, no el símbolo de chanel, y estas son de Khloe Kardashian)


Nos pusimos manos a la obra y este fue el resultado.


Es una pena, porque me las he tenido que limar (mi uñas crecen a la velocidad del viento) y ya no las llevo así, pero quedaban genial y mucha gente me ha preguntado por mis uñas estos días =).
Os aviso que para teclear en el móvil no es lo mas práctico, pero es cuestión de acostumbrarse.

Espero que os gusten, y nos vemos en breves en el próximo post!
Lor.

------------------------------------------------

Hi there guys!

Sorry for being M.I.A. this week, but I´ve been out of town part of the last week for family stuff, and I didn´t have enought time to write something for the blog. And in addition to that, all the entries that I had ready to post, I don´t know what happened with Word when I saved my documents, but when I opened them they were toally wrong =(. So I have to rewrite everything again!

Meanwhile, I wanted to show you my acrylic nails. A very good friend of mine, Desirée did them for me .I know how to do acrylic nails, but on myself gets a little bit tricky, so she did them for me (and that was a fantastic excuse to see her!)

I spent a few days looking for a design, and I saw one with glitter that I liked it. The thing was that a few of my family members and friends (including Desirée) told me that the design didn´t suit me at all. So when I arrived to her home, we searched inspiration and finally some of the nails that Kylie Jenner has been wearing inspired us, and this is the final result.

Now I have my nails more short, cause it´s a little tricky to do some stuff with such a long nails! But I loved them so much and a lot of people asked about my nails and complimented it.

Photos above, as always.

Hope you like the post, and I will see you very soon!
Lor.


domingo, 20 de abril de 2014

Rainbow Dot Manicure

Hola a todos!!

Como estais? Espero que hayáis recargado muchas fuerzas estas vacaciones de Semana Santa y que la vuelta a la rutina no sea demasiado dura =).

Antes de volver a la rutina también con el blog, me gustaría enseñaros una manicura que me hice ayer. La verdad que me inspiré después de estar un rato en Instagram viendo fotos de "Nail Art" y como llevaba mucho tiempo sin hacerme nada  en las uñas, decidí que era el momento.
Aunque parezca un poco complicado, es muy sencillo. Os voy a contar como lo hice.

Primero, siempre limo las uñas, y es recomendable aplicar un esmalte que actúe como base para proteger a nuestra uña (yo ahora mismo no tengo ninguno, porque el ultimo que probé resulto ser un desastre y ando a la búsqueda de uno nuevo, si tenéis alguna sugerencia, decírmela!).

Después apliqué dos capas de este azul pastel de Kiko (todos los colores que os voy a enseñar me los encontré guardados en una caja y los tenía totalmente olvidados...) y dejé que se secase completamente. Esto cuando vayáis a hacer cualquier tipo de diseño en la uña es muy importante que el esmalte que pongáis como base esté seco, porque si no posiblemente cuando hagáis algo encima y no esté seco, os estropeará el diseño.


Y ahora comienza la parte divertida. Con un punzón de "Nail Art" de tamaño pequeñito, todo lo que hice fue ir haciendo puntos de colores, alternando los distintos esmaltes que tenia. Como veis en la foto, mis lineas no son perfectas, ni todos los puntos son iguales, tengo un pulso horrible! Pero bueno, aún estando desigual, creo que no quedó del todo mal.
Para terminar, os recomiendo que pongáis un top coat para dar brillo (en su defecto, un esmalte transparente os hará el mismo efecto).


(los esmaltes son de hace bastante tiempo y tienen la numeración antigua, pero están todos esos colores en la línea normal de Kiko, en caso de que os haya gustado alguno)


Se tarda un poquito en hacer las dos manos, pero el resultado merece la pena.

Espero que os guste, y nos vemos en el próximo post!
Lor.

----------------------------------------------------

Hello everyone!

Happy Easter! I hope you´re having a great day and eat a lot of chocolate!

Today, before starting again with the usual makeup looks, I wanted to show you a manicure that I did to myself yesterday. I was checking Instagram pictures of "Nail Art" and I got super inspired to do this one. Is not so complicated to do, so I´m going to tell you how I did it.

First, apply a base coat to protect your nails, and then I applied this pastel blue color, two coats (by Kiko, all the nail polishes that I used are for this brand, I found them on a box in my closet and I had totally forget them there) and let it dry completely. This is so important, because if you don´t let the polish dry complete, you will ruin it when you start with the design.

Then, with a small dotting tool, all you have to do is start creating dots all over the nail. I mixed a few colors like if it was a rainbow. As you can see, not all the dots are the same size and the lines are not so straight, that´s because I don´t have a very good steady hand. But I think that it doesn´t look so bad after all.
To finish off this, apply a top coat to give some shine, and you´re done.

It takes a while to do both hands, but I think is a very cool design to wear now on spring and looks so fun on the fingers.

Photos, above.

By the way, the nail polishes had the old numbers, but they still having the same colors in case you like any of it.

Hope you like the post, and I will see you on the next one!
Lor.


domingo, 22 de diciembre de 2013

Christmas Must-Have

Hola a todos!
Que tal estáis? Espero que estéis disfrutando mucho de las vacaciones Navideñas, y si no tenéis, que no os hagan trabajar demasiado!

Hoy vengo con un post dedicado a mis Must-Have en Navidades (relacionado con maquillaje) que creo que pueden ser muy buenas opciones para crear looks rápidos sin necesidad de llevar algo muy recargado que nos haga parecer una bola de navidad ultra brillante!

(Sigo sin entender por qué en estas épocas, las marcas de belleza se empeñan en ponerle purpurina a kilos a cualquier producto e intentar venderlo a precios exagerados, por más que lo intento… Jamás lo comprenderé. Hay un limite muy fino entre brillar un poquito y parecer una bola de discoteca!)

Empiezo por lo básico (y esencial para mí, pero para todo el año casi) una barra de labios roja. Ya sea un rojo anaranjado, granate, un rojo rosado, granate… Un labio rojo puede hacer que cualquier look, por simple que sea, automáticamente quede de lo más elegante y festivo. Mis rojos favoritos son Ruby Woo y Crimson, porque ambos duran mucho y así no tengo que preocuparme si voy a una cena o comida, porque sé que no se desplazaran.


Si sois de las que os gustan los labios con brillo, quizá un gloss con brillo o purpurina pueda ser un acompañamiento perfecto para un labio rojo. Mi favorito es Candy Apple de Lime Crime, queda espectacular!


Colorete rosa suave o melocotón. Ya que los labios son los protagonistas (si usáis rojo, o en su defecto lleváis un ojo maquillado muy potente) para equilibrar siempre me gusta aplicar un colorete suave en estas épocas. Además que si estáis en un sitio que haga un poco de calor (con toda la familia junta en casa siempre se acaba caldeando demasiado el ambiente), los coloretes suben enseguida! Y eso acentúa mucho más el tono que lleves puesto… Mejor llevar algo ligero y no parecer que has tenido una lucha a muerte con el colorete, y que el colorete te ganó.

(perdonad que os ponga la imagen así, pero hoy no me deja subir mis propias fotos!)


Para los ojos, me gusta mantenerlo básico. Un poco de sombra suave (un tono beige con un poco de brillo para igualar el tono del parpado) y eyeliner, rematando con pestaña postiza. Obviamente podéis usar una sombra dorada (combinada con los labios rojos queda espectacular!) o un ahumado verde (ahí optar por otro color de labios, un rosa clarito, un nude, ya que si no estáis acostumbradas a los colores fuertes; rojo y verde junto puede llegar a ser demasiado) usar purpurinas, pigmentos, hay miles de looks posibles. Pero recordad, que en esta epoca, una puede exagerar un poco con la purpurina y que no se note demasiado =P.


Las acabo de nombrar, pero un look navideño puede resultar perfecto si ponéis como  “guinda” unas pestañas postizas. Generalmente para estas épocas suelen sacar ediciones especiales con brillantes pequeñitos, de colores, con toques dorados… Las opciones son muchas, así que eso es al gusto del consumidor!


Y para ir terminando, un infaltable para mí, es una manicura navideña a juego. Me gusta mucho Ruby Pumps de China Glaze (y que se parece un montón al brillo de Lime Crime que os dije antes) o cualquier otro rojo que tenga a mano. Y un tono verde o dorado tampoco queda nada mal! Para las que sean más creativas (y tengan mejor pulso que una servidora) podéis crear rayitas, copos de nieve, un árbol de navidad… Cualquier motivo navideño quedará precioso. Y si usáis un poquito de purpurina, las uñas gritarán “ya es navidad!!” a kilómetros!


Estos son mis básicos en cuanto a belleza. De ropa no os puedo decir, ya que siempre visto de negro, así que espero que llevéis colores típicos navideños por mi!

Espero que os gusten estos pequeños básicos, y que si no nos leemos antes de Navidad, tengáis una noche estupenda con vuestra familia y seres queridos! Y que Papa Noel ( O Santa Claus, como prefiráis llamarlo) se porte muy bien.
Feliz Navidad!!

Lor.

------------------------------

Hello everyone!

Hope that you´re all doing well on this beautiful time of the year! And if you are working and don´t have holidays, hope the work is not so stressing!

Today I come with my Must-Have for Christmas. Simple options to create very beautiful looks, and don´t look like a super-glitter- ornament from a Christmas Tree!

(I still trying to understand why all the brands in Christmas put a lot of glitter on every single product, and they sell it like if it´s something amazing. It´s ok to use glitter, but let´s going to find a limit, dear brands!)

Ok, my first must-have product is a red lipstick (and almost for everyday) in any shade that you like. Orangy red, blue based red, burgundy, there are endless options. I usually prefer matte formula (it stays longer) and my all time favourite colors for this days are Crimson and Ruby Woo.

If you like glosses, maybe this next must-have will be a good one. My favourite glitter gloss ever (and I don´t like gloss too much) Candy Apple by Lime Crime. It´s the most gorgeous glitter gloss that you will ever try, and on top of ANY red lipstick looks amazing.

Blushes, I like to keep it simple and soft. Normally you´re in home, with a lot of people and it can get so warm, so you naturally will blush. If you´re wearing strong blush, you will look like you had a fight with the blush brush. But if you keep it soft, it will look normal and natural.

All about eyes. First, eyeshadows. If you want something simple, go for soft beige eyeshadow and strong liner with falsies. More drama, maybe? Gold eyeshadow all over the lid, smoky green, some pop of red eyeshadow... There are endless options again, and of course, you can use glitter! Christmas is the time for glitter.

And lashes. Don´t forget a pair of falsies. This season you will have incredible designs of falsies that will look amazing on your eyes.

For finish this, let´s not forget the nails. Some red polish, green or gold will look extremely festive on your nails (my favourite ever is Ruby Pumps by China Glaze) and if you make any decorations on your nails, they´ll look even more beautiful!

In the field of clothing I am not a good advisor. I always wear black, so... Hope you wear bright colors for me!

Photos above!

Just in case I don´t write before Christmas, I hope you have an amazing night with your family and beloved ones, and Santa brings you all you wished for!
Merry Christmas! And see you soon =)
Lor


domingo, 20 de octubre de 2013

Nail Experiment!

Hi there!

Well, as I promised, I´m going to tell you how I made my manicure for this week.


I was watching some nail tutorials on Youtube, and I came across with this one (she´s one of my favourite nail artist in Youtube, and you should follow her, I leave you the link here of her Youtube chanel), that inspired me to do this nails, and after I finished I thought it could be very awesome nail design for Halloween. It´s like a dirty zombie nail, so I hope you like it and try it out!

Before anything, I´m going to tell you what you´re going to need:
-Nail polish closer to your skin tone
-Mint green nail polish
-Black nail polish
-Top coat and Base coat
-Bowl with warm water
-Hairspray
-Brush

Let´s start!

First, I always apply my base coat, and after that, apply the nail polish closer to your skin color. I used one from Kiko (I have this for a long time ago, probably the number is changed) and I applied two coats to make it look opic.


(My favourite base coat of the moment and #106 Kiko Polish)


When it was dry, I took some of the mint green polish and mix it with a little bit of black, and with an old makeup brush I put some little touches of the mix in all my nails. After that I let it dry well, for not ruinning my nails on the next step.


(The black polish I have no idea where´s from, and #345 from Kiko)


Now it´s time to use the bowl and the water. All you have to do is pour some warm watter (not so hot) and to know if it´s on the correct temperature, all you have to do is let fall a drop of nail polish that will star expanding on the water, on a slowly way. If it disappear so fast, the water is so hot and you will have to wait for the water to be a little bit colder. 
So once you have the water on the correct temperature, all I did was let fall a drop of nail polish, and then, carefully spray it with the hairspray. This will break the nail polish, and after that, you dip your finger (after chosing what side of the broken nail polish you like more) and wait 10 to 15 seconds to the nail polish to stick in your  finger. You can take off the nail polish excess with a toothpick, orange woodstick, but be careful.

After that, I let the nails dry for a few minutes, clean any excess of nail polish on my fingers, and for finishing I just applied some top coat to add a little bit of shine.


( top coat from Astor)

You can recreate this with any color you like, just have fun mixing colors!

It seems to be a little tricky, but is very easy and fun to do.

Hope you like it, and see you on the next post.
Lor.


---------------------------------------------

Hola a todos!

Lo prometido es deuda, y aquí estoy hoy para contaros como he hecho mis uñas para esta semana.

Estaba viendo ayer tutoriales de uñas, y topé con este , que fue el que me inspiró para hacer mis uñas. Esta chica es mi favorita de todo Youtube creando diseños para uñas, así que os recomiendo que la sigáis, porque es alucinante! Aquí os dejo el link a su canal para que lo veáis. Cuando terminé las uñas, pensé que podría ser un diseño que podría valer para Halloween, como una especie de uñas sucias de zombie o algo parecido... Así que espero que os guste y lo probéis =D.

Antes de empezar, os voy a poner una lista de lo que necesitais: 

-Esmalte de uñas que sea parecido a vuestro color de piel
-Esmalte de uñas verde menta
-Esmalte de uñas negro
-Base y Top coat
-Bol con agua templada
-Laca
-Brocha

Empezemos!

Primero, siempre aplico mi base de uñas. Y después, apliqué el esmalte que se parecia a mi color de piel, aplicando dos capas para que mi uña natural no se transparentase. El esmalte que uso es uno de Kiko de hace muchísimo tiempo, probablemente le hayan cambiado el número, pero este es el #109.

Una vez que las uñas estaban secas, mezclé un poco del verde menta con negro (pero no demasiado, solo un poco para dar un poco de oscuridad al color) y con una brocha de maquillaje que nunca he usado, porque no me resulta cómoda (por eso la deje para estas ocasiones) fui dando toques con la mezcla de los colores en todas las uñas y lo deje secar.

Ahora viene lo divertido. En un bol, echad agua templada. Para saber si la temperatura es la correcta, echad una gota de esmalte. Si no se expande en la supeficie o desaparece muy deprisa, teneis que esperar a que el agua se enfríe. Cuando este el agua en su punto, al echar la gota de esmalte, se irá expandiendo. Justo cuando ya esté expandida, coged la laca y echar un poco. Eso provocará que el esmalte se rompa y se quede en hilitos.
Lo unico que hay que hacer después de eso es ver que lado de los hilitos te gusta mas, sumergir el dedo por encima de estos y dejar durante 10 a 15 segundos el dedo dentro del agua, para que el esmalte se adiera a la uña. El exceso lo podeis retirar con un palillo o palito de naranjo. Una vez transcurrido el tiempo, sacais el dedo y dejais secar. Solo queda limpiar con un bastoncillo y quitaesmaltes cualquier exceso de color que quede en nuestro dedo. Y finalmente, aplicar una capa de Top coat para dar brillo a las uñas.

Podeis mezclar cualquier color que os guste, yo escogí estos para hacerlo más acorde a la temporada de Halloween.

Parece complicado, pero una vez que le coges el truco, es facilísimo de hacer.

Fotos, como siempre, más arriba.

Espero que os guste, y nos vemos en el siguiente post.
Lor.

sábado, 19 de octubre de 2013

Kind of nail experiment...

Hello there!

Here I leave you a sneak peek of my new nails for the week, hope you like it! Tomorrow will be a post about how I did it.


See you on the next one!
Lor.

---------------------------

Hola a todos!

Aquí os dejo un adelanto de mis uñas para esta semana, espero que os gusten! Mañana habrá un post en el que explicaré como lo hice.
Foto, más arriba, como siempre.
Nos vemos en el siguiente post!
Lor.

martes, 15 de octubre de 2013

Manicure of the week...

Hi there!

I didn´t expect the color and the effect to look so gorgeous... So here I show you my manicure for this week!


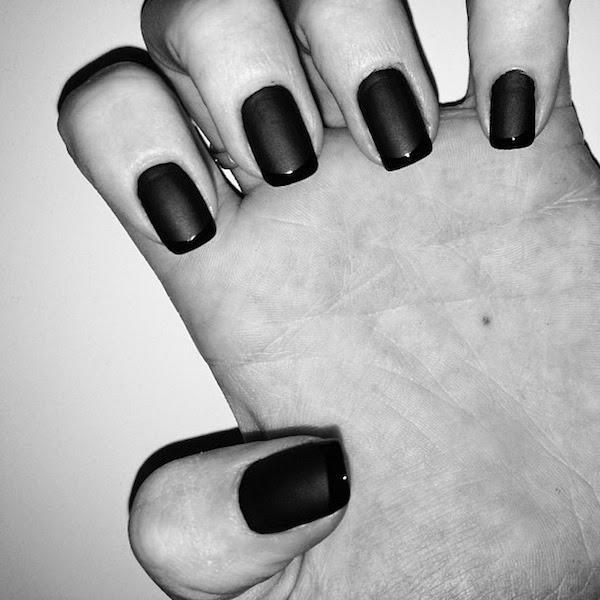
Burgundy matte nails.

I used a base coat and a matte top coat both from Deliplus (a cheap brand from Spain, but has very awesome products! Really impressed with this matte top coat) and this gorgeous color by Sally Hansen in #12 Flirt, from the Xtreme Wear line.


Hope you like it!
See you soon,
Lor.

--------------------------------------

Hola de nuevo!

La verdad es que no esperaba que la combinación de color y efecto fuera a quedar bien y me gustase, pero definitivamente si quedo mejor de lo que yo creía =).

Esta es mi manicura para la semana (o al menos mas de dos dias jajaja, me cuesta mucho aguantar con el mismo color de uñas) Uñas granate con efecto mate.

Usé tanto la base como el top coat matificante ambos de Deliplus (no suelo ser demasiado fan de sus productos, pero la verdad que el top coat matificante me ha dejado sin palabras) y el color es el #12 Flirt de Sally Hansen de la línea Xtreme Wear.

Espero que os guste y nos vemos en el próximo post!
Fotos, más arriba, como siempre.
Lor.

lunes, 7 de octubre de 2013

Salon Look 2013: Visit and Haul

Hi everyone!

As you may guess for the title, this is a post about the Salon Look that was celebrated this weekend. And, as every year, I went (with some friends) to take a look on the news on the beauty field and to get some makeup stuff.

Really, nothing changed a lot from the last year, so basically we visited the pavilion that is dedicated just to hair and hairstylist stuff. A lot of hair extensions, wigs, flat irons, blor dryers... Incredible stuff for your hair. All the brands had people making demonstrations of haircut, how to put extensions of any kind, doing incredible and crazy stylisms for the hair, etc. I am so sorry, because I didn´t get any picture, but I´m sure there are a lot around the internet!

Later, when we finished with the hair, we went to the other pavilion dedicated to nails, makeup, aesthetics and spa. This year it was a little bit frustrant because there were like the half of brands that usually are always on the fair. We visited Peggy Sage´s sales stand (big and with a lot of people), the StarGazer one (loads and loads of people around this one), the Make Up For Ever too (again full of people), the Novara one for brushes and the Essie, that was the first time ever for them on this fair as the Wet n´Wild too. In the Make Up For Ever stand they were doing Body Painting, it was so beautiful!

We got a lot of stuff, and I´m going to show you what I got. It´s not so much, but right now I have a lot of makeup and no space for it...

From StarGazer I took this year one pigment in Silver color (#27) and two different glitters in Garnet (burgundy color) and Hologram (Holographic glitter).They told me that this glitter can be used for the eyes, but on the jar of the glitter says that is not for eye makeup, so I won´t use it, just in case. The pigment is the most incredible silver color that I´ve ever seen, and it has a lot of shine, just what I was looking for.


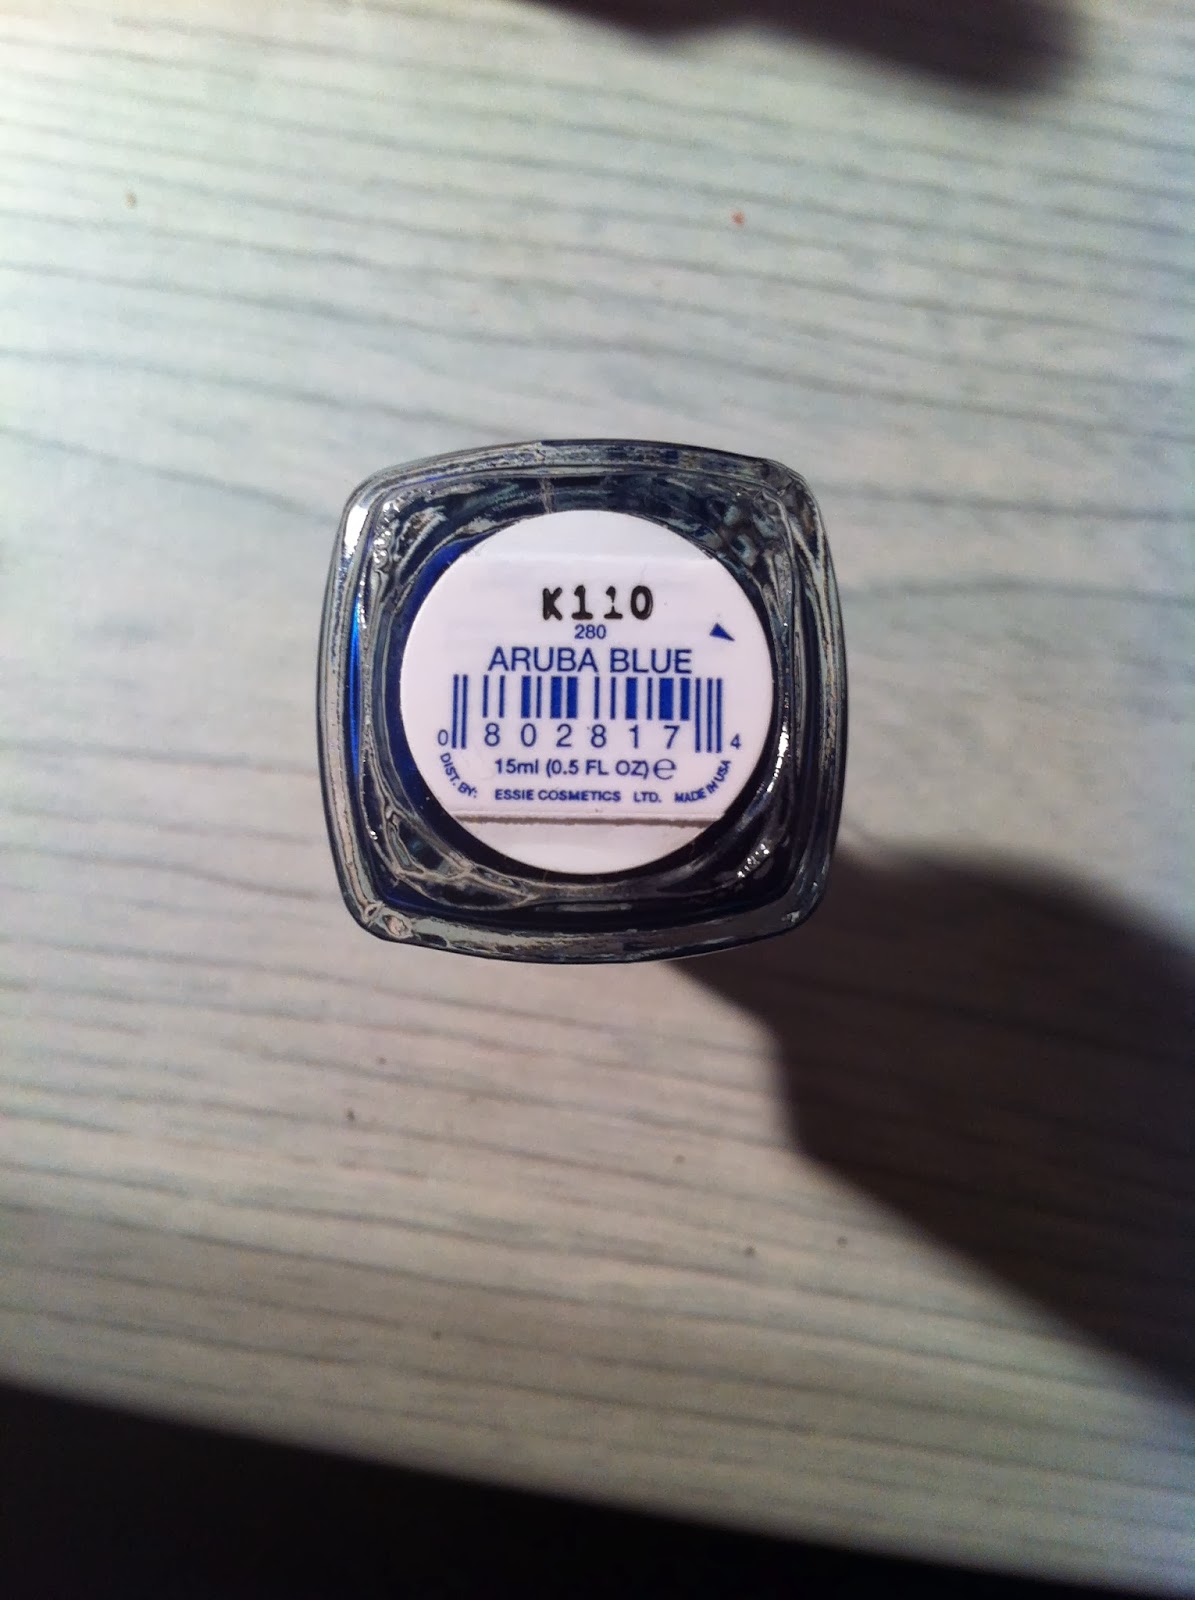
From Essie I took my favourite color ever, Aruba Blue. This is the most bright metallic blue nail polish ever, and for me, one of the most beautiful colors. And from the Fall 2013 collection I got a mini size nail polish in the color "For the twill of it" that is one of this colors that depending on the position and the light look all the time in a different color.


From Make Up For Ever I got one eyeshadow that I was looking for a very long ago. Is one of the most popular colors from them, #92, incredible bright violet color in mate finish, as well incredibly pigmented.


From Wet n Wild I got a blush in the color Pearlscent Pink and one of their big eyeshadow palettes (it has 8 different colors) in Blue Had Me At Hello. I have seen this one a lot in YouTube tutorials, and when I saw it yesterday, I took it instantly!


And no visit is completed without the two samples of Moroccanoil and their famous bag.

Not so much stuff, but I am extremely happy with what I got.

Hope you like the post, and see you on the next one!
Lor.

------------------------------

Hola a todos!

Bueno, como podéis suponer a través del titulo, este post es sobre el Salon Look, que fue celebrado este fin de semana. Y como todos los años, fui (con mis amigas) a ver que habia nuevo en el campo de la belleza y a comprar maquillaje.

La verdad es que no ha cambiado la cosa demasiado desde el año pasado.

Empezamos por el pabellón de peluquería, como siempre, un montón de extensiones, secadores, planchas de pelo, pelucas... Creo que una de las novedades este año eran las extensiones de plumas, un monton de gente las llevaba puestas. Y como siempre, exhibiciones de casi todos los expositores, cortando el pelo, peinando, poniendo extensiones... No hice ninguna foto, porque siempre se me olvida hacerlo, pero seguro que en internet hay muchisimas fotos ya colgadas.

Cuando terminamos con el sector de peluquería, nos fuimos al otro pabellón de estética, spa, uñas y maquillaje. Este año la verdad que me decepciono un poco, porque no estaban todos los stands que suele haber todos los años, pero bueno, seguía habiendo muchos para ver. Visitamos los stands de Make Up For Ever, StarGazer, Peggy Sage, Novara, Essie y Wet n Wild. Todos ellos estaban llenos de gente, era casi imposible acercarse a ver las cosas. En el stand de Make Up For Ever estaban haciendo Body Painting y era increíble, la verdad, todos los años me encanta!

Compramos bastantes cosas entre todas las que fuimos, y ahora os voy a enseñar lo que yo cogí. No compré demasiado, porque tengo bastante maquillaje y me estoy quedando sin espacio para guardarlo... XD.

De StarGazer compré dos botes de purpurina (En los colores Garnet y Holographic), muy ilusionada porque me dijo el señor del stand que valía para los ojos. Pero en el bote pone que no esta hecha para uso en los ojos... Así que por si acaso, no la usaré. También compré un  pigmento (#27) que es un color plata, justo como el que llevaba buscando bastante tiempo, con el brillo justo sin parecer una bola de discoteca.

De Essie compré dos pintauñas, uno de ellos es Aruba Blue, el azul metálico brillante más increíble que he visto nunca y el otro color ( de su colección de Otoño 2013) en tamaño mini For The Twill Of It, es uno de estos colores que dependiendo de la luz y de la posición de la mano se ve de diferente color.

De Make Up For Ever compré una sombra que ya llevaba mucho tiempo pensando en comprarla, y ayer finalmente lo hice. Es uno de sus colores más populares, #92, un violeta mate impresionante y con una pigmentación enorme.

De Wet n Wild compré un colorete en el color Pearlscent Pink y una de sus paletas grandes (las que vienen con 8 colores) Blue Had Me At Hello. Esta paleta la he visto mucho por YouTube, y cuando la ví ayer, fui corriendo a cogerla.

Y ninguna visita al Salon Look esta completa sin la muestra de Moroccanoil y su mítica bolsa.

No es mucho, pero estoy muy contenta con todo lo que compré.

Fotos y swatches, como siempre, arriba.

Espero que os guste el post, nos vemos en el próximo!
Lor.