Hola a todos!!
Como va la semana? Espero que muy bien, para los que estáis en recta final de exámenes mucha suerte y animo, y al resto espero que el calor no este siendo demasiado malo (para mi ya es horrible, y aun como quien dice no ha empezado "lo bueno").
Hoy vengo con un look que me pareció precioso, simple y tremendamente elegante a pesar de las circunstancias que le rodeaban. Os explico, este es el look que Rihanna llevo a la entrega de los CFDA Awards, donde era premiada por Icono de la Moda.
Y por supuesto, la señorita Rihanna se hizo notar con un impresionante vestido transparente recubierto de cristales Swarovski, muy bonito. El vestido, pero a mi ver ella lo hizo quedar un poco ordinario, ya que el vestido no dejaba lugar a la imaginación.
Antes de que alguien me quiera matar, respeto totalmente que la chica quiera enseñar su cuerpo, pero creo que ya le queda poco para enseñarnos que no hayamos visto previamente.
El vestido sin duda ha acaparado toda la atención, pero sinceramente en cuanto vi un primer plano de su maquillaje se me olvido el vestido, porque el look es precioso! Es un ahumado en tonos plateados, negro y marrón. Y como los ahumados son una de mis técnicas favoritas no he podido resistir la tentación de recrearlo.
Vamos a ello!
Empezamos con la base. La piel de Rihanna siempre se ve perfecta se mire por donde se mire, pero la mia digamos que esta un poco lejos de ser como la suya. Como base voy a aplicar la Face and Body en el tono C1 y después lo fijaré con los Studio Careblend para dar un acabado suave y perfecto a la piel. Como corrector el HD de Nyx, en el tono Porcelaine. Para aplicar la base usé la brocha F80 de Sigma y para el corrector mi esponja de Burlesque, y los Studio con la Powder Brush de Real Techniques.
(Base Face and Body en C1, corrector Nyx en Porcelaine, Studio Careblend en Light, esponja, brocha de Real Techniques y arriba del todo la F80 de Sigma)
(Face and Body foundation, Nyx HD concealer in Porcelaine, Studio Careblend in Light, makeup sponge, Real Techniques Brush and on top the F80 Sigma Brush.)
Las cejas, mi rutina usual de sombra y fijador.
( Sombra Charcoal Brown y fijador de Catrice)
(Charcoal Brown eyeshadow and Catrice brow fixer)
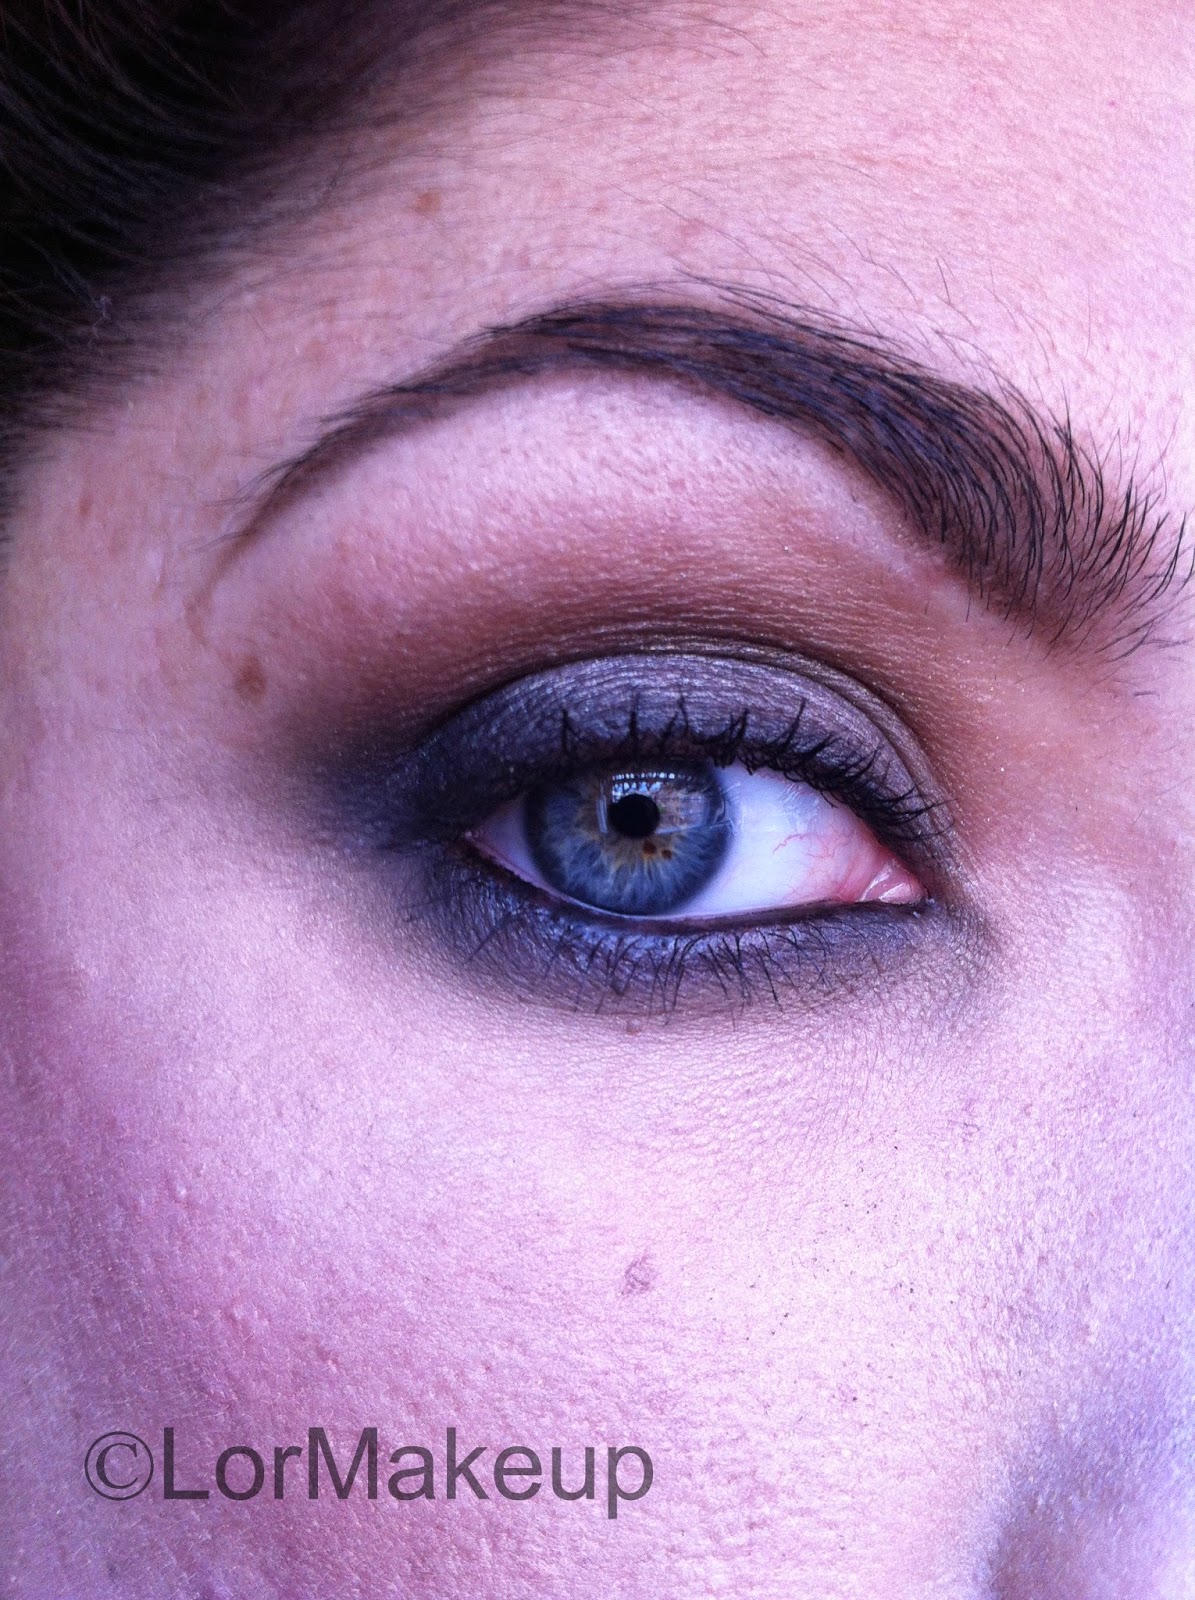
En los ojos aplicamos una prebase para mantener todo en su lugar y que no ocurra ningún desastre. Este es un look muy oscuro y lo ultimo que quieres es que pierda color o aparezcan pliegues. He usado el paintpot de MAC en el color Bare Study. Después, con un tono marrón oscuro he marcado la cuenca del ojo y lo he difuminado hacia arriba, fundiendo bien el color. El resto del parpado que se ha quedado libre es donde he aplicado un tono plata oscuro, y en la esquina exterior del ojo he aplicado negro (y también a ras de las pestañas) para aportar mas definición al ojo.
En la parte inferior del ojo con el mismo tono plata oscuro lo apliqué y difuminé los bordes con el mismo marrón que usé en la cuenca. Y por supuesto, delineación interna en negro.
(Rizador de pestañas, máscara de Astor, paint pot en Bare Study y eyeliner de Nars en Black Valley)
(Sombras de arriba a abajo y de izquierda a derecha: Ground Brown, Knight (edicion limitada), Omega y Brulé)
(Lash curler, Astor mascara, Bare Study paint pot and liner from Nars in Black Valley)
(Eyeshadows from top to bottom and left to right: Ground Brown, Knight (limited edition), Omega and Brulé)
Ricé bien las pestañas y apliqué dos capas de máscara. Podéis aplicar pestañas postizas, yo no lo hice para que pudierais apreciar bien el look en la foto.
En las mejillas he mezclado dos tonos de colorete, un rosa muy clarito y otro un poco mas fuerte con un poco de brillo para conseguir el mitico "glow" look. Y un contorno muy ligero.
(De arriba a abajo y de izquierda a derecha: colorete Stunner, contorno Harmony y colorete Springsheen)
(From top to bottom and from left to right: Stunner blush, Harmony for contour and Springsheen blush)
Y para los labios, delineé con el lápiz de labios Whirl y rellené con el labial Peachstock.
(Lápiz de labios Whirl y labial Peachstock)
(Lip Pencil in Whirl and Peachstock lipstick)
Este es el resultado final, espero que os haya gustado mi interpretación del look =).
Nos leemos en el próximo post!
Lor.
----------------------------------------------------------
Hello there!
How are you doing? Hope that your week is going fine, and for all of you finishing your exams, I wish you the best! And for the rest, hope that your week is not as hot as here in Madrid, Summer finally is coming (and I hate it a lot).
Today I am here to show you my interpretation of the look that Rihanna wore on the CFDA Awards, a few weeks ago. All the people was talking about that incredible dress covered in Swarovski crystals, but the make up caught my full attention after I saw a picture of her face.
I loved the dress, but I didn´t like so much how she wore it, she was showing her soul trough the dress, and I think that looked so vulgar. But I totally respect that she wants to show her body, after all everyone can show whatever they want to.
Let´s get started with the look!
Her skin is always flawless, but mine is way to far from being like that. So I took my Face and Body foundation and applied it with my F80 Sigma brush. Then some concealer time, under my eyes, using Nyx HD concealer and my dupe of the Beauty Blender Sponge. To set everythin in place, I used my Studio Careblend powder with a Real Techniques Powder Brush.
For the eyes, on this kind of looks, you want to make sure that you use a primer to avoid the eyeshadow creasing and keep everything in place. As my primer, I used Bare Study paintpot all over my lid. Then, with a blending brush, I made a cutcrease with a dark brown shade, slowly building the color and blending it towards the eyebrow. On the lid, I applied a dark silver color all over, and on the outside corner (and all along the top lashes) I add black eyeshadow to make the look deeper and defined. On the lower lash line, I used the dark silver color and blended the edges of that with the dark brown that I used on the crease. For highlight my brow I put some Brule eyeshadow.
After that, I curled my lashes and applied two good coats of mascara. And I line my waterline in black. Of course you can apply falsies, but I didn´t because I wanted that you could see the look properly on the pictures.
For my cheeks I used two different colors, a pale pink and another shade of pink, a little bit darker and with some shine on it, to create a glowy cheek look. And of course, I contoured a little bit using Harmony.
On the lips, I lined them with Whirl lip liner and applied Peachstock lipstick all over.
And this is my interpretation of the look, hope you like it.
Photos, above as always.
See you on the next post!
Lor.


.jpg)


.jpg)
.jpg)

.jpeg)
